An homage to Old Black for dad (Neil content, but no Warmoth content...)

I also found them direct from All Parts at a much better price than the original link.

https://www.allparts.com/EP-4968-000-Solder-Lug-washers_p_1471.html

 
Now you're talking. Is there a minimum order? It might be a good thing to add on to something else you need.

Or order a whole shitload bunch of them.
 
Rgand said:
Now you're talking. Is there a minimum order? It might be a good thing to add on to something else you need.

Or order a whole shitload bunch of them.

It's too bad Stew Mac doesn't carry them, the StewMax free shipping thing is awesome for stuff like this.
 
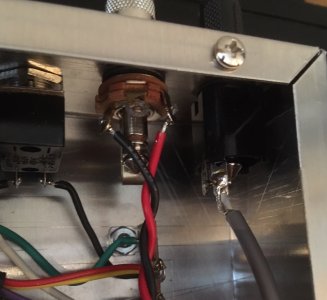
Since the neck volume wasn't involved in any of the funny business, I loaded it into the control cavity on its own and made up the pickup and switch connections. (Actually, the switch wire on the middle lug isn't soldered yet as the capacitor will be going there. That will be fun...) The wire from the grounded lug will join the pot case grounds when the rest of them get loaded in. The red wire on the left is the string ground. I joined it with the wire for the neck pickup cover/mounting plate ground and will ground it on the output jack.

Photo%20Dec%2004%2C%204%2021%2002%20PM.jpeg


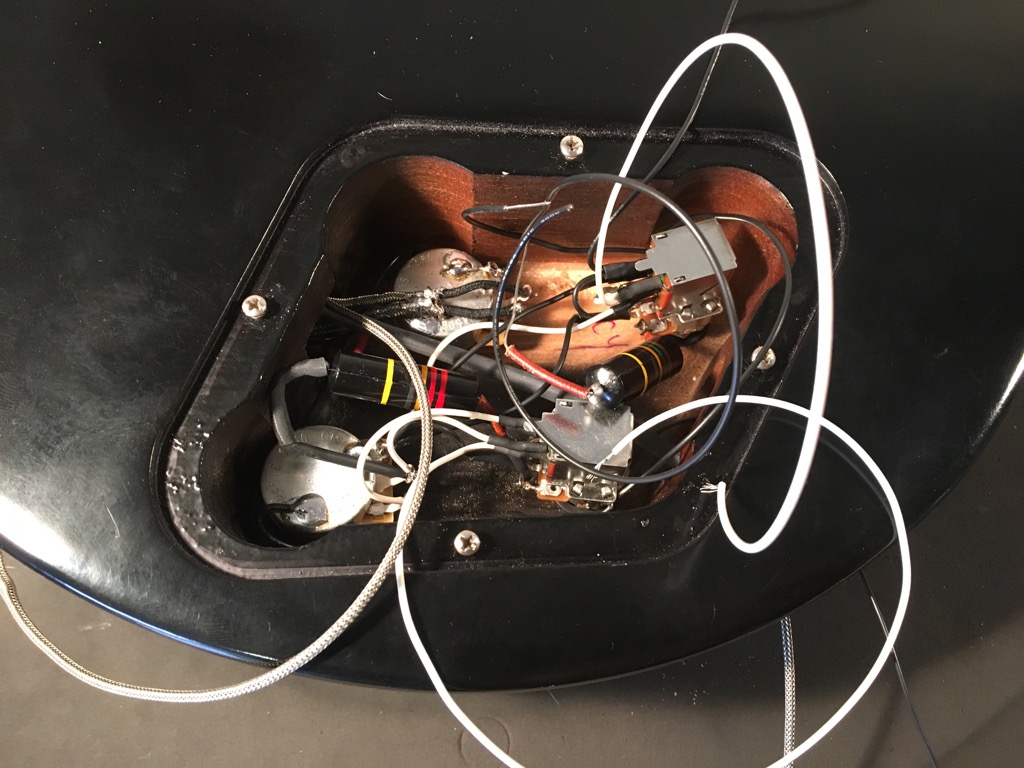
And in with the rest of the guts... egad!

Photo%20Dec%2004%2C%204%2032%2001%20PM.jpeg


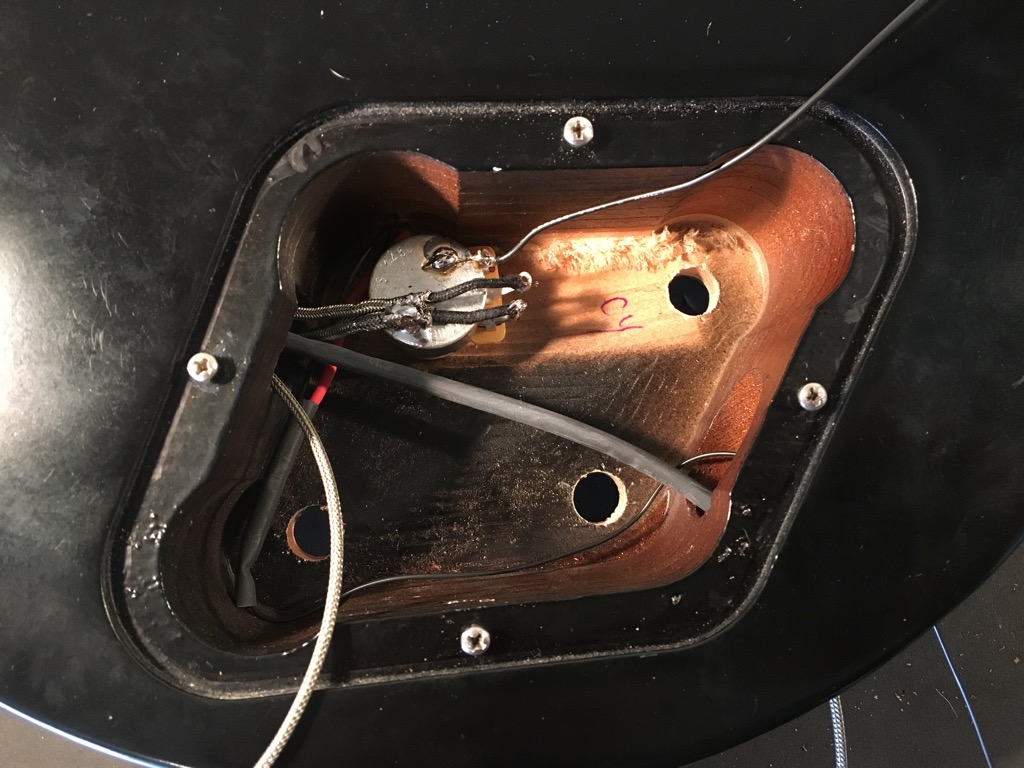
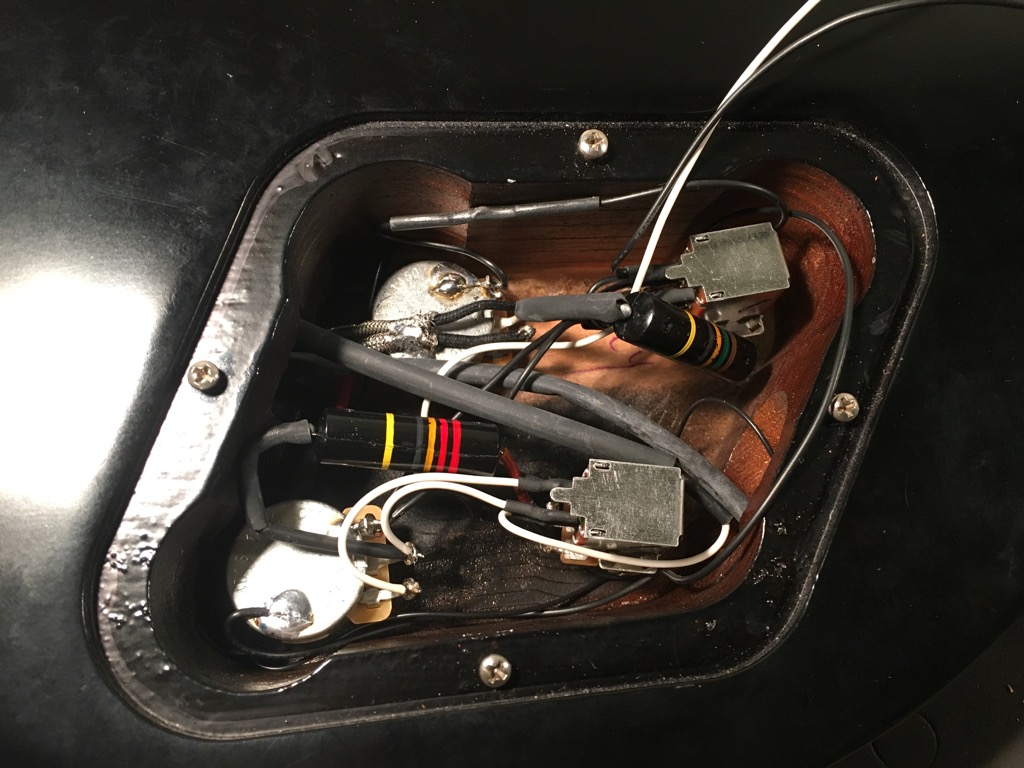
At this point I've just got a few connections to make. The neck tone cap to the volume pot, the neck volume pot ground to the rest of the grounds, the output of the bridge control bypass switch to the selector switch, and the hot and ground for the output jack. After making those connections and cleaning things up, this control cavity looks almost like you could bring it out in public without being embarrassed.

Photo%20Dec%2004%2C%208%2032%2013%20PM.jpeg


The two wires exiting the cavity are for the bridge pickup hot and ground..

I hooked the old bridge pickup back up with alligator clip leads just to verify that everything worked and, because why not, there was exactly zero output. I traced the issue down to a single sliver of braided shielding making contact with the tip of the output jack. I wouldn'ta thunk it possible with all the heat shrink in there, but there it was. Remedied that and proceeded to get a good functional checkout on everything. I'm going to call that a success story.

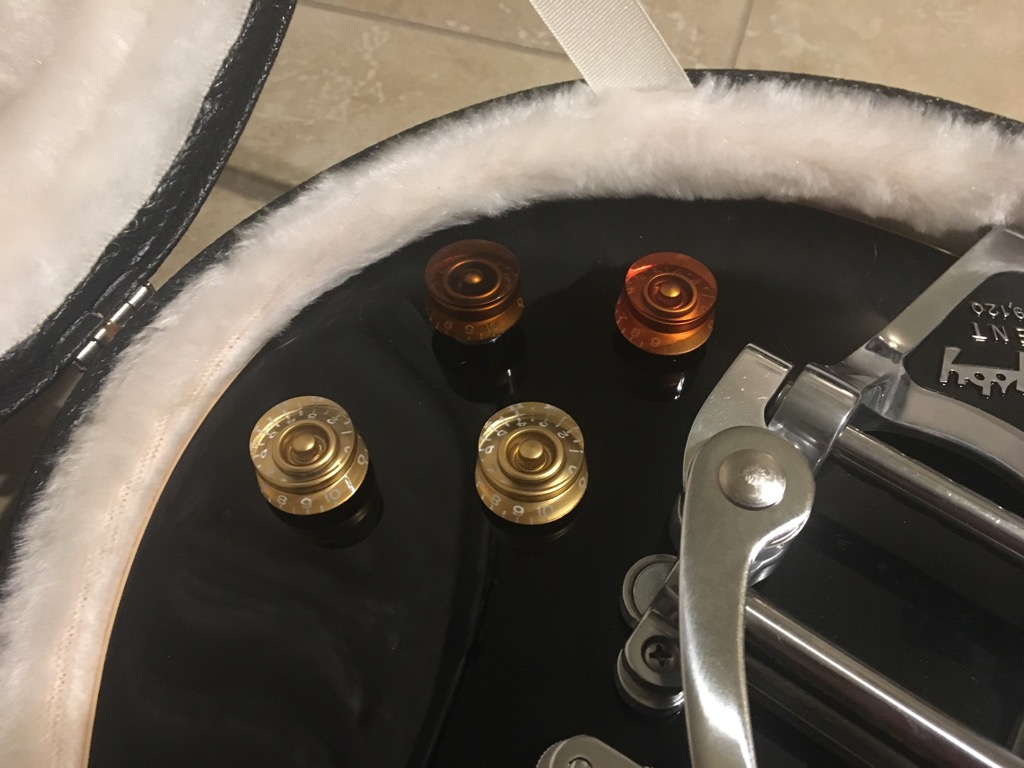
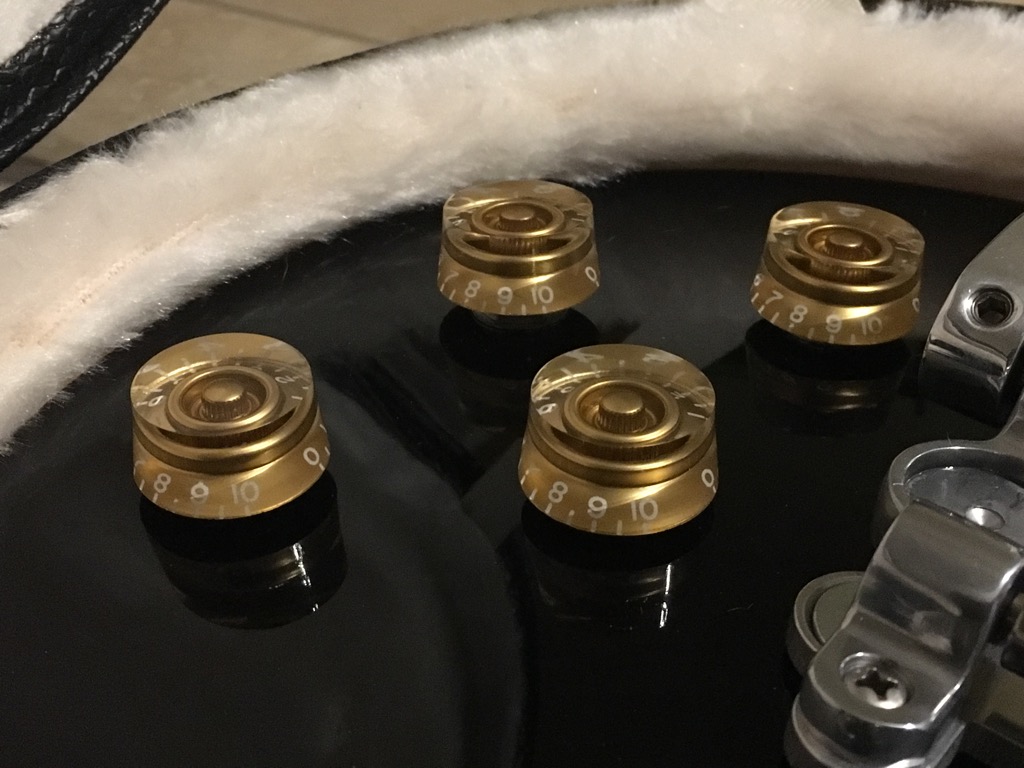
Old Black sports either gold or amber "Top Hat" or "Bell" style knobs. I think they are amber, but then I see a picture where they look gold, I dunno. I do know that those bell style knobs suck with push/pulls, so we are going to follow function over form and go with standard speed knobs. I tried the amber, two different varieties, and I didn't like either of them. They just did not fit aesthetically. The gold ones on the other hand look quite sharp. I made an Executive Decision.

Photo%20Dec%2004%2C%209%2041%2047%20PM.jpeg


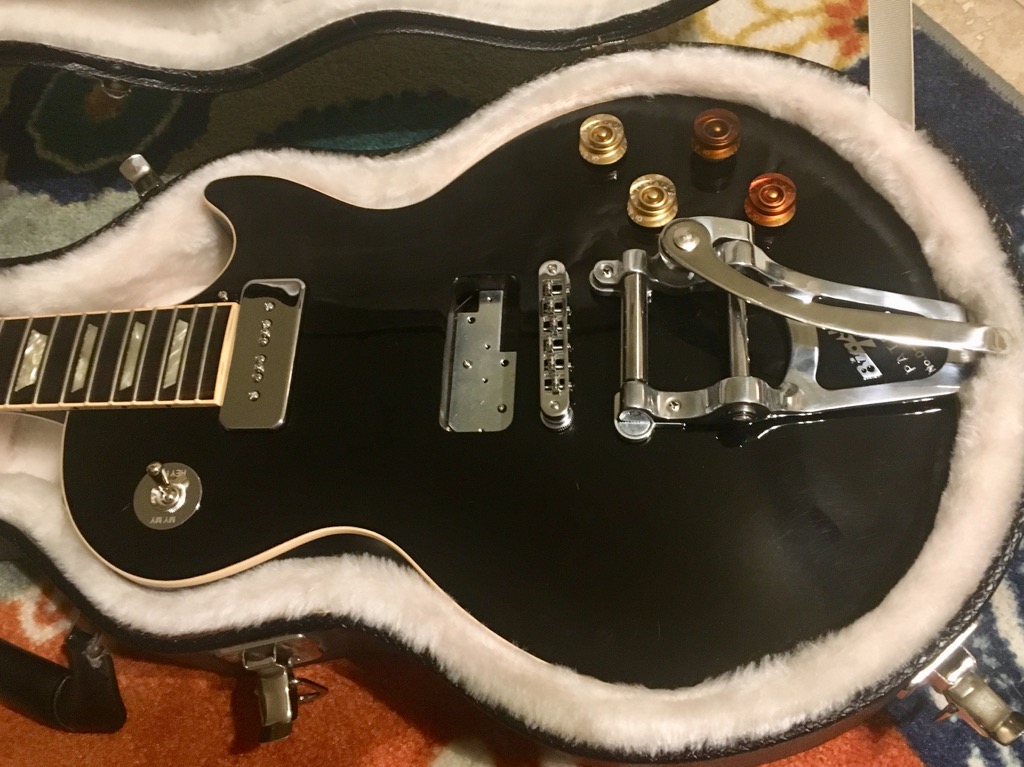
For now that's about as far as I can go. Well, almost. I broke a corner of the plastic jack plate when I was re-installing it so I will probably track down a proper metal replacement. Something to add to my solder-lug-washer order!
 
Looks good! Clean wiring is so satisfying. Lets you sleep easy, knowing the chances of anything going fiddly with it later on are very slim.

-VB- said:
I hooked the old bridge pickup back up with alligator clip leads just to verify that everything worked and, because why not, there was exactly zero output. I traced the issue down to a single sliver of braided shielding making contact with the tip of the output jack. I wouldn'ta thunk it possible with all the heat shrink in there, but there it was. Remedied that and proceeded to get a good functional checkout on everything. I'm going to call that a success story.

Braided shield ends are notorious for fraying and inadvertently grounding things that shouldn't be grounded, or migrating forward to the hot inner conductor and doing the same thing. That's why I do this to the end...

3opB0Iq.jpg

If you were ever in the Boy Scouts, or hung around with seasoned outdoorsmen, ranchers, etc., you learned about "whipping" rope ends...

[youtube]wECupgmIJio[/youtube]​

It just keeps things from fraying and causing you trouble down the road. That's what we're doing with that short bit of heat shrink above. Cover the braid end plus a little past it, shrink it, and you won't have whiskers making you miserable later. Once that's done, you can reinforce and insulate the whole connection with another piece of heat shrink...

VWy91S3.jpg

Then, to keep the tip of the plug from touching the braid once inserted into the socket, you can cover the whole shebang, and that jack should be good to go for a long time.

pnl7kUL.jpg

 
Thanks. Learned that stuff many moons ago from little old ladies who built milspec electronics for industrials.
 
Cagey said:
I like your single-conductor wire for the ground lead. I've been stripping the braiding back and attaching that to ground. This is a much simpler and certainly more durable way to do it. You just saved me a whole lot of work on the wiring I'll do in the future. Thanks for that (and the grounding lug idea).
 
Now compare Cagey's wiring to mine!

index.php


Hmmm.  I think I need to up my game a bit  :)


Attachments

  • IMG_3459.JPG
    IMG_3459.JPG
    604 KB · Views: 289
To be fair, there is such a thing as production efficiency, which allows passing on minor embellishments designed to avoid rare failure modes. The little old ladies who went to such extremes when wiring had the luxury of time afforded by exorbitant sell prices to finance their efforts. But, those who cannot abide failure, such as the military or high-demand abusive environments like automotive factories are willing to pay the premium for that last few percent of reliability.
 
Good grief Cagey, that jack is a thing of beauty! I have something to strive for. I do utilize a separate wire from the braid to the ground lug, but I worked the braid back a full couple of inches, attached the wire there and heat shrank (Heat shrunked? How do I conjugate this?!) the whole mess. With the knot from the wire joining the braid, the heat shrink couldn't close as tightly as it otherwise would and the tip of the jack went right to the tiny piece of exposed braid in the middle. Your approach is much more controlled and refined and I like it a lot.

Generally when I'm doing a guitar like this I wire the toggle switch in full, pull it all through, then attach the jack at the other end of the switch output wire. Proximity to the guitar body means I don't bring the heat gun in for that part and rely on the soldering iron to shrink down the heat shrink. It looks like you are wiring the jack up on its own. Do you do the jack first then join it to the switch?
 
I am still hemming and hawing about the knobs...... What do you guys think?

Photo%20Dec%2005%2C%208%2009%2048%20PM.jpeg


The volume knobs are the gold, bridge tone (left) is Amber-Flavor-1 and the neck tone (right) is Amber-Flavor-2.

Here they are with a bit more context:

Photo%20Dec%2005%2C%208%2035%2018%20PM.jpeg


In this case the difference in color true, not an effect of lighting. #2 is rather orange-y while #1 is more... rusty. Which probably answers my question I suppose...
 
-VB- said:
Good grief Cagey, that jack is a thing of beauty! [snip] Do you do the jack first then join it to the switch?

Thanks! I mount the jack to the plate so it'll lay down and be nice while I'm working on it, and the whole thing is wired separate from the guitar, so it's basically a jack with a pigtail on it. I buy the braided shield wire in bulk, so I can afford to make the tail a little long and trim it to fit once it gets installed in the guitar. Then it gets terminated wherever it needs to be, depending on the control circuit/guitar style.
 
Back
Top