Leaderboard

80s superstrat project (Hohner body / Warmoth neck)

Heavy Rock

Junior Member
Messages
60
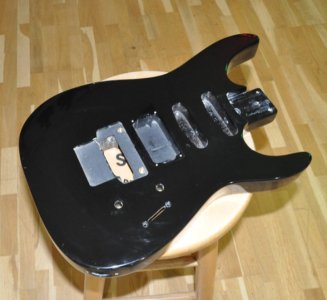
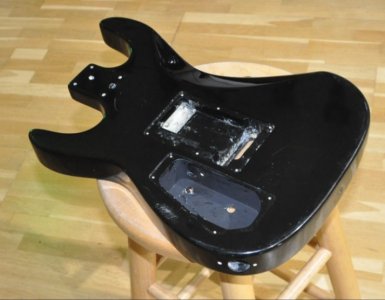
The story begins when a few months ago, I got a cheap body from Reverb, because I had a few cheap parts lying around and wanted to turn them into a complete guitar, although to be a beater cheap one. So I went on searching and found this Rockwood by Hohner black body for 58 euros including shipping and I assembled the guitar with whatever crap I had around. Well, to my huge surprise the guitar sounded so good that I couldn't stop playing it. Since then it's the guitar I play almost all the time and whatever pickup I put in it, it brings the best of it out, the notes jump as long as I touch the strings and it's crazy how much the whole body vibrates while playing it.

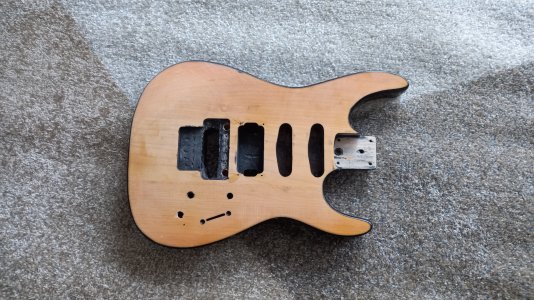
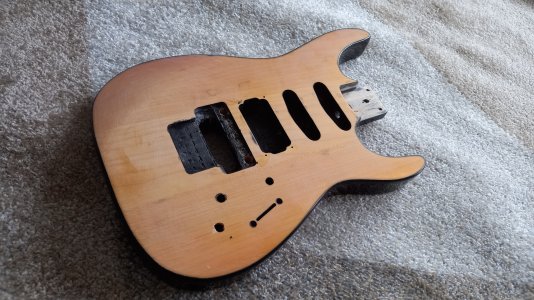
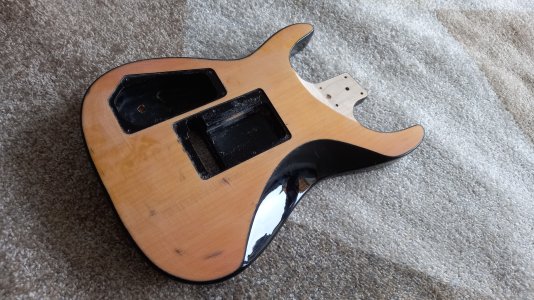
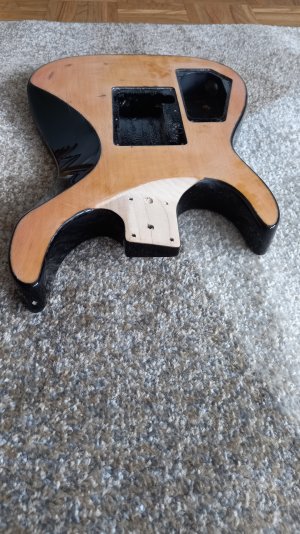
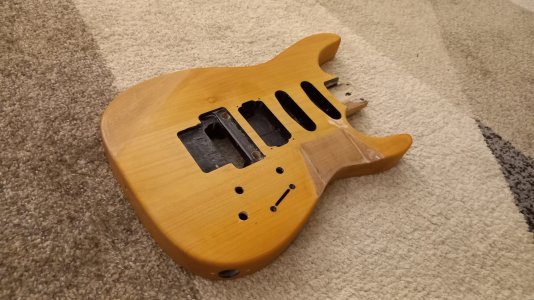
So a couple weeks ago I decided that this body really deserves to be a better guitar than what I had matched it with. I made a quick research on what this body is made of and looks like many people believe it's made of plywood or basswood. It's a 1996 Rockwood body which in fact is a Korean Cortek body. It's surprisingly well made. For a while now I wanted to make a red superstrat, so I decided to use this body instead of getting a new one. I'm currently in the process of sanding the original color off and it's not plywood. It's a 3-piece body (one center piece and two sides), I don't know what wood it is but it has the tonal character of maple, super tight, super clear etc. I have a maple Warmoth soloist body which is almost identical in shape but the Rockwood is not as heavy as that though. Maybe it's a lighter piece of hard maple or it's soft maple, I don't know.

So at the end of this month I'm ordering a new Warmoth neck for this project, which will be a paddle headstock one. I want to make a guitar along the lines of the Hamer Californian model which I love the looks of. That headstock is pure 80s but not too bold, really perfect.

I'm attaching some pics of the body as it was originally and how I progressed with the sanding so far. I have made it down to the sanding sealer (I'll leave that on) and sculpted the heel a little. I'll be updating this thread as I go. Sorry for the lengthy post. Thanks for reading! See you around...
 

Attachments

  • Screenshot_20241207-162505_Reverb.jpg
    Screenshot_20241207-162505_Reverb.jpg
    101.8 KB · Views: 47
  • 20241207_110714.jpg
    20241207_110714.jpg
    892.7 KB · Views: 26
  • 20241207_110705.jpg
    20241207_110705.jpg
    899.4 KB · Views: 23
  • 20241207_110658.jpg
    20241207_110658.jpg
    902.9 KB · Views: 25
  • 20241207_110649.jpg
    20241207_110649.jpg
    927.4 KB · Views: 29
  • Screenshot_20241207-162518_Reverb.jpg
    Screenshot_20241207-162518_Reverb.jpg
    86.7 KB · Views: 28
Last edited:
Some more progress with the sanding on the body. I'm gathering the parts at the moment.

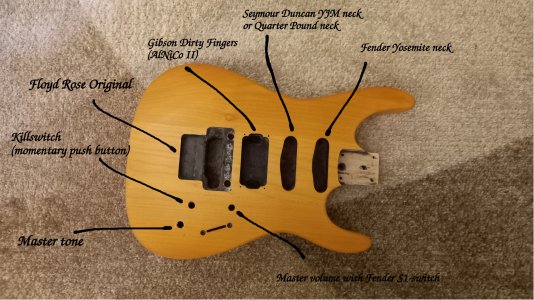
This guitar is going to get all the mods I wanted to make over the years and didn't get to do. I'll make it my "signature" model so to speak. I want to make some slight mods to the body as well as the pickups and the bridge.

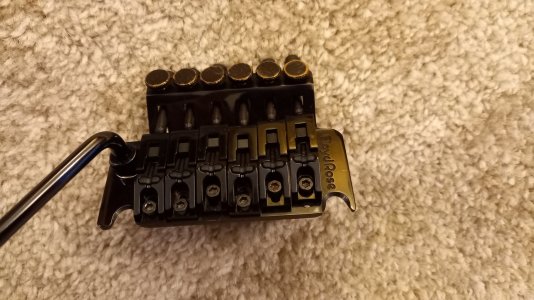
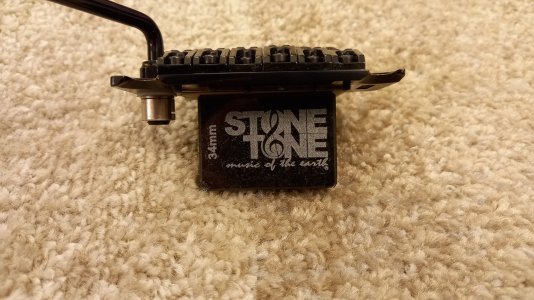
The bridge will be an original Floyd Rose I had since two years ago, that I modified with Graph Tech saddles and a stone block.

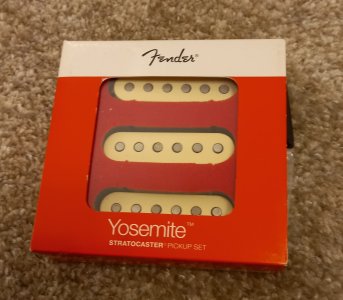
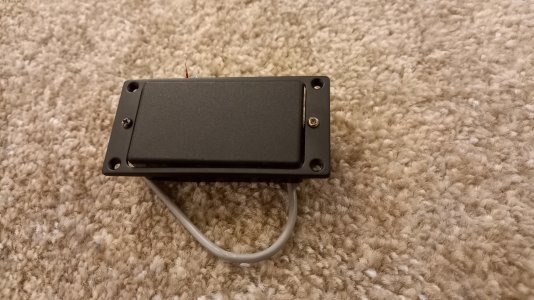
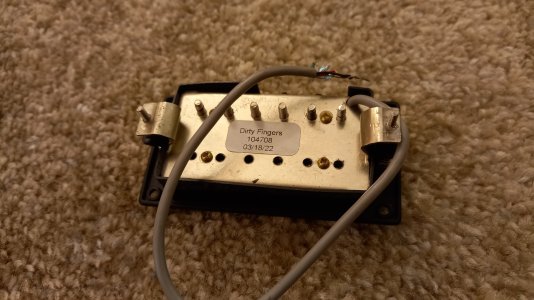
The bridge pickup will be a Gibson Dirty Fingers with an AlNiCo II center magnet instead of the ceramic one. The neck pickup will be a Fender Yosemite and the middle either a Seymour Duncan Quarter Pound or a YJM Fury bridge. Haven't decided between the two yet. I'm going for a fat sounding pickup in the middle for more classic rock riffing and a Fender style sound from the neck pickup. The bridge must have that super tight clear distortion of the 80s.

I'm thinking to put all three pickups in plastic covers for that 80s look but not sure yet if I'll do that. Also I want to try the Graph Tech Un-Lock nut. If it works I'll keep it, otherwise I'll replace it with a standard Floyd Rose nut.

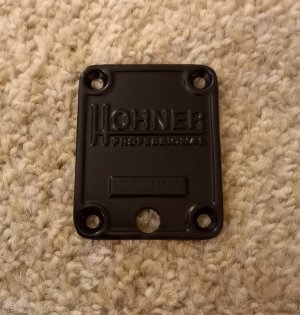
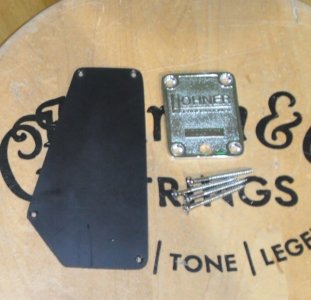
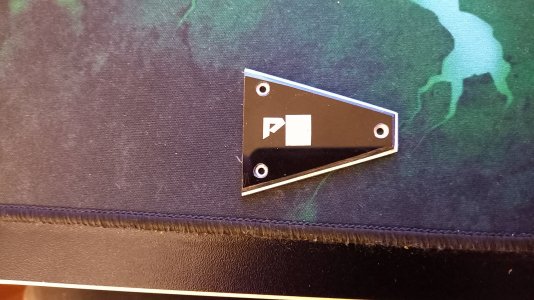
The Yosemites can be bought only as a set but I have plans for the other two in another project. Also I painted the neck plate black and sprayed a clear coat on too, I hope it will last long enough, we'll see.

I'm currently working on the body mods.

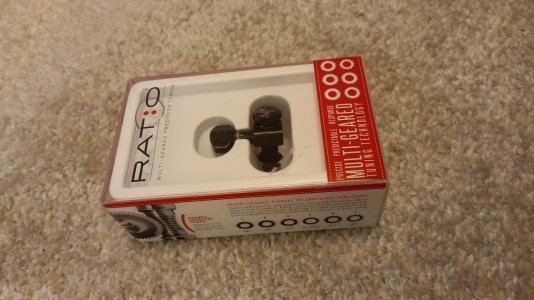
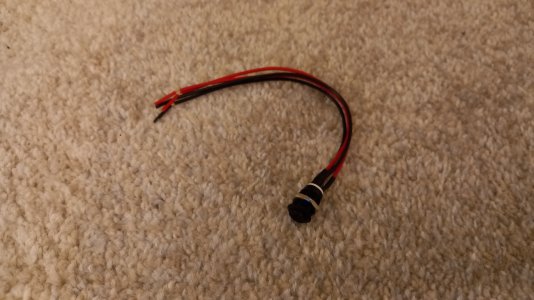
So here are a few pics with the parts I have s far.
 

Attachments

  • 20241208_195551.jpg
    20241208_195551.jpg
    652.1 KB · Views: 11
  • 20241208_195558.jpg
    20241208_195558.jpg
    741.3 KB · Views: 12
  • 20241208_195749.jpg
    20241208_195749.jpg
    648.3 KB · Views: 11
  • 20241208_195813.jpg
    20241208_195813.jpg
    677.5 KB · Views: 10
  • 20241214_220811.jpg
    20241214_220811.jpg
    508.1 KB · Views: 10
  • 20241218_012510.jpg
    20241218_012510.jpg
    723.7 KB · Views: 10
  • 20241218_012518.jpg
    20241218_012518.jpg
    551.8 KB · Views: 10
  • Screenshot_20241214-221035_Reverb.jpg
    Screenshot_20241214-221035_Reverb.jpg
    269.1 KB · Views: 8
  • 20241214_220928.jpg
    20241214_220928.jpg
    930.5 KB · Views: 24
  • 20241214_220855.jpg
    20241214_220855.jpg
    800.4 KB · Views: 31
The Yosemite pickups suck (very microphonic). I would suggest the Texas Special, or Dimarzio Area 61 or 67 for neck, and Injector for middle.
 
Last edited:
Thanks for the suggestions, I'll keep that in mind. Actually if they don't work well my next choice is the Fat 50s. I'll keep the DiMarzios in mind too.
 
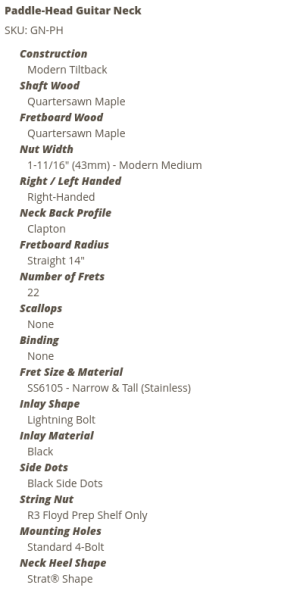
The neck is ordered (specs in picture).

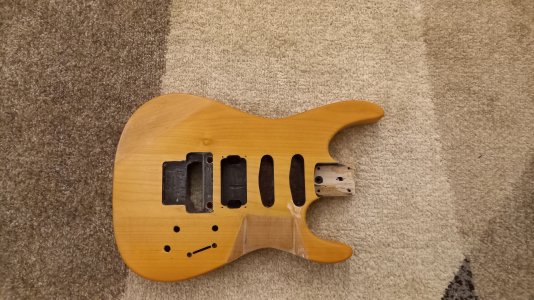
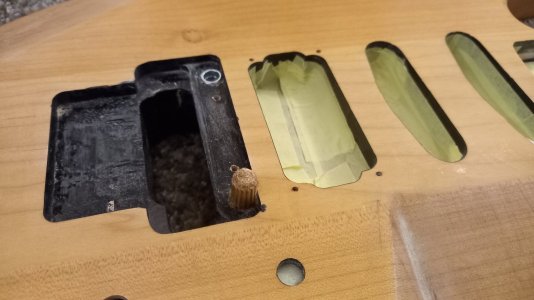
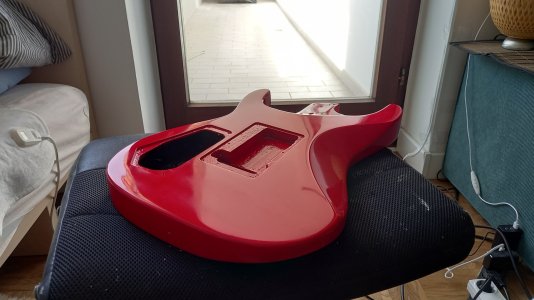
And here's my weird mods on the body in question. What can I say, getting older makes me be more particular about little things on the guitar. It's been a while that I've noticed when playing my LTD MH-400, which has a carved top body, my picking hand likes it more because the center part of the body where the strings are, is elevated from the rest of the body. My hand has more room to move while I pick and somehow that helps me pick more accurately. But I don't like the look of carved top bodies, I prefer the minimal look of the flat top ones so here's my solution. I carved out a piece of it below the strings at the spot where I pick and tried it. Works great, and I like the look also.

The second mod is, I made the forearm contour flat. I always liked how the LTD 1987 Mirage looks like, so I took that idea and it actually feels more comfortable than the curved one from before.

The body needs some more detail sanding and then it's ready for the primer. I'll probably do it this week or the next weekend, lets see. I hope I'll be able to finish with the body before the neck arrives.
 

Attachments

  • 20250106_193310.jpg
    20250106_193310.jpg
    677.1 KB · Views: 15
  • 20250106_193303.jpg
    20250106_193303.jpg
    848.6 KB · Views: 15
  • Screenshot_20250106_193826.png
    Screenshot_20250106_193826.png
    71.4 KB · Views: 16
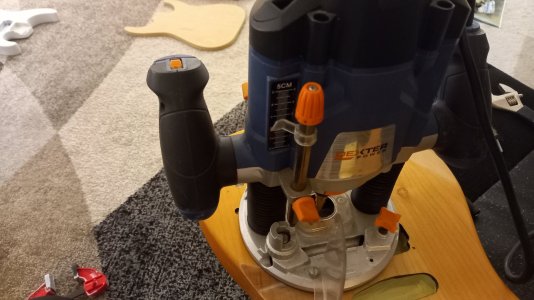
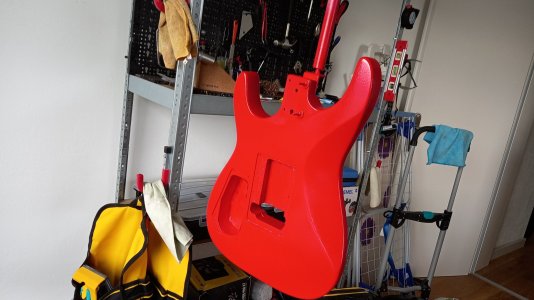
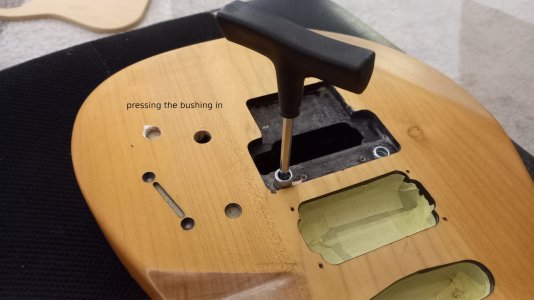
Ok, I had a minor setback. I had to enlarge the bridge post holes to put the Gotoh GE1996T posts in, because they're the only ones I have around from the good quality ones. One of the holes was for some reason a little too tight and a small crack formed in the wood while I was pressing the bushing in. That's not such a big deal, I've had other guitars like that and with some wood putty on the crack they're still holding perfectly fine. But I couldn't get over the fact that the hole was also a little crooked. I think that has to do with the Floyd Rose tuning stability so I glued a dowel in the hole and re-drilled. Now it's perfect.

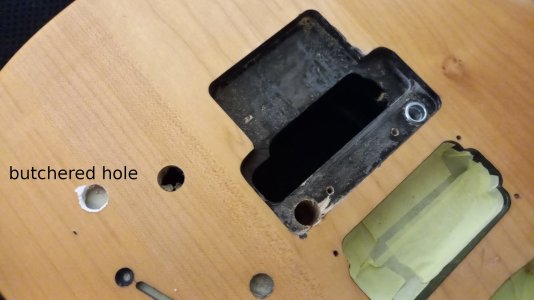
I was looking for a way to drill the hole perfectly vertical and thought to try with a Dremel and its router base, but the tolerance of that one is not very good and while pressing it down it would move and change its angle. So I took out my big router which was a lot more stable. After I made a deep enough point by hand with the drill so the drill bit can be centered, I started drilling with the router using a step bit up to 10mm. Then I used a 7/16'' reamer bit to open it to size for the bushing. Everything went well and now it's vertical as it should.

Actually I should have followed the same process for the whole I needed to open for the tone pot, but at that moment I just rushed and used a big-ass 10mm drill bit right away and butchered it. Sometimes my brain doesn't work as it should to be honest.

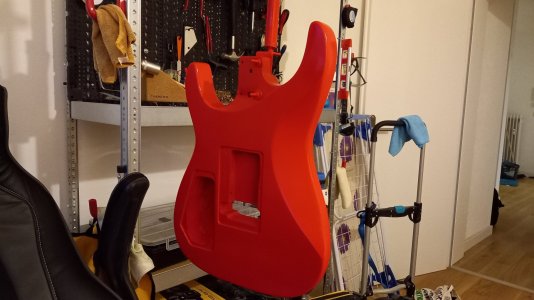
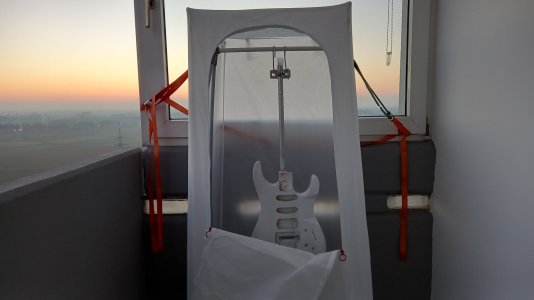
Also I got this small wardrobe from IKEA to protect the guitar from dust and bugs while painting and it works very well. So started with the primer today and tomorrow I'm painting the color on.

Some pics of the process:
 

Attachments

  • 20250117_183213.jpg
    20250117_183213.jpg
    244.7 KB · Views: 10
  • 20250117_193025.jpg
    20250117_193025.jpg
    278 KB · Views: 10
  • 20250117_195345.jpg
    20250117_195345.jpg
    231.1 KB · Views: 10
  • 20250117_195311.jpg
    20250117_195311.jpg
    249.4 KB · Views: 10
  • 20250118_164356.jpg
    20250118_164356.jpg
    145.6 KB · Views: 11
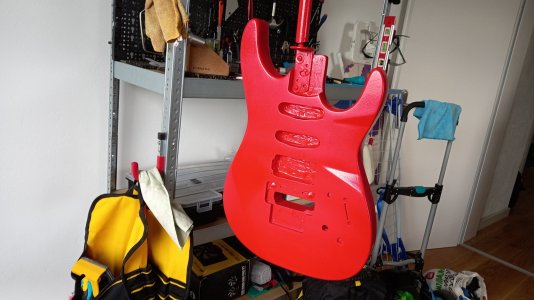
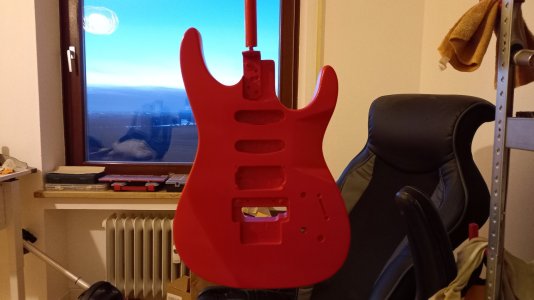
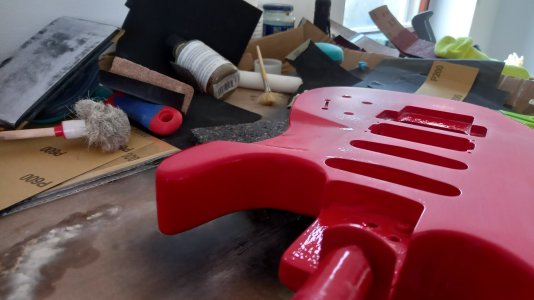
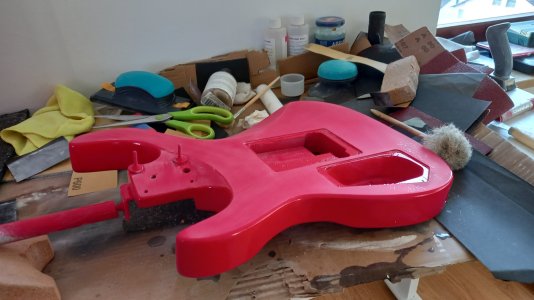
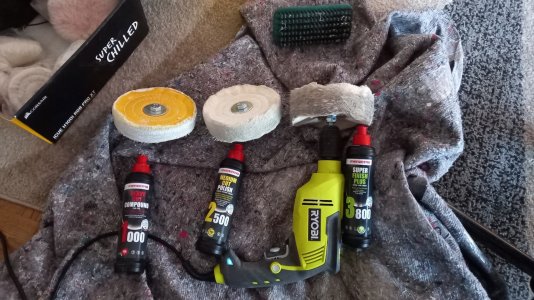
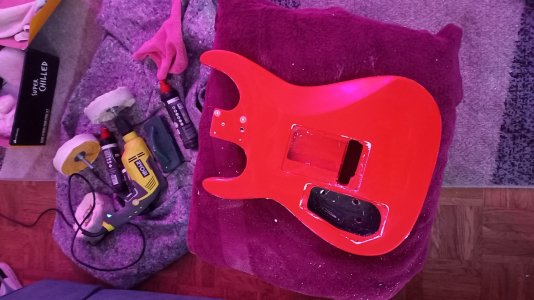
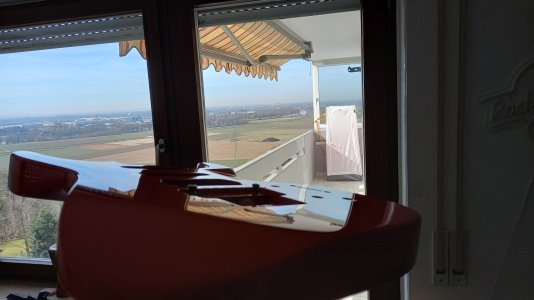
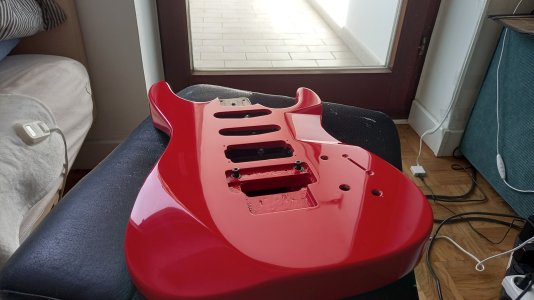
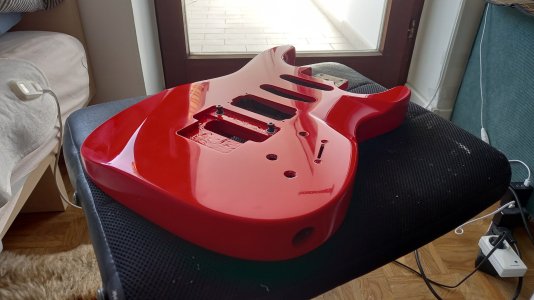
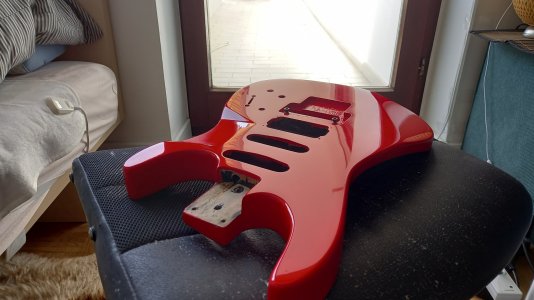
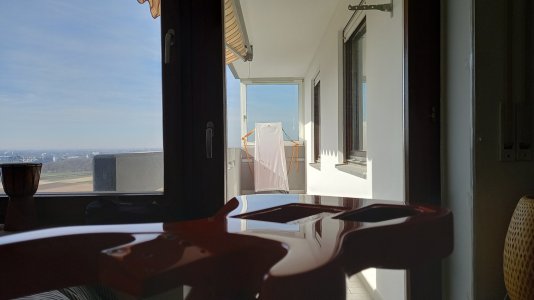
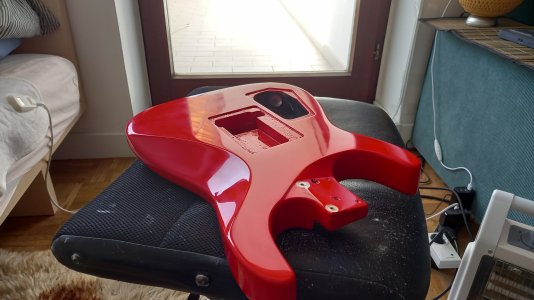
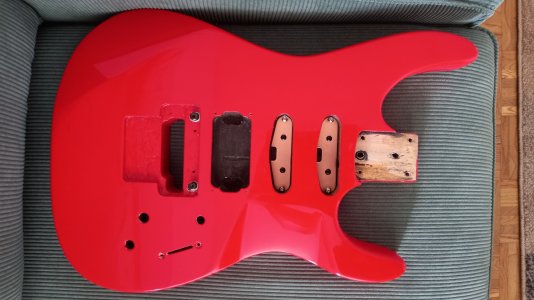
The process goes a little slower but I'm keeping the waiting times as I should with the primer and paint coats. For the paint, I was looking for a specific red shade that is bright enough but without any orange hint inside it, and the best red I found was a car brake caliper paint 😜. So I took that and painted the guitar with it lol. Very happy with that red however. I sanded the orange peel look down a little and now I'll wait a few days and spray the clear coat. I'll use SprayMax 2K gloss for that one.

Also I decided to use a standard Floyd locking nut for this one. The experiment with the Graph Tech Unlock nut will wait for another project. I feel a little lazy to mess with a different nut at the moment and also I already have a bunch of standard locking nuts already, and a couple of them are original.

And one more thing that came to mind. I really like the HSS setup but don't like the single coils mounted directly on the wood. I had them jumping out due to worn threads in their mounting holes multiple times in the past. So I got these single coil pickup base plates that I'm going to use to mount the pickups. I'll screw those in on the bottom of the pickup cavities and mount the pickups on them. Their edge holes come already threaded for standard single coil mounting screws, like the ones Fender uses to mount the pickups on their pickguards, and I have many of those (perfect!). I think these will work a lot better.

Link: Single coil base plates

Some pics:
 

Attachments

  • 20250125_122556.jpg
    20250125_122556.jpg
    225.5 KB · Views: 9
  • 20250126_132102.jpg
    20250126_132102.jpg
    274 KB · Views: 10
  • 20250126_132120.jpg
    20250126_132120.jpg
    272.7 KB · Views: 11
  • 20250126_173246.jpg
    20250126_173246.jpg
    208.6 KB · Views: 9
  • 20250126_173313.jpg
    20250126_173313.jpg
    264.2 KB · Views: 12
Ok there's only 10 pic upload limit so I'll make two posts.

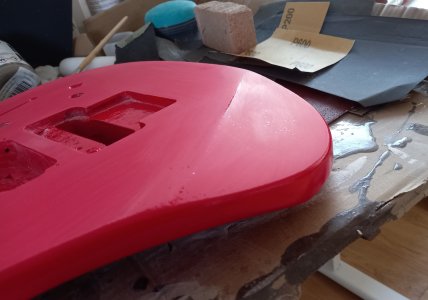
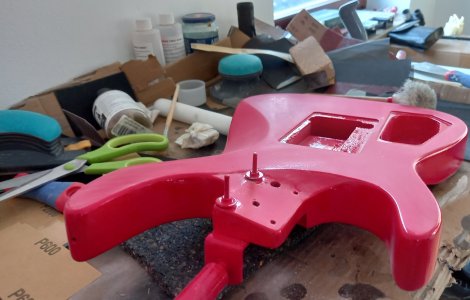
I level-sanded the body before I put the final few coats of clear on. There are still some low spots but I think it'll be fine with the couple more coats and final sanding and polishing. I reached a level with the body that can't go any further for now because I want to use the other can of 2K poly for the headstock as well so I'll spray them on the same day. The timing couldn't be better because the neck arrived! (next post).
 

Attachments

  • 20250209_161909.jpg
    20250209_161909.jpg
    330.7 KB · Views: 8
  • 20250209_161903.jpg
    20250209_161903.jpg
    261.3 KB · Views: 8
  • 20250209_155348.jpg
    20250209_155348.jpg
    233.3 KB · Views: 7
  • 20250209_152908.jpg
    20250209_152908.jpg
    295.6 KB · Views: 9
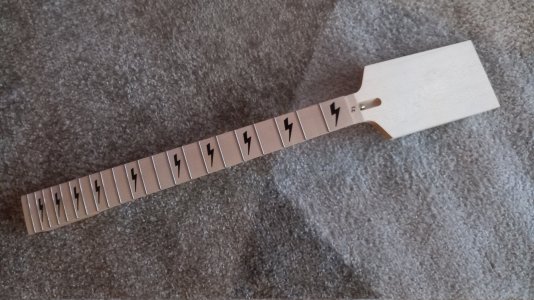
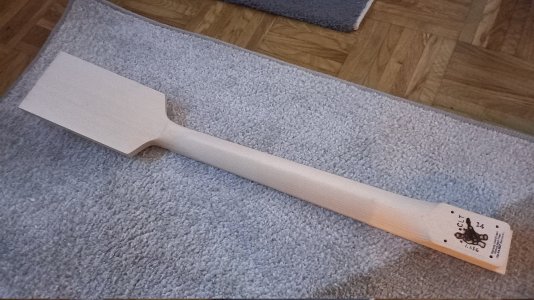
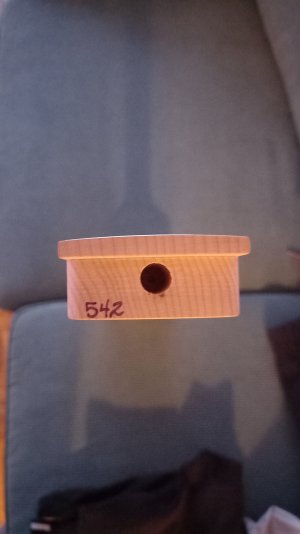
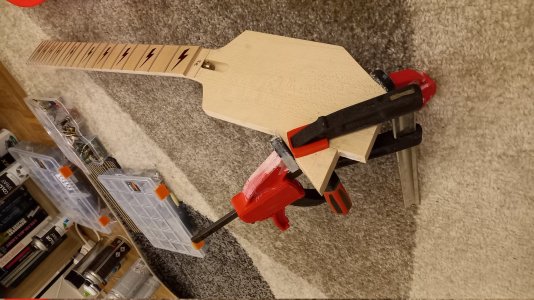
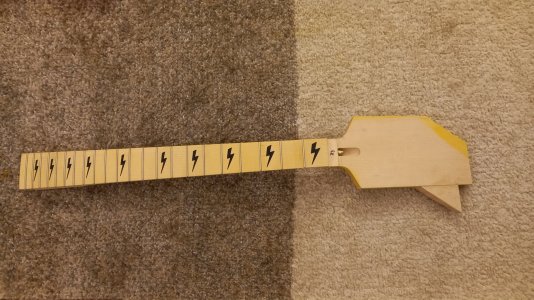
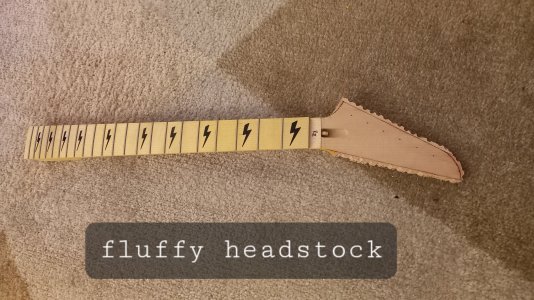
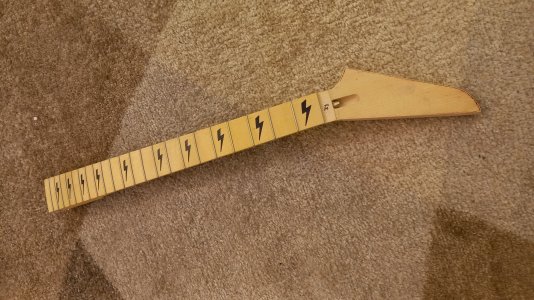
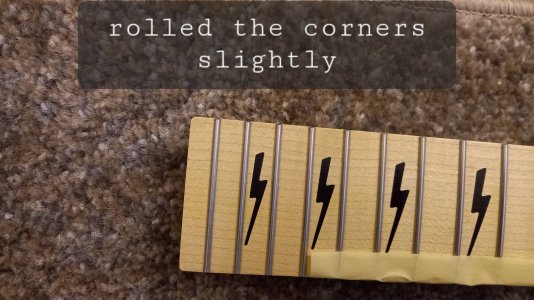
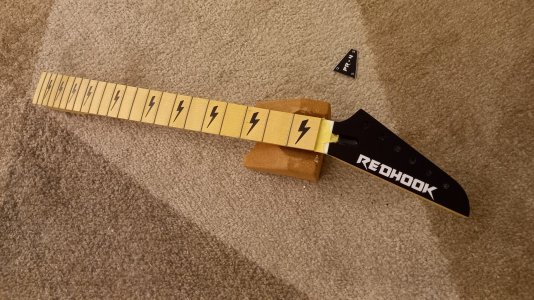
So as Warmoth said (4-6 weeks) the neck was finished last Wednesday exactly on time, and within two days it came here! Super fast! I got to say, the Clapton profile feels so good, I should have tried it earlier. And the quartersawn is super good, almost vertical. The lightning bolt inlays look amazing, very cool stuff overall! Very happy with the result. I started working on it right away.

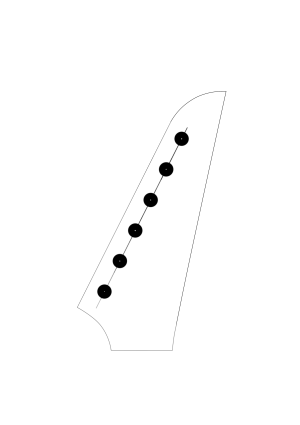
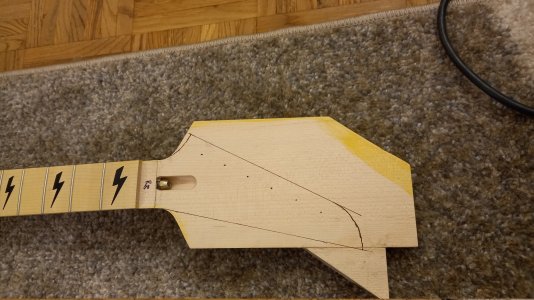
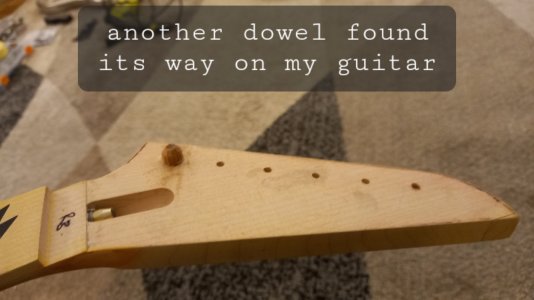
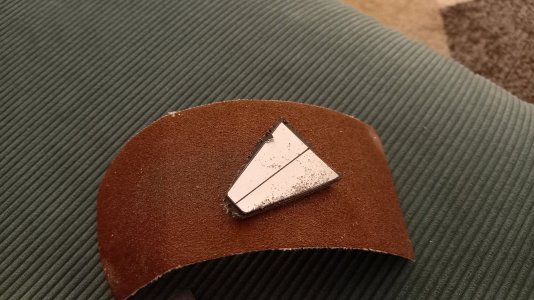
The last picture shows the headstock design I used. I needed one tiny piece on the bottom of the paddle to accommodate that, so I cut a small piece from the top side and glued it on the bottom side. I could have tilted the headstock slightly to fit it but since I had enough wood, I didn't want to mess with the geometry of the whole thing, sometimes a small difference can ruin things aesthetically. Anyway...

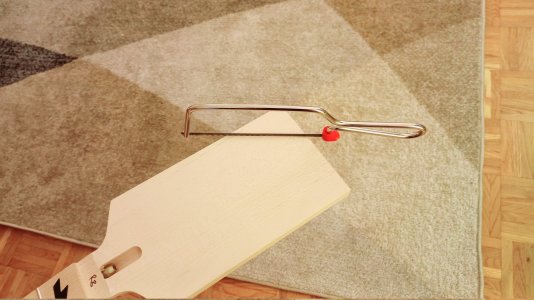
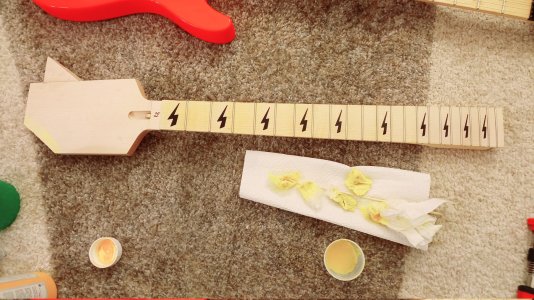
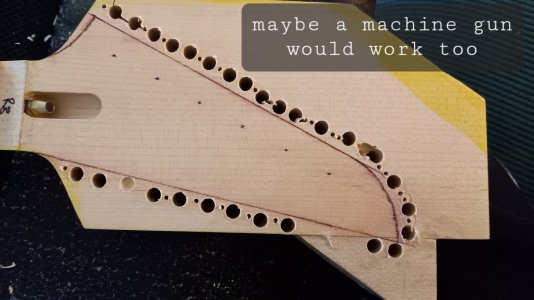
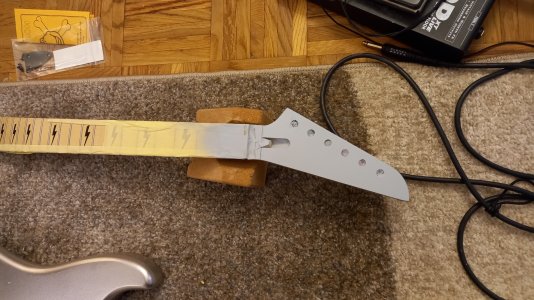
So here are some pictures of the progress. I also wanted to stain the neck a little, not much. I used a golden yellow paint and denatured alcohol, looks pretty good and the next day I put a very thin coat of sanding sealer on top. Today, I'll cut the headstock, probably I'll use a drill to drill many holes along the perimeter and a saw.

If anyone wants to use the headstock of the last picture, the nut width came out a little narrower on the A4 sheet for some reason (42mm instead of 42.8mm), but that worked out pretty well, since you can use the paper as a template to trace it with a marker on the wood, so it will add one mm to the whole perimeter. That's what I did and it worked pretty well.

Pics:
 

Attachments

  • 20250214_230032.jpg
    20250214_230032.jpg
    494.6 KB · Views: 9
  • 20250214_222946.jpg
    20250214_222946.jpg
    664.9 KB · Views: 7
  • 20250214_220421.jpg
    20250214_220421.jpg
    459.9 KB · Views: 6
  • 20250214_220410.jpg
    20250214_220410.jpg
    723.9 KB · Views: 6
  • 20250214_190723.jpg
    20250214_190723.jpg
    632.7 KB · Views: 7
  • 20250214_180108.jpg
    20250214_180108.jpg
    401.7 KB · Views: 7
  • 20250214_171256.jpg
    20250214_171256.jpg
    316.1 KB · Views: 7
  • 20250214_171215.jpg
    20250214_171215.jpg
    633.4 KB · Views: 6
  • 20250214_165200.jpg
    20250214_165200.jpg
    493.6 KB · Views: 8
  • Untitled_1739520673409.png
    Untitled_1739520673409.png
    161.2 KB · Views: 8
Last edited:
Back
Top