Verne Bunsen
Hero Member
- Messages
- 2,531
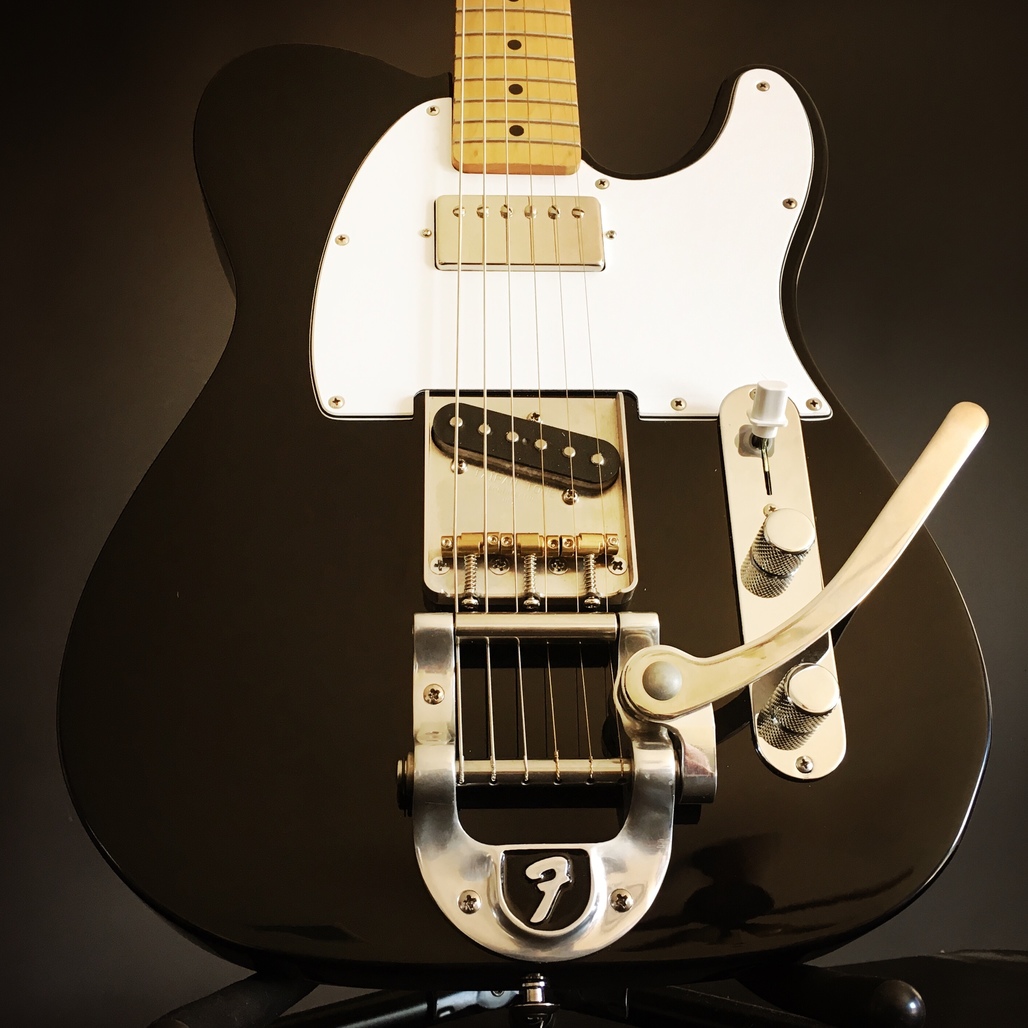
This is my 90s MIM Telecaster Special. There are many like it, but this one is mine.
I bought it new off the rack in '96 from a place called Guitar Centre in Anchorage, AK. That's not Guitar Center mind you, it's Guitar Centre. It was a small shop owned and operated by one guy known around town as "The Fender Guy". I was 16 years old, and it's been with me for the entirety of my guitar-tech learning curve. As an example, about a year after buying it I adjusted the neck pickup a little too low and one side came off of the mounting screw. I thought I had broken my guitar. It was months before I worked up the nerve to remove the pickguard and have a look. It may seem a bit silly now, but discovering that I could fix that was a real confidence booster and kind of stoked my interest in the "nuts and bolts" side of guitars. It's been steadily spiraling out of control ever since.
This axe has had it's pickups changed more times than I can begin to recall, but the configuration you see here has been its longest running: Seymour Duncan Jerry Donahue bridge and Lollar Firebird neck. They are fantastic pickups both, and they play quite nicely together, but the urge to tinker some more with "Ol' Number 1" has been nearly overwhelming of late. So, time to wind me some pickups! I find this stuff very interesting and entertaining; I figured it would be a fun thing to post about for anyone else who is similarly interested. Many pictures to follow, and sound clips at the end.
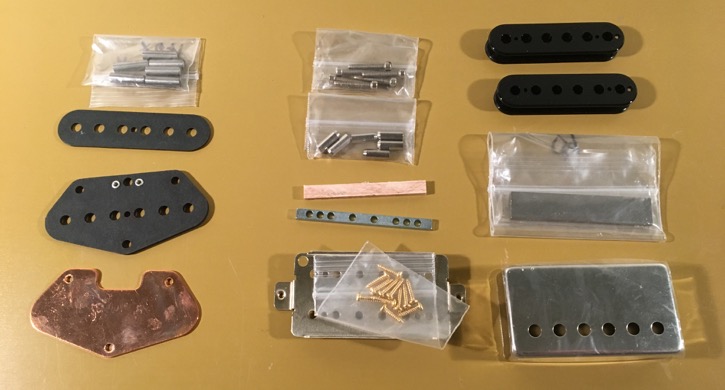
The plan is a splittable PAF style humbucker and a moderately beefy Tele single coil bridge pickup with a lower output tap for combining with the split humbucker. They are both getting Alnico V magnets and 42AWG Plain Enamel wire.
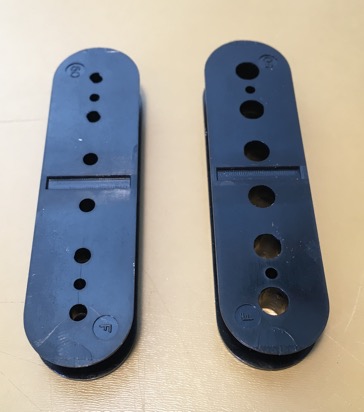
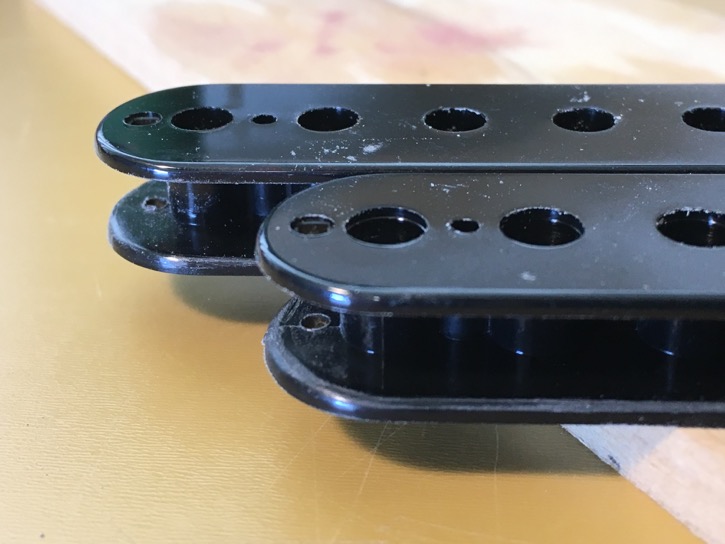
Starting with the neck 'bucker. I have no idea what the purpose of the square holes in the top flange of humbucker bobbins is, but I know I have no use for them. Where I would have a use for them is in the bottom flange, for the coil-start lead to come through, but alas there is not one.
We can fix that though. Drill and sandpaper.
The screw coil is up first. The pole pieces require a 5-40 tap, which my collection of taps is currently lacking. Had to chase the threads using one of the pole pieces instead. Not a problem in the soft plastic so long as you keep it slow-and-steady.

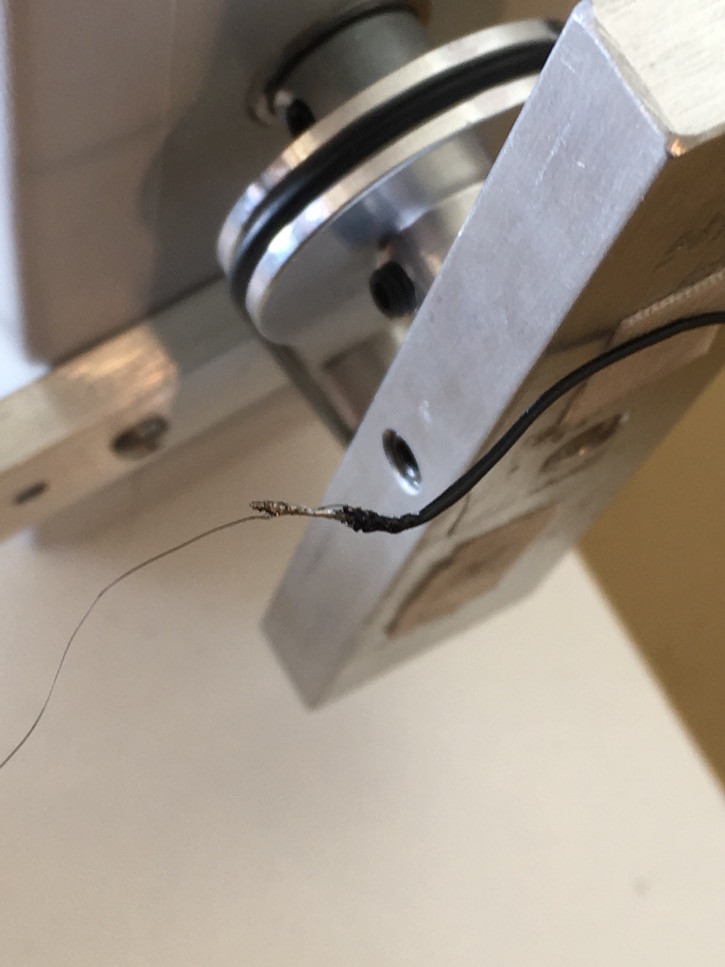
Joining the coil wire to the coil-start lead.
Insulate the joint, thread it through the hole in the bottom flange of the bobbin and secure it...

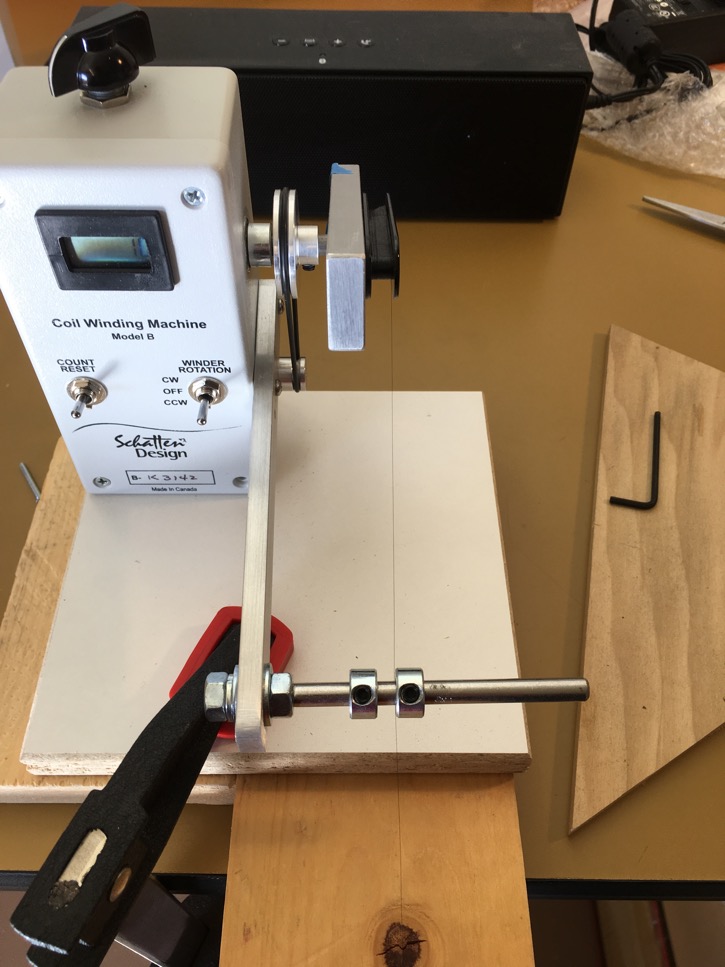
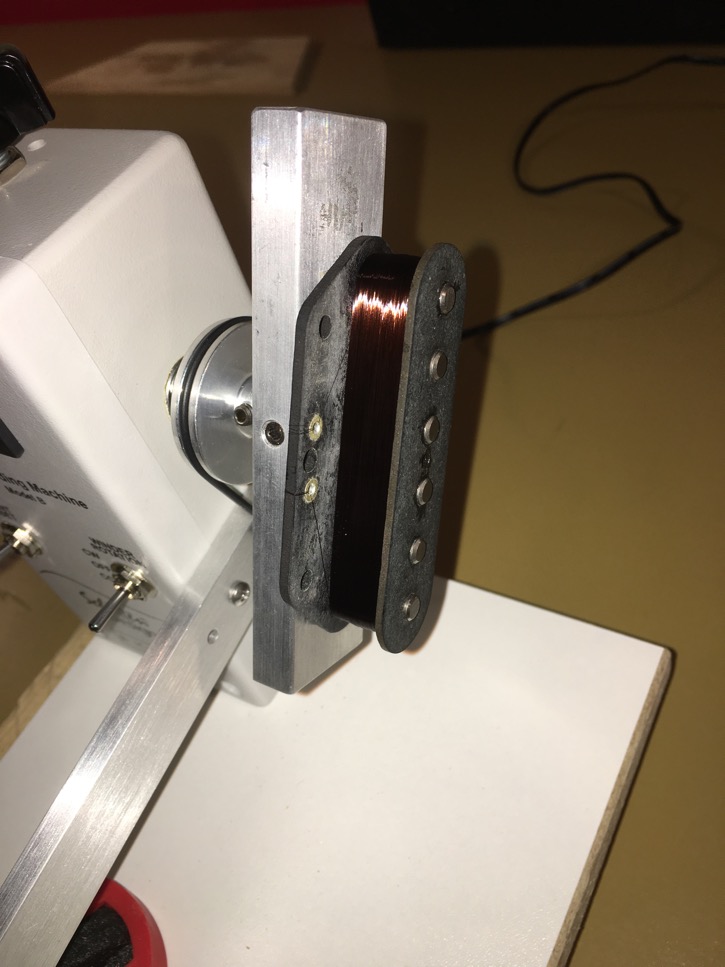
...and commence winding! Both coils in this pickup got a very traditional 5000 turns.
Joining the end of the coil wire to the coil-finish lead.
Insulate the joint, wrap it back into the coil and tape securely, and viola!
Repeat for the slug coil.
The coil-finish lead on the screw coil ended up a little shorter than I'd intended, so I ran the slug coil's a good bit longer so I could get them to meet easily. Fun fact: both coils in a humbucker are wound the same direction, but joining them together finish-to-finish means they flow in opposite directions, satisfying the "reverse wind" part of the hum-canceling recipe.
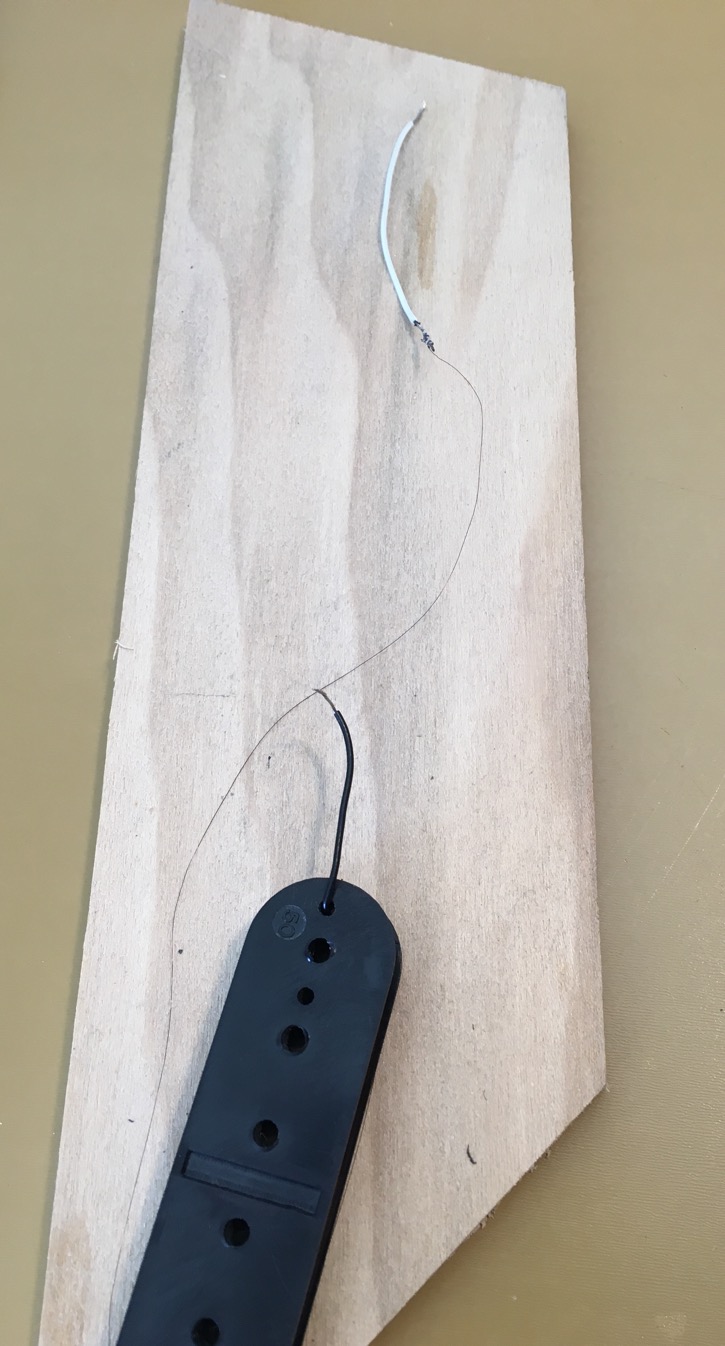
The only "trick" I need this pickup to do is to split, no parallel or anything else, so I'm wiring it up using a two conductor cable with a third bare wire. The bare wire will serve as chassis and coil ground, while black and white will serve as hot and the series link respectively.
Here is the chassis ground:
And the coil ground (screw coil-start).
Here the screw and slug coil-finishes are joined to each other and to the white pickup lead. Connecting this lead to ground will cut to the slug coil; connecting it to hot will cut to the screw coil. Not connecting it to anything leaves both coils in series, the "normal" configuration for a humbucker.
Keeper bar (not visible), bar magnet and screw coil in place.
Wooden spacer (not visible) and slug coil in place. Joining the slug coil-start to the black pickup lead. This is the "hot" lead.
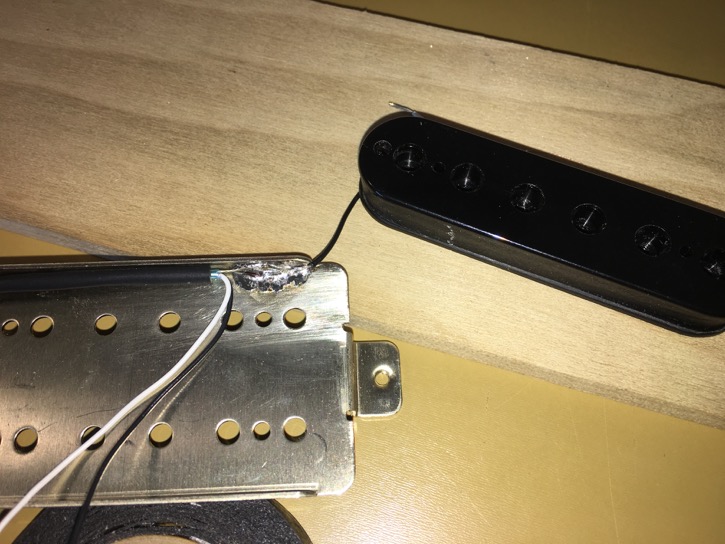
Tuck everything away nice and neat, tape the coils and install the slugs and pole pieces. Looking very humbuckery!
Install the cover and bond it to the chassis.
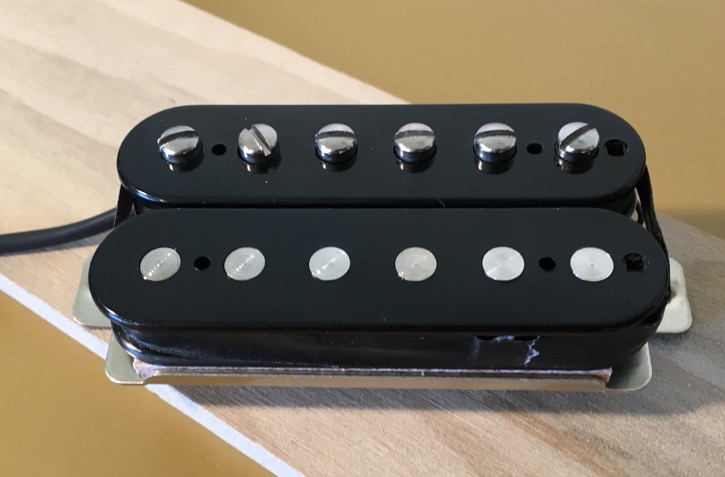
One humbucker, ready for action!

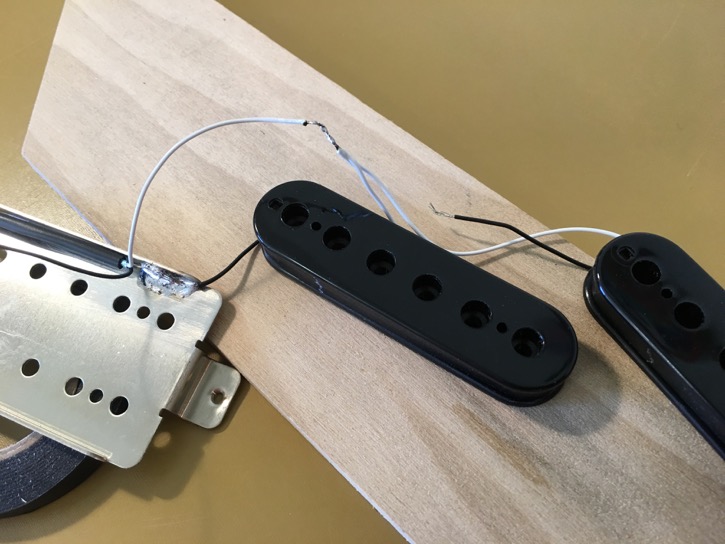
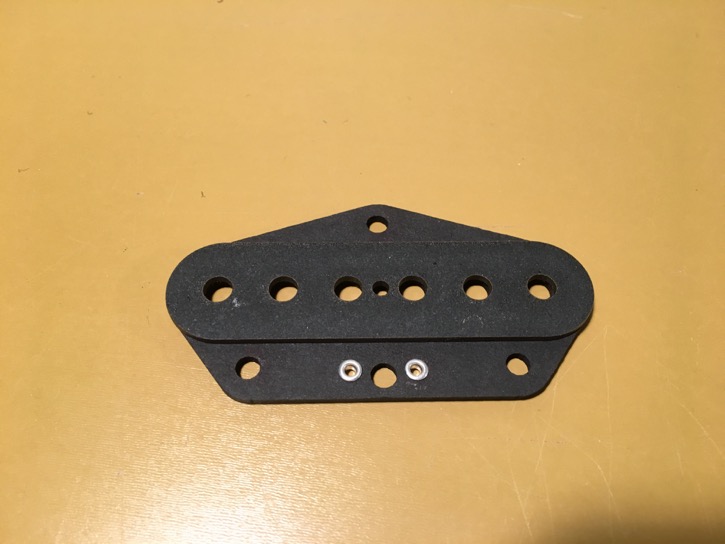
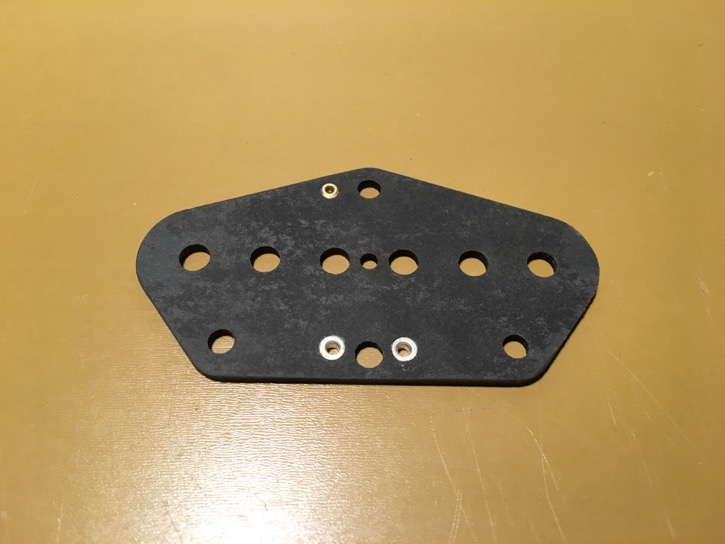
On to the bridge. The pickup flatwork I use come with two eyelets pre-installed in the bottom flange, but for the tap I'm going to need a third. Using the top flange as a guide, I picked a spot that would be both out of the footprint of the coil and positioned to work with the lay of the wire.
With that done, it's time to press the rod magnets into the bottom flatwork.
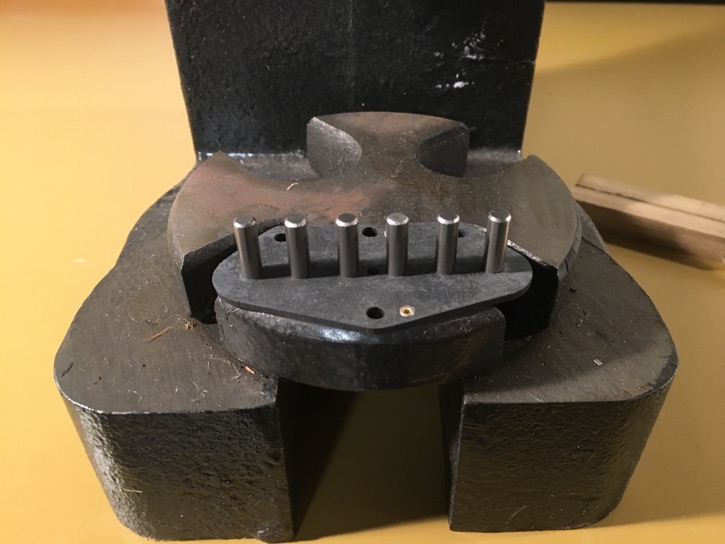
And then press the top flatwork on. While you don't see it in the picture, I have a couple of wooden spacers that I use to get the height right and make sure that the top flatwork goes on level with the bottom. (Actually, I just noticed while proofreading that you can see them sitting behind the press in the previous picture.)
I apply thin CYA superglue around the magnets on the inside of the top and bottom flanges, then wrap them with coil tape to insulate the coil wire from them. Any irregularity or burr in the surface of the bobbin can grab the wire when winding, so everything gets sanded nice and smooth.
Time to wind. I want the bridge pickup to hum cancel with the split humbucker, so I had to do a bit of thinking. The pickup selector switch that I'm using cuts to the screw coil by connecting the series link to hot. The screw coil was wound TR/TG (top right/top going: the bobbin is mounted to the winder with the top flange facing right, and rotated such that the top traveled away) and the coil-start was ground. I want the coil-start of my bridge pickup to be ground as well, so in order to get a reverse wind I'll have to wind it TR/TC (top right/top coming).
Here is the low output tap, at 7800 turns. The wire runs from the coil to the eyelet, but if I let it run back to the coil as it would naturally lay it would be much too close to the screw hole in the bobbin. So I brought it back in an out-of-the-way fashion and used the small piece of coil tape to keep it in position until winding was resumed.
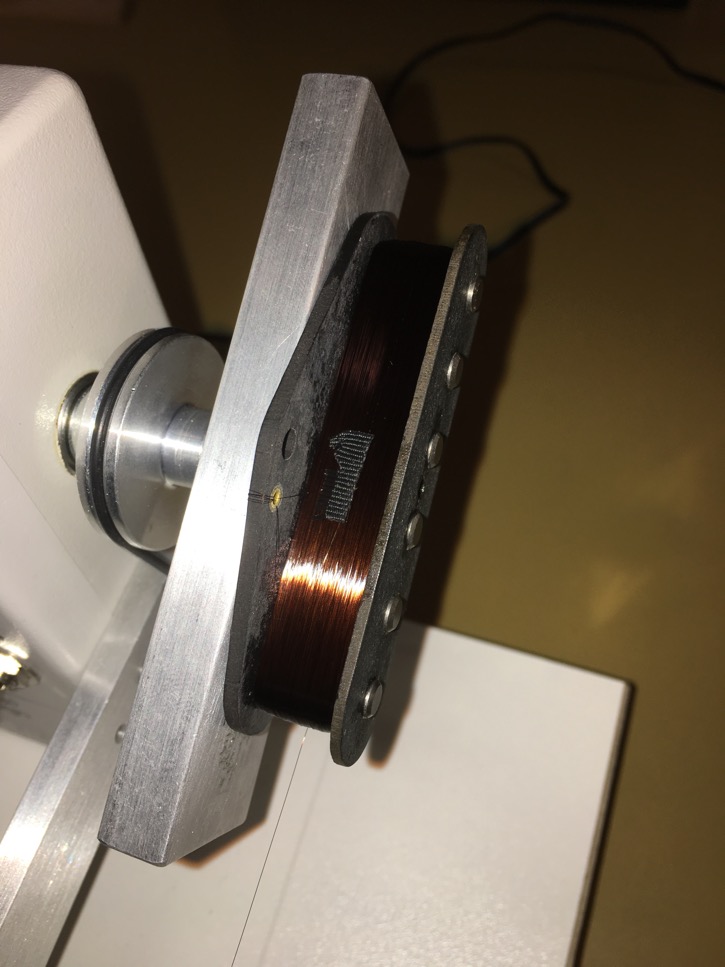
And done at 9200 turns.
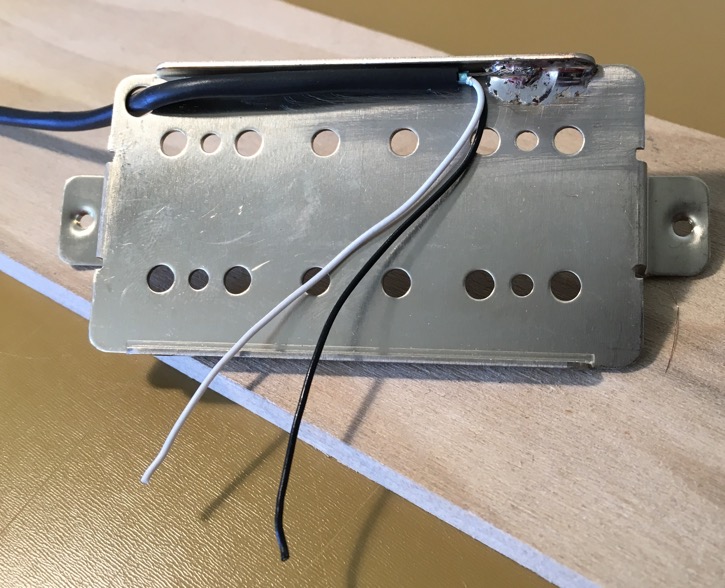
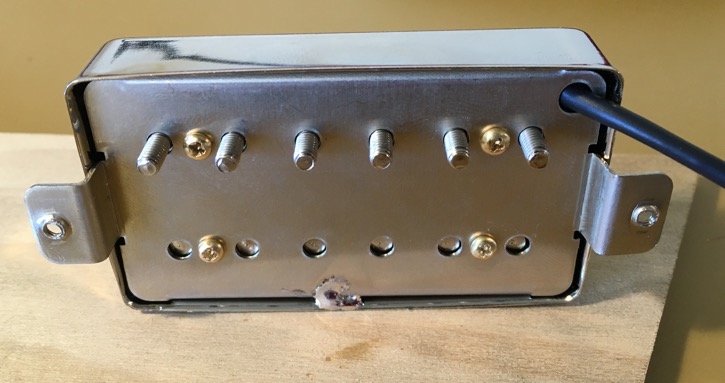
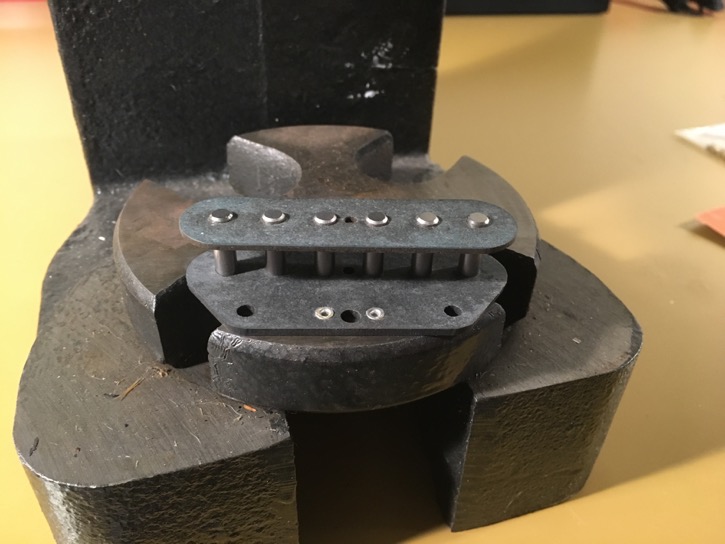
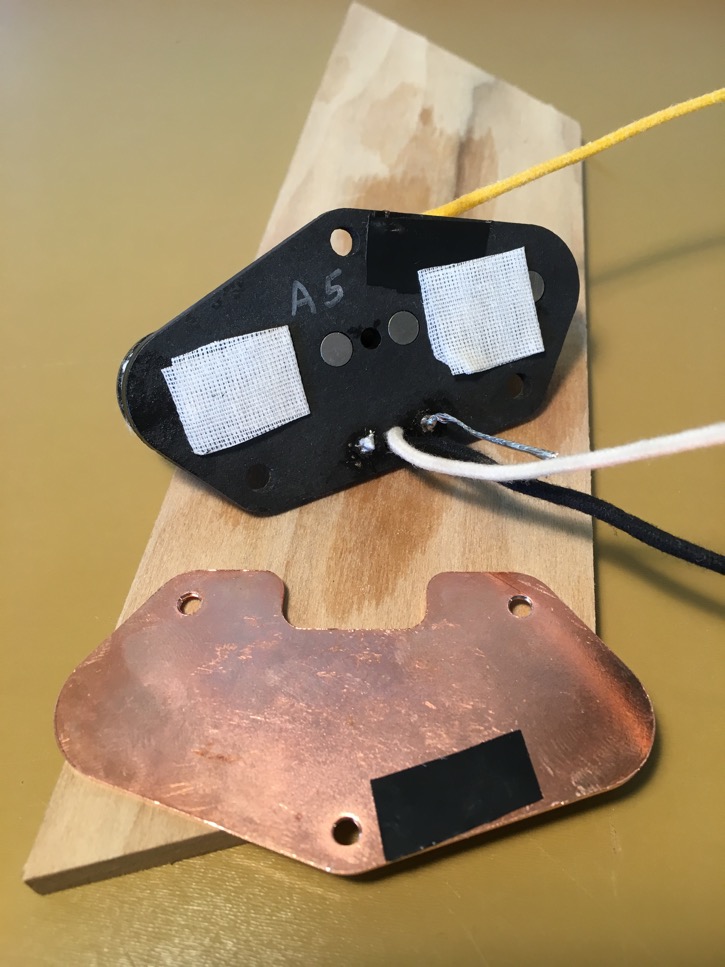
Attached the leads. Next is to attach the base plate, in this case copper plated steel. I realized as I went to fit it up that, with the eyelet for the tap lead where it was, I'd be shorting the coil out on the base plate. So I used some electrical tape to insulate them from one another. Affixed the plate to the bobbin with double-stick tape. Used the mounting screws to hold things together.
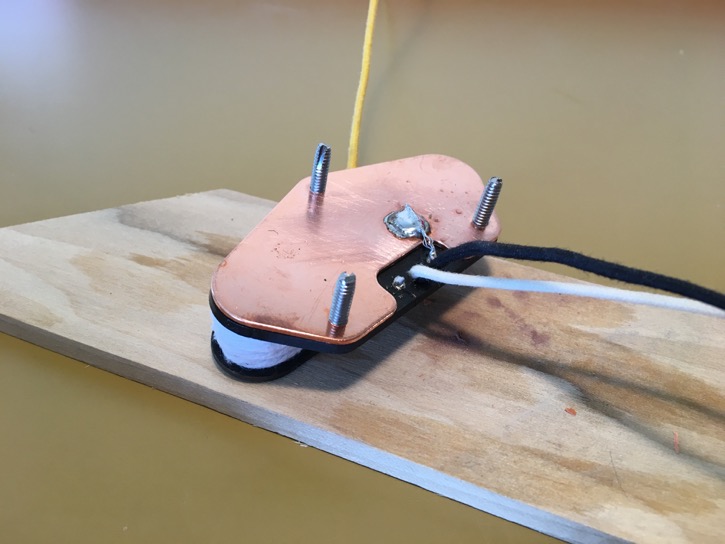
(As it turned out it still shorted out. I checked with my multi-meter and I'm glad I did as it would have sucked to discover that later. I added some thick coil tape over the offending area and that did the trick. If I ever lose the bridge pickup during my big solo at Madison Square Garden, I'll know just where to look...)
I wax potted both pickups for about 90 seconds, just long enough to get the big voids filled and prevent the ugly uncontrollable squealing. I'll pot pickups more thoroughly if they are destined for crazy high-gain applications, but these will dwell in moderate-gain territory and a little bit will be plenty. Sorry, no pictures of that...
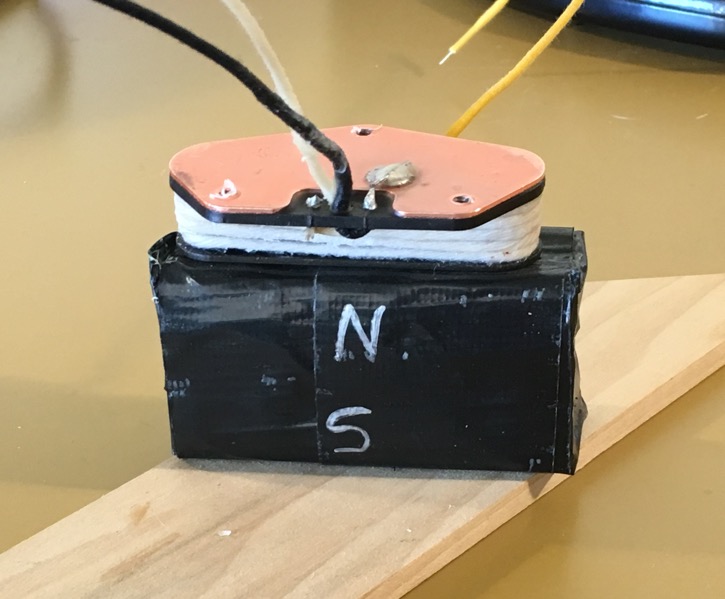
The bar magnet in the humbucker is already charged, but the rod magnets in the single coil must have charge applied. The humbucker's screw coil is North, so I charge the bridge pickup South using my block of neodymiums. Charging from the top of the pickup with the North pole of the neodymium will polarize the pickup magnets South.
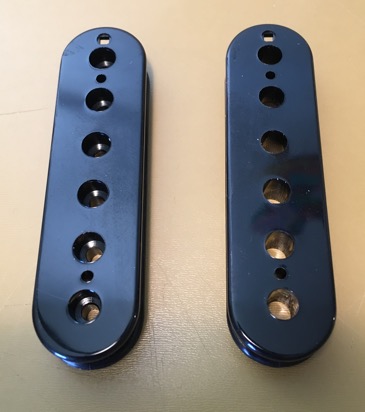
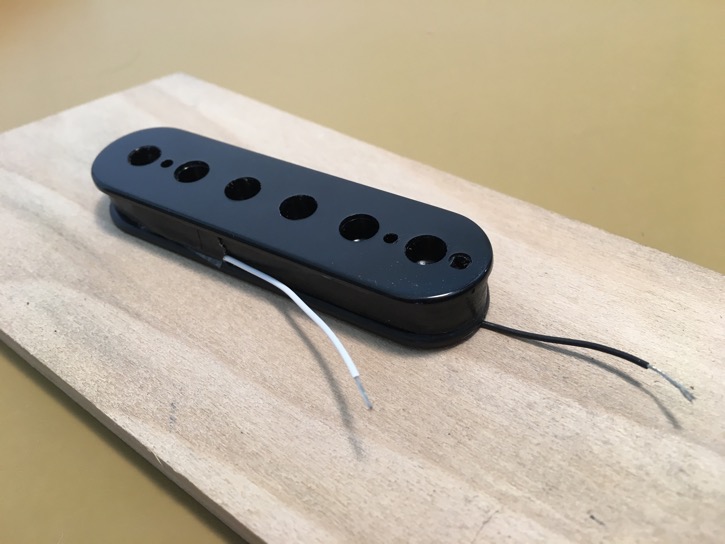
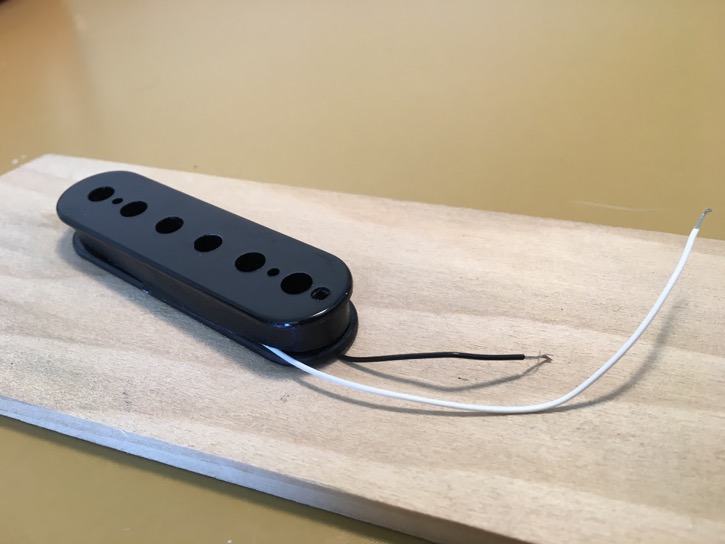
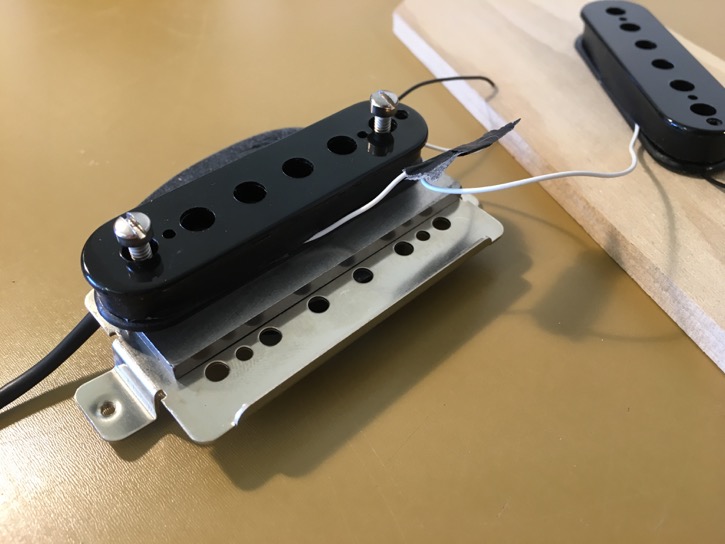
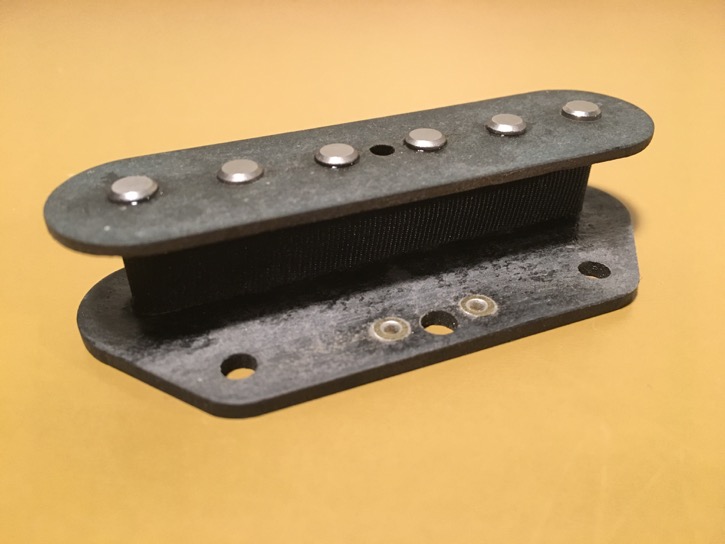
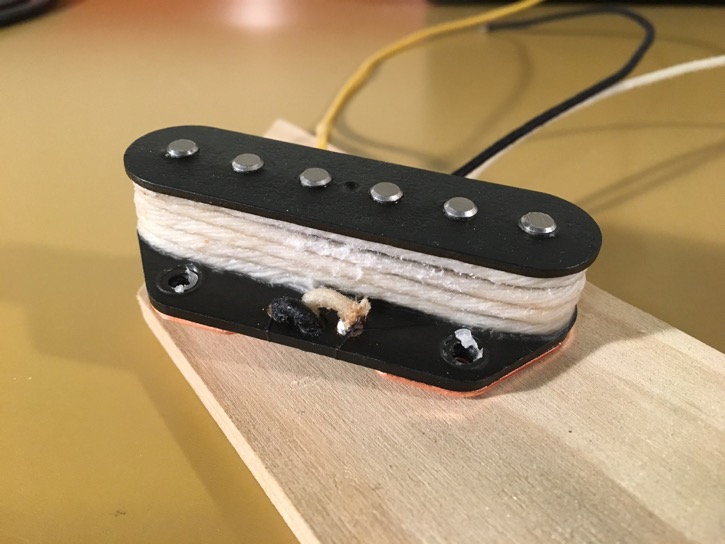
One bridge pickup ready for service.
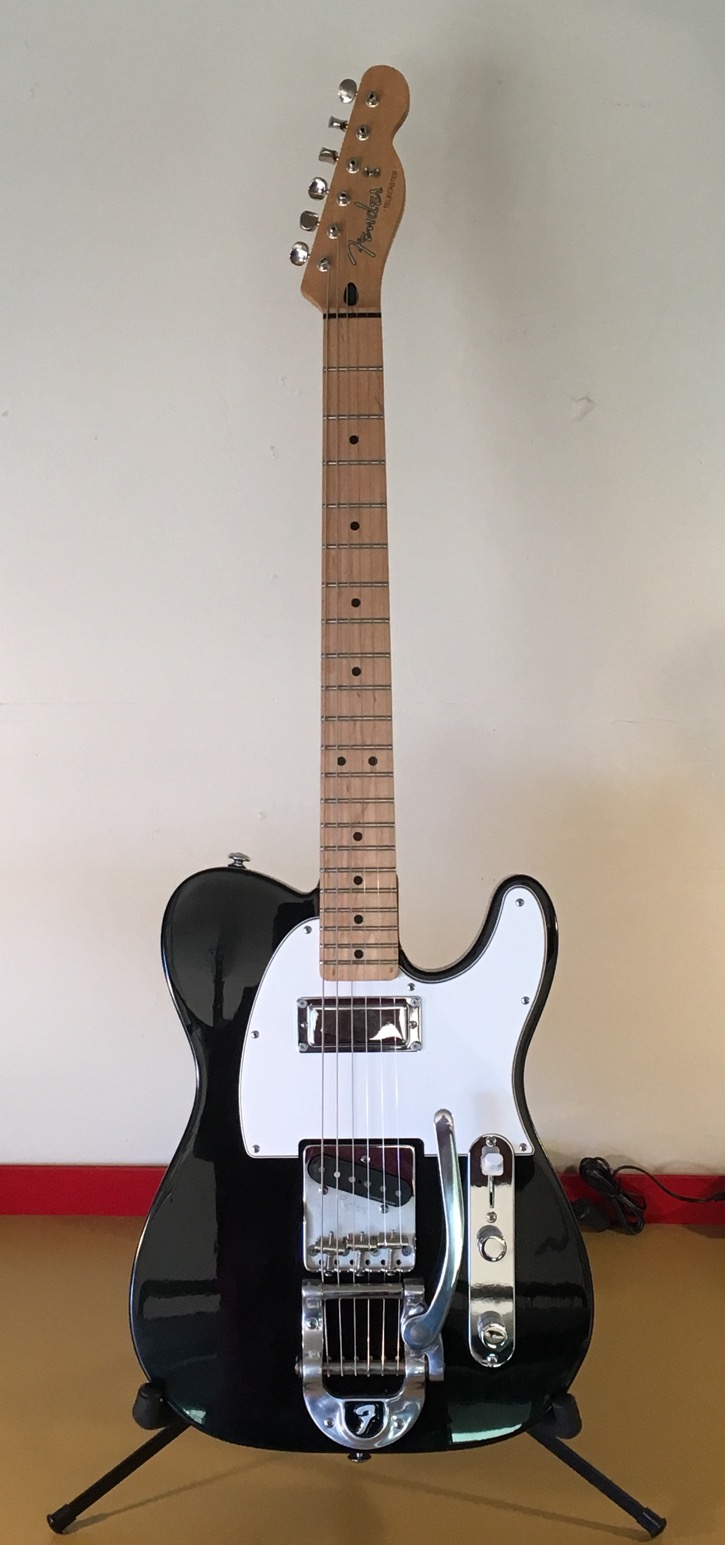
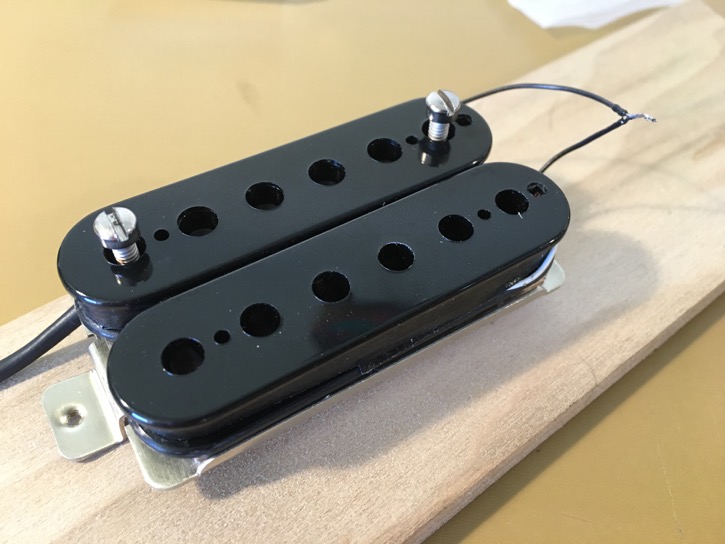
In fact, one Tele Special set ready for installation. I like the look of 'em.

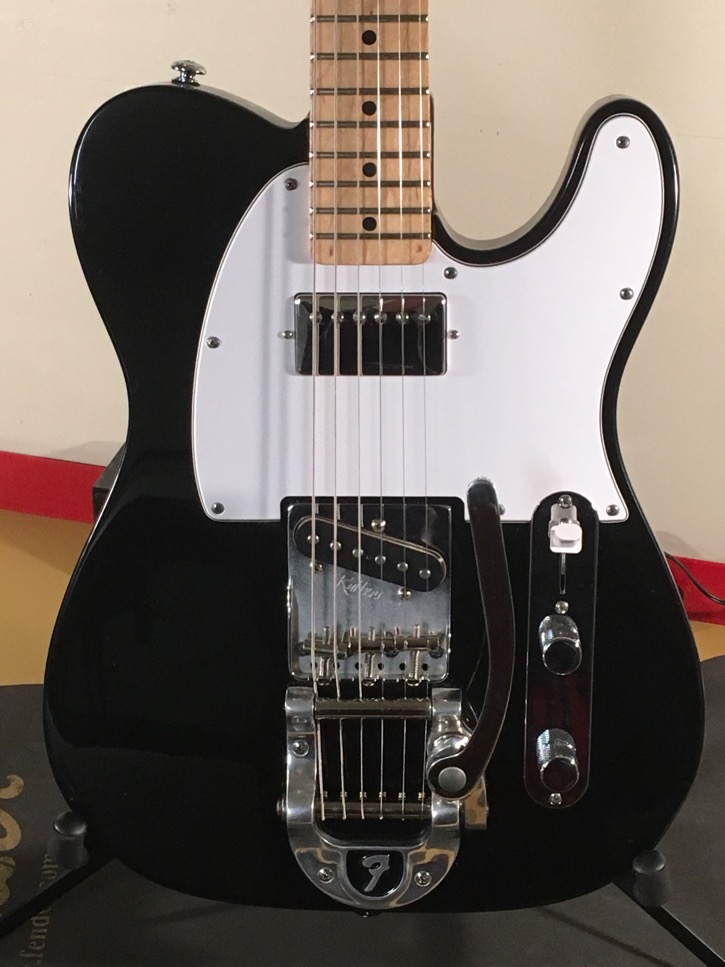
Here she is with the new pickups installed. New pickguard too. Also a taller Bigsby spring, but that's not really relevant to this conversation...
I have to say I'm really happy with how they turned out. I captured some audio clips, enjoy!
Bridge (Full)
https://www.dropbox.com/s/zpxoy9fvelfbfip/1%20Bridge%20%28Full%29.mp3?dl=0
Bridge (Tapped) + Neck (Split)
https://www.dropbox.com/s/njrtwa428o4vrxh/2%20Bridge%20%28Tapped%29%20%2B%20Neck%20%28Split%29.mp3?dl=0
Bridge (Full) + Neck (Full)
https://www.dropbox.com/s/zpmznm7tawhadl0/3%20Bridge%20%28Full%29%20%2B%20Neck%20%28Full%29.mp3?dl=0
Neck (Split)
https://www.dropbox.com/s/n2p3kjx4dgn0wa1/4%20Neck%20%28Split%29.mp3?dl=0
Neck (Full)
https://www.dropbox.com/s/qng2e4o27jlziro/5%20Neck%20%28Full%29.mp3?dl=0
I had thought that if the split humbucker on its own didn't grab me then I could drop that option and add in the tapped bridge pickup by itself, I'd kind of like to hear that, but I'm actually digging the split bucker for now. Maybe down the road...
That was a long post, thanks for making it all the way to the bottom!
I bought it new off the rack in '96 from a place called Guitar Centre in Anchorage, AK. That's not Guitar Center mind you, it's Guitar Centre. It was a small shop owned and operated by one guy known around town as "The Fender Guy". I was 16 years old, and it's been with me for the entirety of my guitar-tech learning curve. As an example, about a year after buying it I adjusted the neck pickup a little too low and one side came off of the mounting screw. I thought I had broken my guitar. It was months before I worked up the nerve to remove the pickguard and have a look. It may seem a bit silly now, but discovering that I could fix that was a real confidence booster and kind of stoked my interest in the "nuts and bolts" side of guitars. It's been steadily spiraling out of control ever since.
This axe has had it's pickups changed more times than I can begin to recall, but the configuration you see here has been its longest running: Seymour Duncan Jerry Donahue bridge and Lollar Firebird neck. They are fantastic pickups both, and they play quite nicely together, but the urge to tinker some more with "Ol' Number 1" has been nearly overwhelming of late. So, time to wind me some pickups! I find this stuff very interesting and entertaining; I figured it would be a fun thing to post about for anyone else who is similarly interested. Many pictures to follow, and sound clips at the end.
The plan is a splittable PAF style humbucker and a moderately beefy Tele single coil bridge pickup with a lower output tap for combining with the split humbucker. They are both getting Alnico V magnets and 42AWG Plain Enamel wire.
Starting with the neck 'bucker. I have no idea what the purpose of the square holes in the top flange of humbucker bobbins is, but I know I have no use for them. Where I would have a use for them is in the bottom flange, for the coil-start lead to come through, but alas there is not one.
We can fix that though. Drill and sandpaper.
The screw coil is up first. The pole pieces require a 5-40 tap, which my collection of taps is currently lacking. Had to chase the threads using one of the pole pieces instead. Not a problem in the soft plastic so long as you keep it slow-and-steady.
Joining the coil wire to the coil-start lead.
Insulate the joint, thread it through the hole in the bottom flange of the bobbin and secure it...
...and commence winding! Both coils in this pickup got a very traditional 5000 turns.
Joining the end of the coil wire to the coil-finish lead.
Insulate the joint, wrap it back into the coil and tape securely, and viola!
Repeat for the slug coil.
The coil-finish lead on the screw coil ended up a little shorter than I'd intended, so I ran the slug coil's a good bit longer so I could get them to meet easily. Fun fact: both coils in a humbucker are wound the same direction, but joining them together finish-to-finish means they flow in opposite directions, satisfying the "reverse wind" part of the hum-canceling recipe.
The only "trick" I need this pickup to do is to split, no parallel or anything else, so I'm wiring it up using a two conductor cable with a third bare wire. The bare wire will serve as chassis and coil ground, while black and white will serve as hot and the series link respectively.
Here is the chassis ground:
And the coil ground (screw coil-start).
Here the screw and slug coil-finishes are joined to each other and to the white pickup lead. Connecting this lead to ground will cut to the slug coil; connecting it to hot will cut to the screw coil. Not connecting it to anything leaves both coils in series, the "normal" configuration for a humbucker.
Keeper bar (not visible), bar magnet and screw coil in place.
Wooden spacer (not visible) and slug coil in place. Joining the slug coil-start to the black pickup lead. This is the "hot" lead.
Tuck everything away nice and neat, tape the coils and install the slugs and pole pieces. Looking very humbuckery!
Install the cover and bond it to the chassis.
One humbucker, ready for action!
On to the bridge. The pickup flatwork I use come with two eyelets pre-installed in the bottom flange, but for the tap I'm going to need a third. Using the top flange as a guide, I picked a spot that would be both out of the footprint of the coil and positioned to work with the lay of the wire.
With that done, it's time to press the rod magnets into the bottom flatwork.
And then press the top flatwork on. While you don't see it in the picture, I have a couple of wooden spacers that I use to get the height right and make sure that the top flatwork goes on level with the bottom. (Actually, I just noticed while proofreading that you can see them sitting behind the press in the previous picture.)
I apply thin CYA superglue around the magnets on the inside of the top and bottom flanges, then wrap them with coil tape to insulate the coil wire from them. Any irregularity or burr in the surface of the bobbin can grab the wire when winding, so everything gets sanded nice and smooth.
Time to wind. I want the bridge pickup to hum cancel with the split humbucker, so I had to do a bit of thinking. The pickup selector switch that I'm using cuts to the screw coil by connecting the series link to hot. The screw coil was wound TR/TG (top right/top going: the bobbin is mounted to the winder with the top flange facing right, and rotated such that the top traveled away) and the coil-start was ground. I want the coil-start of my bridge pickup to be ground as well, so in order to get a reverse wind I'll have to wind it TR/TC (top right/top coming).
Here is the low output tap, at 7800 turns. The wire runs from the coil to the eyelet, but if I let it run back to the coil as it would naturally lay it would be much too close to the screw hole in the bobbin. So I brought it back in an out-of-the-way fashion and used the small piece of coil tape to keep it in position until winding was resumed.
And done at 9200 turns.
Attached the leads. Next is to attach the base plate, in this case copper plated steel. I realized as I went to fit it up that, with the eyelet for the tap lead where it was, I'd be shorting the coil out on the base plate. So I used some electrical tape to insulate them from one another. Affixed the plate to the bobbin with double-stick tape. Used the mounting screws to hold things together.
(As it turned out it still shorted out. I checked with my multi-meter and I'm glad I did as it would have sucked to discover that later. I added some thick coil tape over the offending area and that did the trick. If I ever lose the bridge pickup during my big solo at Madison Square Garden, I'll know just where to look...)
I wax potted both pickups for about 90 seconds, just long enough to get the big voids filled and prevent the ugly uncontrollable squealing. I'll pot pickups more thoroughly if they are destined for crazy high-gain applications, but these will dwell in moderate-gain territory and a little bit will be plenty. Sorry, no pictures of that...
The bar magnet in the humbucker is already charged, but the rod magnets in the single coil must have charge applied. The humbucker's screw coil is North, so I charge the bridge pickup South using my block of neodymiums. Charging from the top of the pickup with the North pole of the neodymium will polarize the pickup magnets South.
One bridge pickup ready for service.
In fact, one Tele Special set ready for installation. I like the look of 'em.
Here she is with the new pickups installed. New pickguard too. Also a taller Bigsby spring, but that's not really relevant to this conversation...
I have to say I'm really happy with how they turned out. I captured some audio clips, enjoy!
Bridge (Full)
https://www.dropbox.com/s/zpxoy9fvelfbfip/1%20Bridge%20%28Full%29.mp3?dl=0
Bridge (Tapped) + Neck (Split)
https://www.dropbox.com/s/njrtwa428o4vrxh/2%20Bridge%20%28Tapped%29%20%2B%20Neck%20%28Split%29.mp3?dl=0
Bridge (Full) + Neck (Full)
https://www.dropbox.com/s/zpmznm7tawhadl0/3%20Bridge%20%28Full%29%20%2B%20Neck%20%28Full%29.mp3?dl=0
Neck (Split)
https://www.dropbox.com/s/n2p3kjx4dgn0wa1/4%20Neck%20%28Split%29.mp3?dl=0
Neck (Full)
https://www.dropbox.com/s/qng2e4o27jlziro/5%20Neck%20%28Full%29.mp3?dl=0
I had thought that if the split humbucker on its own didn't grab me then I could drop that option and add in the tapped bridge pickup by itself, I'd kind of like to hear that, but I'm actually digging the split bucker for now. Maybe down the road...
That was a long post, thanks for making it all the way to the bottom!
")