Leaderboard

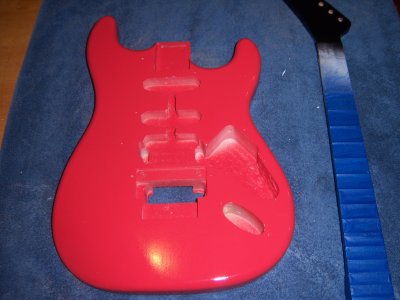
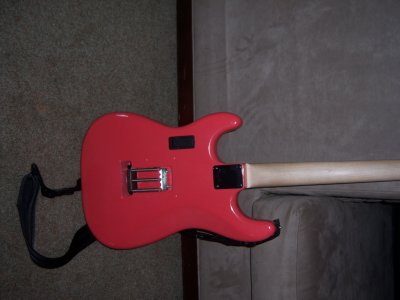
turbo strat painted almost ready for final assembly

Evilfanclub

Newbie
Messages
12
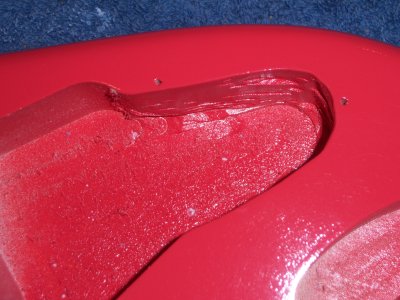
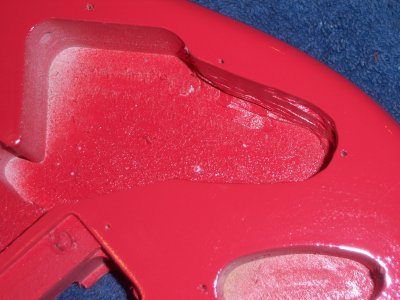
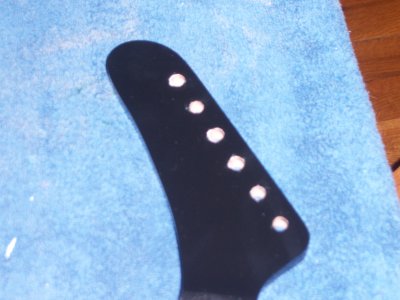
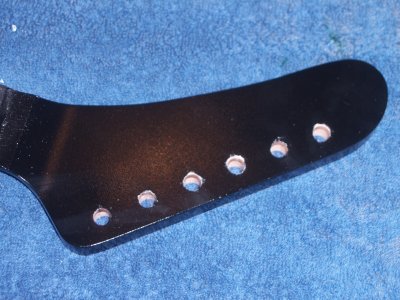
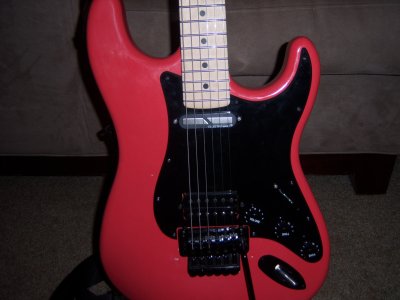
so I painted the body and neck this weekend. I had to do some control cavity routing to accept the sustainiac board and pots. wet sanded and buffed the body, not perfect yet. I might have rushed the primer a bit. 2 heavy coats of primer/sealer. sanded the first with 320 grit. left the second alone. 4 coats of base. (DuPont chromebase fiesta red), then 6 coats of clear. it orange peeled a bit but I wet sanded with 1000 and then 1500 grit, then buffed with 3m finess. she shines. a lot. but I think I should have went with another coat of primer and a least one more base. the reason I say that is up real close I can still see the grain. or I should have fine sanded the body down to 1000 grit. hind sight. metal is easy to paint. don't have a lot of experience with fine wood. need to finish the neck this week. I sanded out the little bump that comes on the slapshot head stock. also if anyone knows... can I shield the control cavity wile running a sustainic? their sight says no shielding in the pickup cavities but nothing on the control cavities.
 

Attachments

  • 100_1068.JPG
    100_1068.JPG
    2.1 MB · Views: 19
  • 100_1070.JPG
    100_1070.JPG
    2.1 MB · Views: 7
  • 100_1069.JPG
    100_1069.JPG
    2.1 MB · Views: 6
  • 100_1072.JPG
    100_1072.JPG
    2.1 MB · Views: 5
  • 100_1071.JPG
    100_1071.JPG
    2.1 MB · Views: 7
I know the pics are close but I wanted to show the difference from wet sanding/buffing to the untouched clear. In the first pic the bottom middle under the floyd route had not been smoothed yet wile the bottom right had. The head stock has not been touched yet. I used a single stage on it. Gonna take a lot of "smoothing". I am not a wood worker, I'm a diesel mechanic but I'm sure most of you can tell that already by my nice routing job.( ya I didn't use a router)
 
Some woods have too coarse a grain for sanding/sealer to close up. Mahogany and Swamp Ash are good examples. In those cases, you would use a grain filler before you seal the wood. A couple/few go-rounds with that and the wood grain is more or less gone. Seal it to close up what wood is exposed after sanding, then start with the color coats. Usually, you want to sand to 320 between color coats to cut back on orange peel. You may end up with 8 or 10 coats to get it uniform. Then you do the clear coats, also sanding to 320 between coats to cut back on orange peel. Again, you're liable to end up with 8 or10 coats. I know those numbers sound big, but keep in mind you're actually removing some of each coat as you go.

Once you think you have enough clear on the thing that you can sand without cutting through to the color coat, you have to let it sit for a long time. 2 weeks is typical, but some go longer. Lacquer has a tendency to shrink as it hardens.

Only then would you start with higher grits to finish sand it. Wet sand with 600, 800, 1000, 1500, then polish out and buff.
 
Thanks. I see what you mean about the body fill. Like bondo for wood. I did not think about that. I used all automotive paints and clear. You should be safe sanding on the stuff I used within 24 hrs. It's kinda hard to lay down, it has a very short set up time. I did get lazy with the sanding at the clear stage. Next time I think I will take your advice and lay more base on it. Wood does take paint very diffrent then metal and urethane.
 
Well, even lacquer will set up quickly. I mean, the stuff practically dries coming out of the gun, so you can sand it within an hour or so depending on the temperature/humidity that day. But, you can't really finish sand/polish until it's good and cured. That's where the long wait time comes in.

I used to shoot cars many moons ago, but I didn't use lacquer. I used a catalyzed enamel (Dupont's Imron), which also sets up surprisingly quickly. I remember the first time I used it, I thought it wasn't curing because after a half hour it still looked wet. Turns out, that's how it cures. Looks like wet glass. Magical stuff, albeit expensive. Problem is, it's very difficult to repair so you gotta be super careful working with it. On the plus side, it's a one-pass finish that's super durable. You shoot it and you're done.
 
So wiring and fitting a sustainiac in a strat body is a pain in the ass. It takes a lot of time and patience. It's all working now after lots of tweeking. Will post up some detailed pics by this weekend. Still setting up the rest of this animal. I will tell you this, I am very affluent at electrical anything. That's what I do. This was challenging. In retrospec I should have paid for the semi install from sustainiac. But at the end I am proud of what I accomplished be it drunk, high or sober.( it took a combination of all) . This guitar is what I set out for. I could not buy it or I would have. So I made it. No experience, no direction. I just read around this forum and other info on the web. There are a lot of people here that have a vast amount of knowledge and knowhow if you just read and learn. If you thought of it someone has done it....wrong or right and you can learn from that. I thank many of you for sharing your own journeys and teaching those of us with the will and balls to try. Will be making music with this beautiful beast by this weekend. Thanks-Tommy

 
So it works. Perfectly. Funny story, so after setting up the floyd and getting it all together I plugged it in to my tuner,after putting in the battery of course. Nothing. Then plugged into the amp. Nothing at all. Pulled it all apart 3 times. Nothing. Finally I took out the batt holder and wow..... The positive tab was bent way in.( came that wat and I didn't notice), after taking resistance check and going over the schematics again and agin it was something simple. After correcting the problem everything worked fine. So mad at myself for not keeping it simple......stupid. It's at the tech now for neck adjustments. Is it normal for the necks to come way out of whack. ( pretty major truss rod adj. needed)? Should be back next week. Will post up pics of the finished product. Still need to name her though.
 
Congrats on the successful build!

Evilfanclub said:
Is it normal for the necks to come way out of whack. ( pretty major truss rod adj. needed)?

Yeah, most neck manufacturers simply install the frets and bevel them, including Warmoth. It's up to the user to level, recrown, dress and polish them, then set the relief and nut slot depths.

Frets have a tendency to sometimes move a bit after installation, so even on a perfectly fretboard surface you're going to end up with a few of them proud. Setting their height (leveling them) then requires a some recrowning. Then, not everybody wants their ends dressed the same way. Once that's all done, you have to polish the file marks out. Then, once you adjust the truss rod to have an acceptable relief set in, you need to know which strings are going to be installed before you set nut slot depth. Might even require another truss rod adjustment, or perhaps some last minute fret fine-tuning. So, that's why none of those things are done out of the factory. They really can't be.
 
I do get that. We buy these because they are true "customs". I would have really like to have done it all but time is something that is hard to come by. In the future I want to practice on some old shitty necks I have, then do a true build start to finish. I am however proud of my electronic work I have done. Just reading this forum you will have all the teaching you need to accomplish anything.
 
Have a question. I ordered my neck as a maple/ maple unfinished . 6105 ss in a slapshot reverse shape. Floyd r2 prep. Wolfgang shape. Years ago I bought a neck from a guy that was just starting out named Mitchell floyd in Florida .( now has a shop called mean street guitars). A evh custom shop of sorts. Anyway I needed a kramer hockey stick neck for a eBay buy.( neck was broken at the luthier joint) it was a 1985 baretta numbers matching. I restored the body and he made replica correct necks. The only deal was the necks he made were exact Eddie 5150 necks. Whatever, for the price it was the best solution to restore the guitar. Since then that guitar has become my workhorse and I have love the feel of the neck.(kramer size I guess asymmetrical cut). My warmoth Wolfgang is way smaller. I mean way smaller. Do you think I got a wizzard cut by accident . I guess I wll measure when I get it back. I love the feel of the warmoth, but it dosent feel like my evh neck at all. Any thoughts?
 
A small shop is unlikely to have a CNC machine of a size that could fashion necks the way an OEM would. Then, you'd need a CMM to duplicate the profile of the original piece so you could feed that data into the CNC for reproduction. You might be looking at a couple/few hundred thousand dollars for that kind of setup, and likely much more. So, chances are, the neck(s) were cut out and shaped by hand. A very good luthier can get close, but it's very difficult to duplicate necks using that method as the hand is capable of feeling surprisingly small changes in dimension and amplifying them in your head.
 
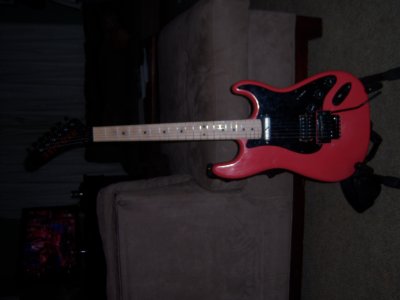
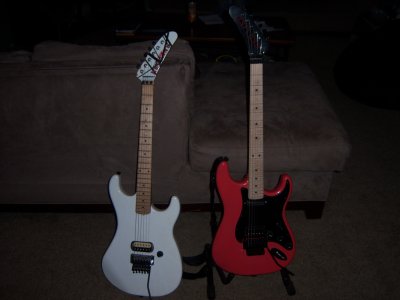
well here she is. a pure shred machine. first show with her last weekend. she is just nuts. will post up some sound clips this weekend.
 

Attachments

  • 100_1087.JPG
    100_1087.JPG
    2.1 MB · Views: 21
  • 100_1086.JPG
    100_1086.JPG
    399.7 KB · Views: 10
  • 100_1088.JPG
    100_1088.JPG
    2.1 MB · Views: 15
  • 100_1089.JPG
    100_1089.JPG
    2.1 MB · Views: 4
I know it's all different, what with the pickup configuration and the maple fingerboard, but I'm still put very strongly in mind of Brad Gillis's red axe.  Nice work!
 
I kinda was going for that look. I always liked his axe and his style. Similar electronics. Besides hot pink or day glo you can't get more 80's. Just played for an hour this morning, I just love this thing. Sustainer aside, this thing just sounds great. Not really strat sounding but that's not what I was going for. The sustainer drive passes for a decent sc active pup, no noise but not as much cream as the reel deal That's to be expected.
 
Back
Top