Jumble Jumble
Hero Member
- Messages
- 1,932
Following on from the "Just Out of the Box" thread here.
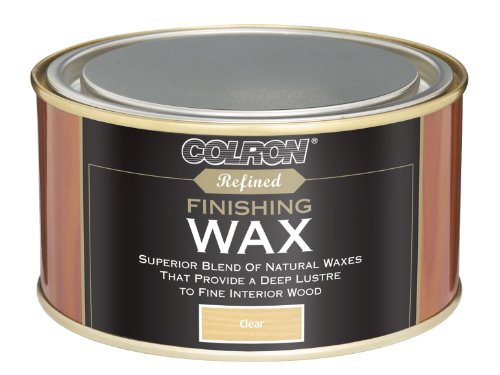
The unfinished alder body was obviously going to pick up dirt and moisture, and be yucky in no time at all. So I did the simplest thing I could: a few coats of shellac-based sanding sealer, each one buffed with 0000 steel wool, followed by a couple of coats of this, applied with the steel wool, left to dry and then buffed out:

It's a soft finish, but I'm only concerned with dirt rather than weather and spillages. The finish can easily be touched in if it ever needs it. It feels and looks nice now, a nice satin sheen.
Today I cut through part of the control cavity to give me access to the wiring from the back of the guitar. I ended up drilling a small hole, then feeding a coping saw blade through the hole, and attaching the two ends of the blade to the saw handle like that. After that it was a simple case of sawing out the hole. All these pictures can be clicked on for bigger versions, and all of them are a bit bad quality, so sorry about that.

I sanded what I could but I could actually do with some dowels and sandpaper to smooth it out all round. I intend to make a plastic cover though so it's not too big a deal.
I also drilled for the pickguard and jack plate. This meant fitting the neck and bridge temporarily. One of the bridge screws just kept turning, first time it had ever been put in the hole. That's a bit annoying but I'll probably just glue in some more wood to give it a better grip.
So this is what it looks like now:


The unfinished alder body was obviously going to pick up dirt and moisture, and be yucky in no time at all. So I did the simplest thing I could: a few coats of shellac-based sanding sealer, each one buffed with 0000 steel wool, followed by a couple of coats of this, applied with the steel wool, left to dry and then buffed out:

It's a soft finish, but I'm only concerned with dirt rather than weather and spillages. The finish can easily be touched in if it ever needs it. It feels and looks nice now, a nice satin sheen.
Today I cut through part of the control cavity to give me access to the wiring from the back of the guitar. I ended up drilling a small hole, then feeding a coping saw blade through the hole, and attaching the two ends of the blade to the saw handle like that. After that it was a simple case of sawing out the hole. All these pictures can be clicked on for bigger versions, and all of them are a bit bad quality, so sorry about that.

I sanded what I could but I could actually do with some dowels and sandpaper to smooth it out all round. I intend to make a plastic cover though so it's not too big a deal.
I also drilled for the pickguard and jack plate. This meant fitting the neck and bridge temporarily. One of the bridge screws just kept turning, first time it had ever been put in the hole. That's a bit annoying but I'll probably just glue in some more wood to give it a better grip.
So this is what it looks like now:


