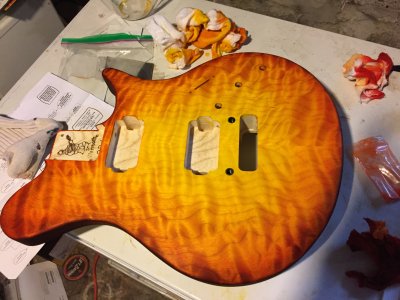
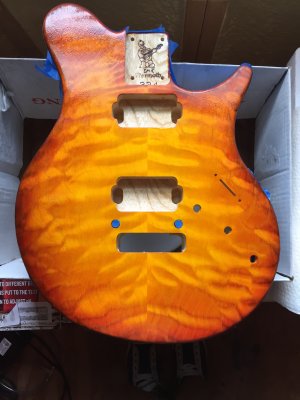
stopping bleed down the side of guitar top

Cyrus Gold

Junior Member
Messages
29
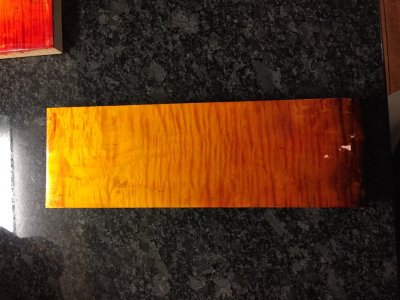
I have been working on my burst skills with scrap quilt maple.  I haven't been paying a ton of attention to the bleed over on the side, but when I do a guitar top, I'd really not want it.  I know one can tape the sides up, but will that stop the bleed over, or do I need to laquer up the sides and back first?
 

Attachments

  • IMG_9183-1.JPG
    IMG_9183-1.JPG
    2 MB · Views: 299
Hey Cyrus welcome to the forum.

I can tell you exactly how to do your burst with more information. What type of woods are on the front and back and is there binding involved. Is the back wood being finished in a darker color than your sample board? If you could get back to us with that info and maybe a picture of the guitar you are finishing I can give you some specific direction on how to proceed.

By the way, your color board looks great.
 
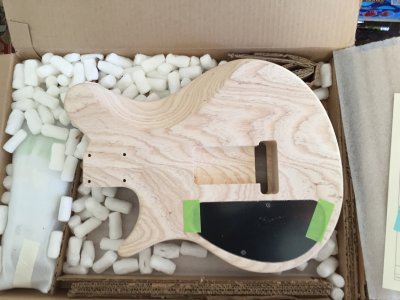
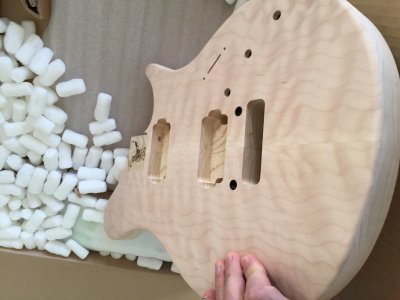
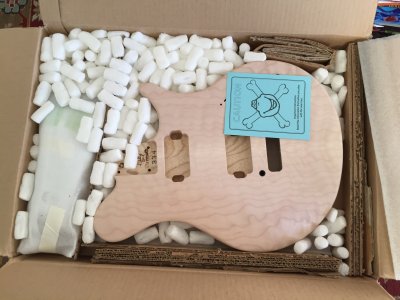
thanks a ton Tonar.  I actually think the guitar body is being delivered today, so I will post it when I get home.  Vip body quilt maple top with swamp ash body.  I didn't do a binding.
 
OK, so what color do you plan for the ash compared to the top? In addition you will have to fill the ash with grain filler to get it level. Do you want a clean line between the ash back and the burst edge of the quilted maple top?
Let me know when you post pictures and we can come up with a finishing schedule.
 
I was contemplating doing a tan stain for the ash with a clean line to a burst quilt finish vs no stain ash, just clear nitro gloss finish vs black and running that right into the burst.  I imagine the black is the easiest because I don't have to worry about bleeding of the dye leaning towards that option.  I think they all would look pretty nice, but I think I'm going with black to burst.
 

Attachments

  • IMG_9187.JPG
    IMG_9187.JPG
    1.6 MB · Views: 268
  • IMG_9190.JPG
    IMG_9190.JPG
    1.3 MB · Views: 296
  • IMG_9186.JPG
    IMG_9186.JPG
    1.7 MB · Views: 258
I can't help you with the burst, but I gotta say, that's a beautiful body! Love the grain on the back, and the front ain't too shabby either!

:icon_thumright:
 
This is they way I would do the guitar. With a clean line you are going to have to deal with both front and back as two separate finishes.

If you are not going to use shading colors but stain you will need to do the top first. I think I would tape the top off first and shoot a sealer coat of clear on the ash so no stain will penetrate the ash. Once the the ash is sealed with clear pull the tape and then do your stain on the maple. It should look like this.
IMG_5743.jpg

Next shoot clear on the whole guitar to lock your color in on the top and then use paste filler on the swamp ash to get the grain filled. It will look like this at this point.
IMG_5388.jpg

If you are going to do a dark shade color on the edge of the burst you will need to tape off the back and shoot the dark color. It will look like this after you pull the tape and then you can put your final coats of clear on the whole guitar.
IMG_5481.jpg
 
I hope that helps you and if you have any question let us know and we will see if we can help.
 
finally getting going... hemmed and hawed so much on it.. decided to go burst front and back with a black side transition.. here is the front.  At this point I am going to seal er up.
 

Attachments

  • IMG_9250.JPG
    IMG_9250.JPG
    2 MB · Views: 315
Cyrus Gold said:
finally getting going... hemmed and hawed so much on it.. decided to go burst front and back with a black side transition.. here is the front.

Yeah, there's an old saying: "There comes a point in every project's life where it becomes necessary to shoot the engineer and start production"  :laughing7:

Looks good! Needs straploks, though. Maybe some pickups. And while bridges may seem frivolous, they actually work pretty good as string anchors.
 
I have lacquer sanding sealer, or would one recommend spraying clear gloss lacquer for to seal in the color on the top.
 
I really like the smooth transition between the colors in the burst. Great looking. :icon_thumright:
 
Thanks for all the nice words!  I have a shot of clear gloss on it now and will move to sides/ back.  Here is a pic of it as is after gloss.
 

Attachments

  • FullSizeRender.jpg
    FullSizeRender.jpg
    1.5 MB · Views: 282
Back
Top