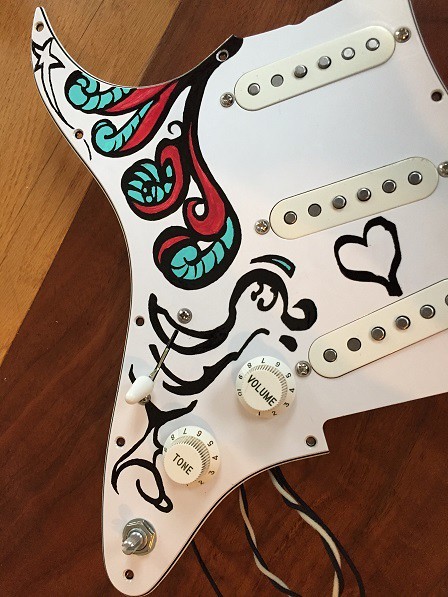
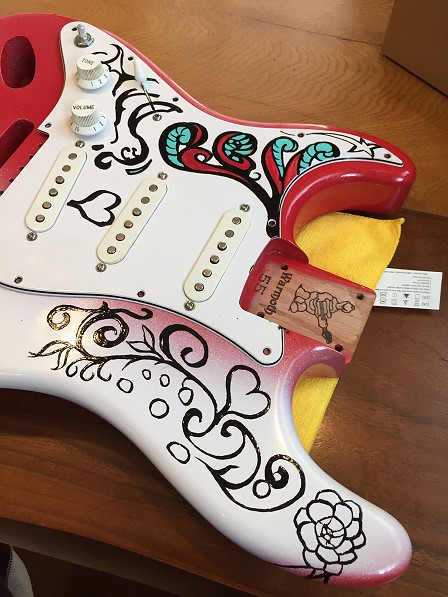
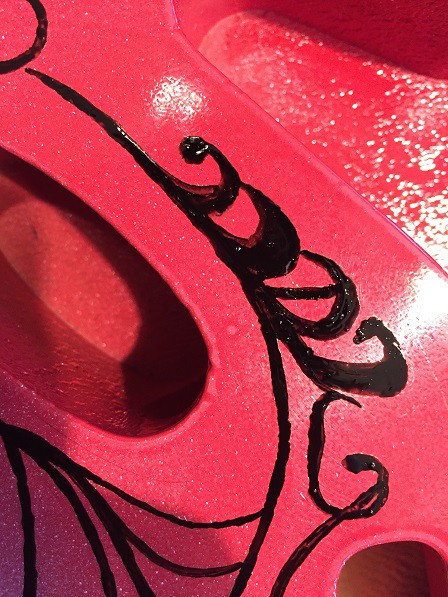
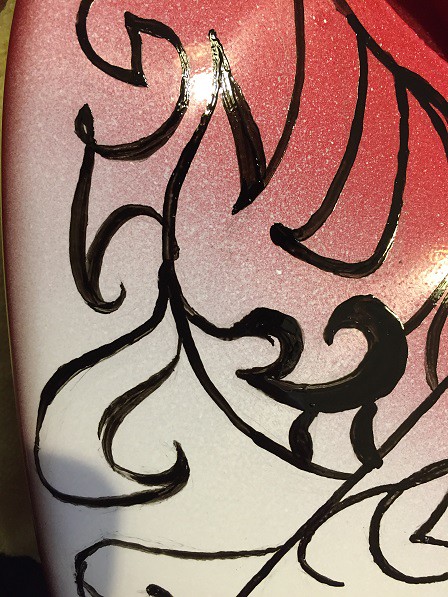
Perfect Mirror of Jimi Hendrix's Monterey Guitar !!

Rgand said:
Your attention to detail is truly outstanding. You honor both the original Jimi and the new one. This is a fun thread to follow.
Thanks for seeing the respect that I have for both of them. For me this is the most important theme regarding this build.
It's kinda hard to phrase it in words, but I'll try my best in delivering my thoughts.
 
[Jimi Project 06]
I had requested a luthier(well, referring to this person as a luthier kinda ticks me off...) for some work to be done... who in return just gave up half way through the order...well I guess it's my fault as well for not managing this luthier properly....

So, I decided to go on order a body at Warmoth. Not only was I thinking of the craft quality, I was after the abundance of woods that they possess.

After a month and a half here's the body I received.

35075347504_3369776b62_z.jpg


This is a 2 piece alder body

35075347404_c8378de4bd_z.jpg


As this is not a finished product, obviously there are some rough edges here and there.
However, the wood grain seen on this is pretty decent.

35075347334_9d12dbf10c_z.jpg


The weight of the wood is as ordered. Knocking on the wood returns a crisp dry sound.
This is deffo growing my motivation in working on this project.

Gotta strike iron while it's hot, so no time to waste, time to do some work.

35075347244_f96d324019_z.jpg


Well, it's only about smoothing the surfaces.

35075347184_a4f35b6f37_z.jpg


I used #400 as a start for the whole body.

35075347174_9b19900fbc_z.jpg


I've just smoothed the fuzz left in the cavities.
Regarding the neck pocket, I've taken care to match the neck that I have so that it matches each other right on.

35075347154_a31ff21676_z.jpg


So, here's the neck together with the body.
Seeing this progress brings up my motivation again(esp. after having to wait a while due to the trouble I had before this...)

Now as I'm done with the general sanding, I've applied a prime coat to ready the body for it's paint.

35075347094_53d8c6b1c6_z.jpg


As I'm using alder this time, it should be rare that I'd see the conducting vessels show up. Thus, I'm thinking of skipping the sanding sealer.

I'm placing more focus on making sure that the paint coat is as thin as possible to emphasize the sonorous trait of the body rather than an icing of the cake finish.

Ofcourse meeting the criteria of both aspects looks and sound is a bare minimum. It's beyond that where I am looking into.

<Original blog from Apr 19th 2017>
http://avici.blog.fc2.com/blog-entry-335.html
 
[Jimi Project 07]
The preparation of the body has completed and now to paint it.

Again, I've visited JERRY'S Auto Restoration for this.
Chatting with Nakamura on how I want to proceed while enjoying the view of with a Lotus and Lamborghini.

35783391851_210db1c64c_z.jpg


gawd... it's a nice view....

ah, btw I ended up adding a thin coat of sanding sealer as my skill of smoothening the body didn't quite make it.

35783391811_d1def3dde0_z.jpg


Nakamura goes on toning the color referring to the previous sample we made.

35783391631_fd1b2a2a9d_z.jpg


As he approaches the exact shade, he tests the color and fine tunes the toning.

35783391501_cfe1985eda_z.jpg


As mentioned in my previous blog, this fiesta red is being toned not to the current fiesta red, but to the existing fragment of the Monterey strat. Nakamura is referring to the red shade which was under the pickguard which would have avoided the white spray and least affected by the fire.

Have to admit that around the final stages of toning, an amateur like myself wasn't able to tell the difference that Nakamura was adjusting.

35527128580_40733f33d2_z.jpg


Now that the paint has been toned, we placed the body in the painting booth.
As this is usually used for painting cars, placing a guitar body makes it seem extremely spacious and light despite not all lighting was powered.

35783391321_88555e7ef2_z.jpg


Following how Fender painted guitars in 1964, a thin coat of white is applied.

35783391211_e2a43eaccc_z.jpg


Then a coat of the toned fiesta red

36151711856_7f867e0c50_z.jpg


Now a clear finish done on this.

Accelerating the drying process with infrared light tends to fail with wood as it will boil and/or lift the coat of paint. So, Nakamura will keep this in the booth for 24 hours and then leave for drying naturally.

Usually it would take approx 1 week to dry up and from there we'd move on to assembling the hardware. But as this is a Monterey Strat Perfect Mirror Project, the main work for painting starts here.

...did I mention perfect?

I guess I'm raising the bar...

<Original blog from May 25th 2017>
http://avici.blog.fc2.com/blog-entry-345.html
 
This has been a cool thread to follow, I am very impressed by your dedication to the accuracy of the replica. I love the backwards headstock decal, reminds me of the Kurt Cobain Mustang that I did for a friend of mine (same basic idea, right-handed tribute to a righty-played-lefty...)

LPB%20Mustang%203.small.jpeg


2zee said:
 
Verne Bunsen said:
This has been a cool thread to follow, I am very impressed by your dedication to the accuracy of the replica. I love the backwards headstock decal, reminds me of the Kurt Cobain Mustang that I did for a friend of mine (same basic idea, right-handed tribute to a righty-played-lefty...)

LPB%20Mustang%203.small.jpeg


2zee said:
Hey thanks! Oh yeah, Kurt Cobain was a lefty that passed away at age 27, same as Jimi.
I believe that if I'm making a tribute replication of a lefty axe for a right-handed person, it's gotta be a mirror image.
I'm guessin that you think similarly; thus the mirrored Mustang. It's nice to find someone that I can truly share this with  :icon_thumright:
 
[Jimi Project 08]
So now it's time to tackle the hardest part in making this a 'perfect' mirror.
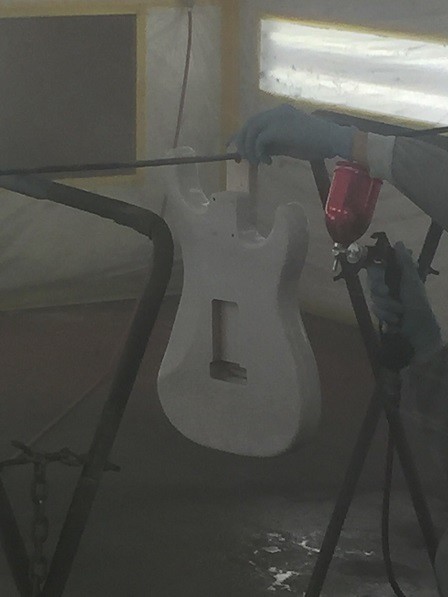
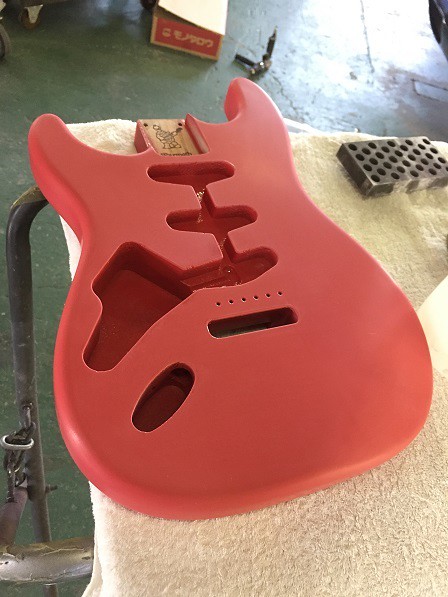
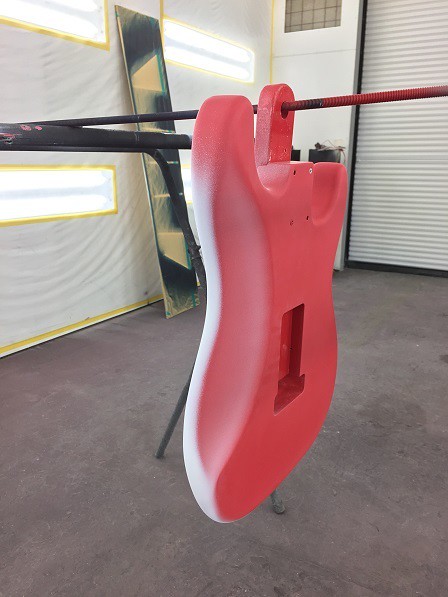
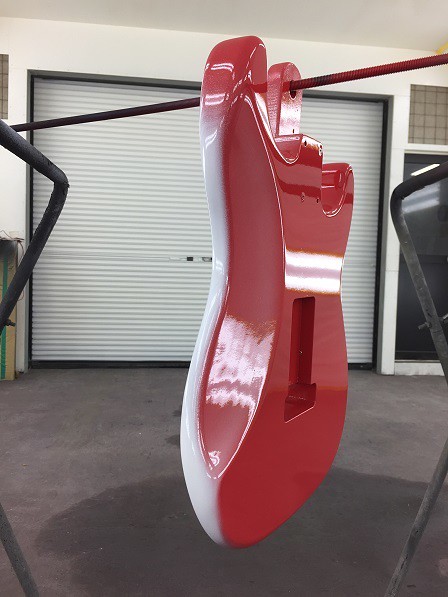
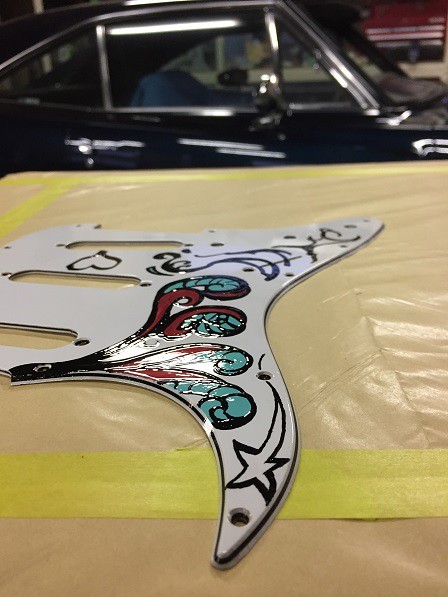
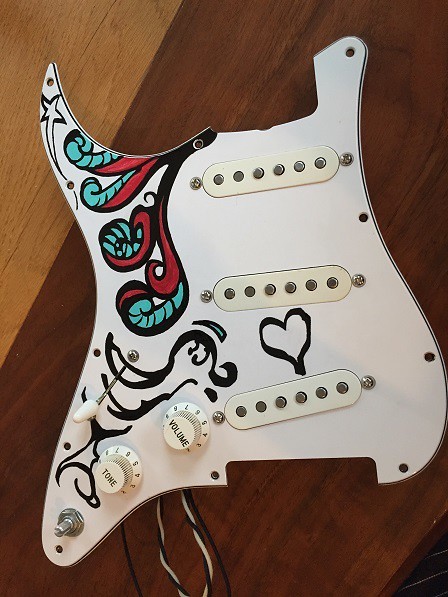
Time to spray the white paint on the body.

Well, if it were brush paint I'd be able pencil in drafts and even fix parts after I do a minor booboo.
But when it comes to spray painting, it's a one-shot job. You either nail it or you just make a mess outta yourself.

You'd think, "hey it's just spray paint"

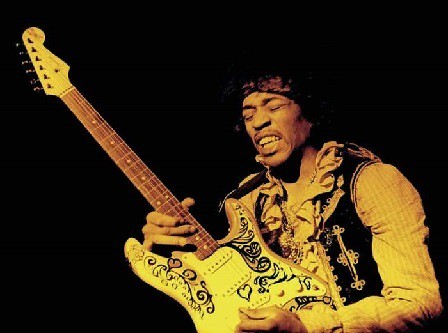
But think of it, it's not just perfecting a spray paint finish. It's imitating how Jimi would have painted this without practice and just with the vibe that he wants to paint. So I gotta place myself how Jimi would've been doing this. With rough strokes, possibly forcibly painting without any spray painting know-how and with a spray paint in the '60s.

So again it starts from eyeballing the live vid and capturing moments where it's most visible.

35527142940_ed9cc993ca.jpg


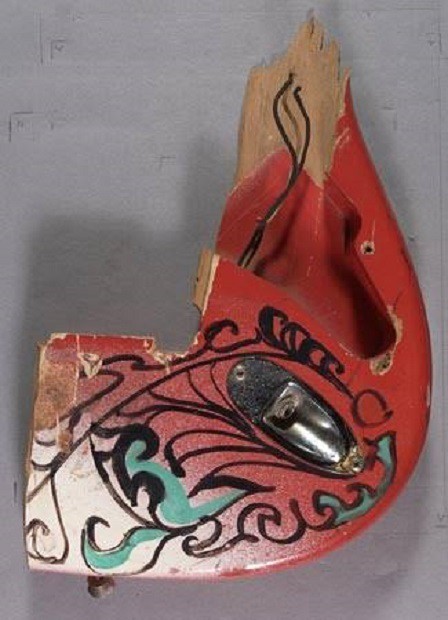
Also determining from the existing fragment.

35527142890_08ec044589_z.jpg


From these evidences my profiling of how this was done starts.

In one report it's said that Jimi painted with manicure the night before the live show. Whether this being true or not, it can be easily imagined that he probably painted this adlib with some notion of art, together as a guitarist that expresses himself....

So here's how I see this was done.

This was painted with canned spray paint the night before the show in a room.

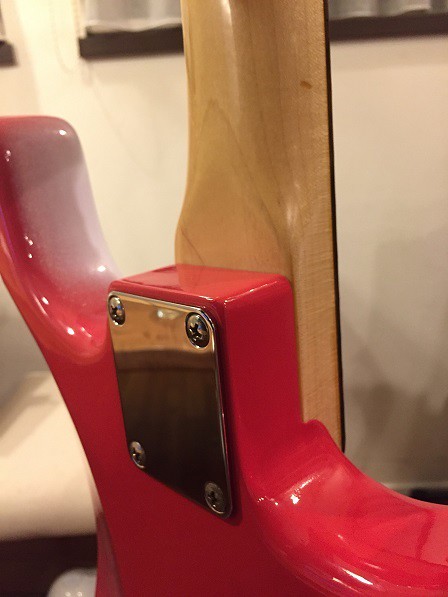
The guitar wasn't hung from above as there are no marks seen on the rear. If it were hung, the spray would have made it's way to the rear which would be recognizable. So the guitar was placed on a table or was flat on the ground. My guess would be on the ground, close to a wall.

It's said to be that Jimi wanted a white strat when he bought this red one. So I'm guessing that if it was possible he would have painted it all white to match his wanting.

Upon spraying, obviously if he sprayed the neck and fretboard it would affect his playing so he tried as much as possible not to spray on the neck/fretboard nor the hardware. When applying the spray, it would be most likely from the center of the guitar outwards.   

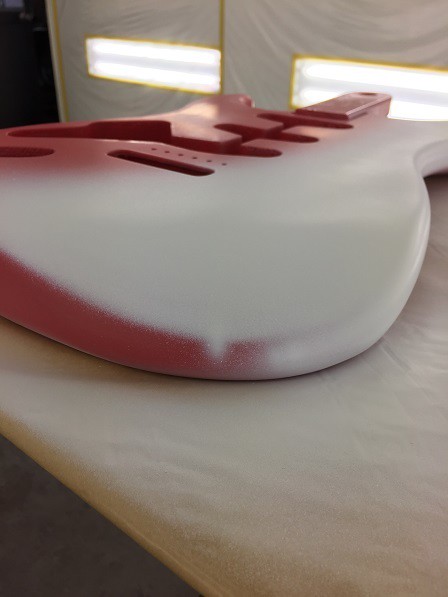
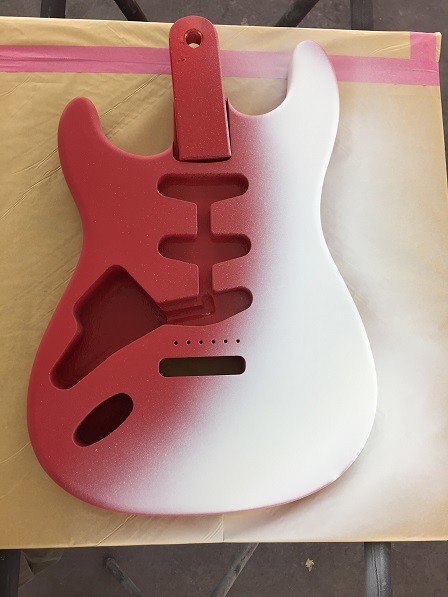
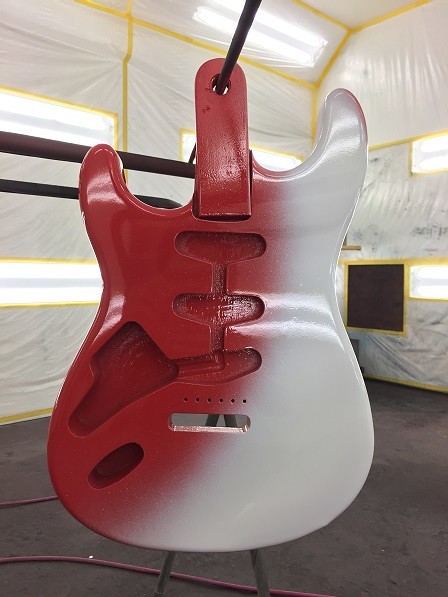
The main observations about the white spray paint are

1) the inner side of the upper horn in a slanted manner(solid with edges being coarse finish)
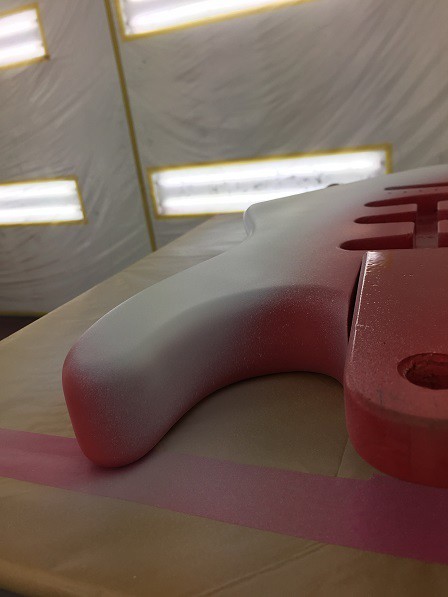
As the upper inner horn is not fully painted, I see that Jimi held the spray can sideways(if it were straight he'd need an acute angle which would risk the fretboard getting painted) and sprayed from center of the body outwards. This results in the base of the horn having the gradation of white. The coarse gradation is also reasoning for the spray can being held side ways.

2) on the top side, from the upper horn beyond the end pin(solid with edges being coarse finish)
This again was sprayed from the center of the body outwards with the spray can being held side ways. Again, the coarse gradation backing me up on the reasoning for the spray can being held side ways.

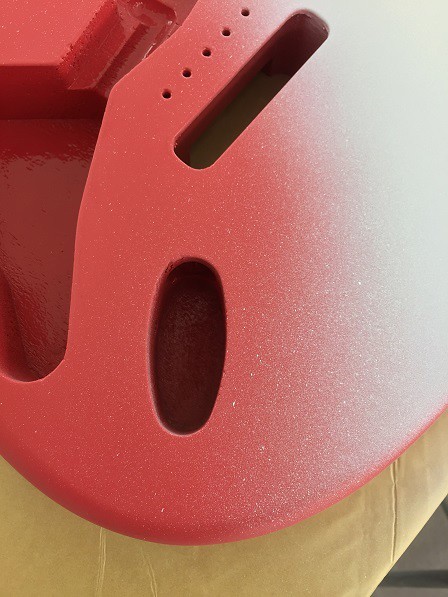
3) On the rear body contour(coarse finish on the whole)
Again, spray can side ways, but this time he's painting from the side of the guitar towards the center. However, as he's doesn't want to get the paint on the top, he's aiming the surface where the guitar is placed on thus the coarse gradation on the whole of the contour. Also as there is no paint else where on the back, the guitar is placed on a hard surface.

4) 3 points on the upper horn where it seems to be touched be for the paint dried
Jimi needed to change the orientation of the guitar while painting. He had paint on both hands so he didn't want to touch the neck, carefully with 3 fingers(most likely thumb, index and middle) he lightly held the guitar on the upper horn, thumb in the inner side to change the orientation. This is probably between 2) and 3) when he changed the spray direction from center outwards to outside towards center. Also, because of this, I think that he was painting close to a wall, thus needed the orientation of the guitar changed to physically make it possible to spray paint the contour.

Imagine the process mentioned above. If a right-handed person were to spray paint a right handed guitar as mentioned without any masking, it would be a tough experience. Someone like Jimi that took great detail in the brush painting showing signs of a hard time while spray painting might just support the argument of him being right handed when drawing once again. Also taking the above steps and spray painting as a lefty makes it very obscure imagining the angles that the left hand would be in when spraying in this manner.

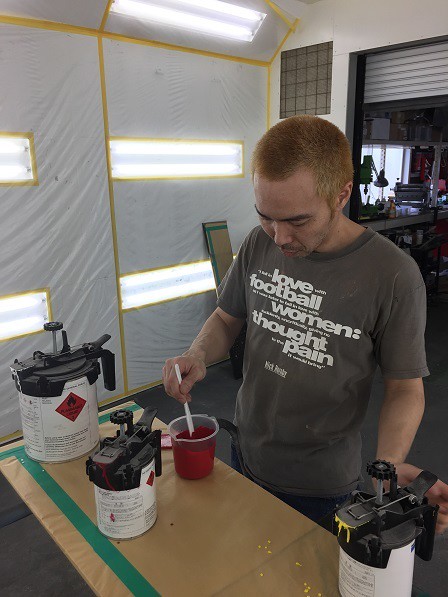
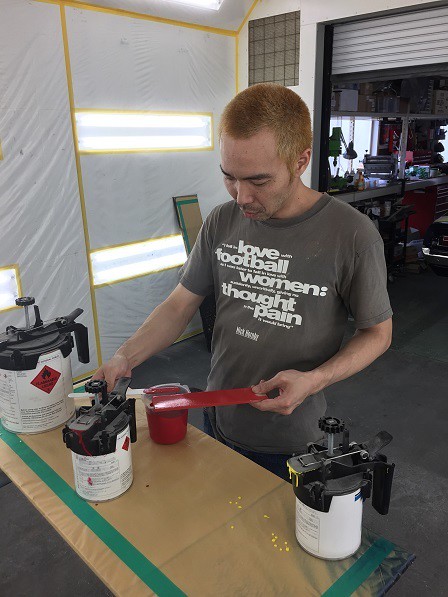
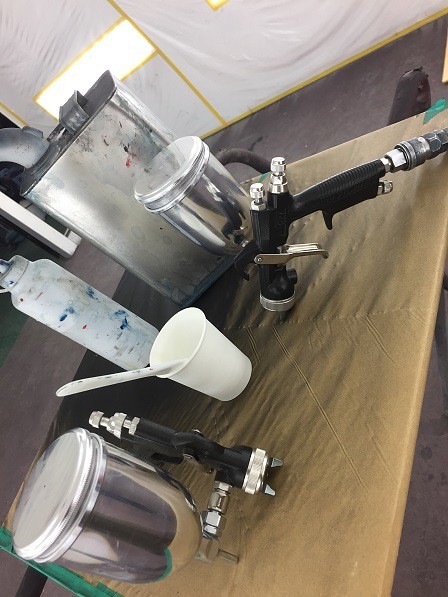
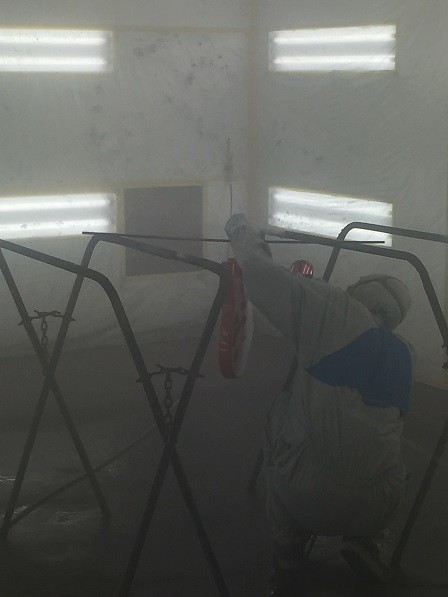
...so now to reproduce what Jimi did that night before the Monterey gig, time to practice with a spray gun.

Today again I'm at Jerry's Auto Restoration. ( https://www.instagram.com/jerrysautorestoration/ )

and yes, it's my time in using a spray gun.

35527142800_761ba22c91_z.jpg


It might be a foolish challenge, but you know, there's always a start for anything. So it's a great chance for me to start... and  practice like mad...

35783403541_667320e95b_z.jpg


Well, I realized that as newbie spray painter, I'm never gonna be ready and done practicing, so I'm gonna rely on my will power that "I can".

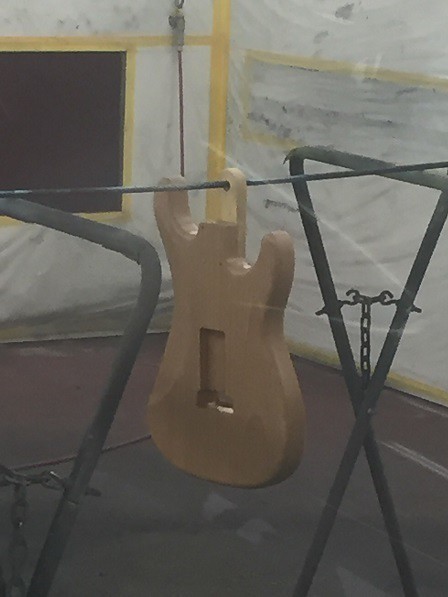
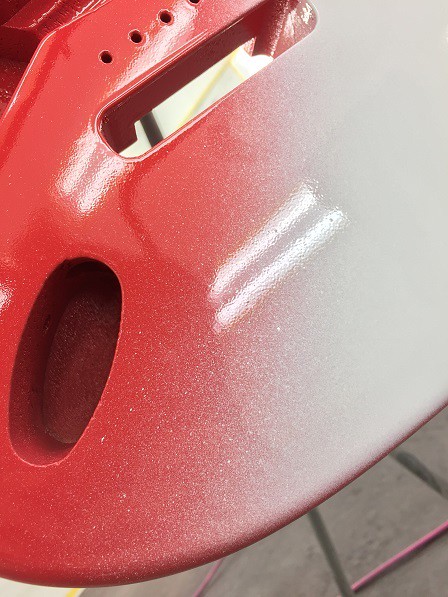
Starting from the upper horn

35783403461_8954e6bbf4_z.jpg


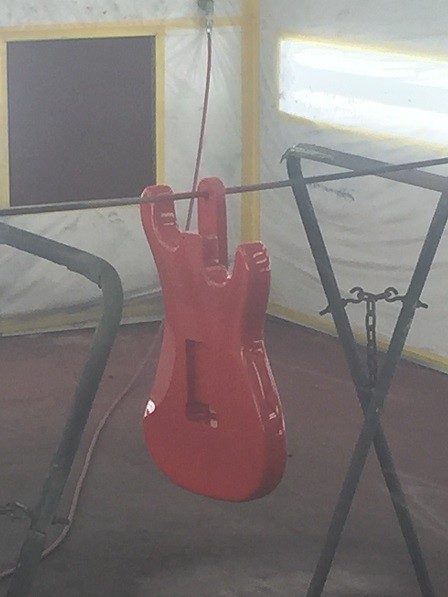
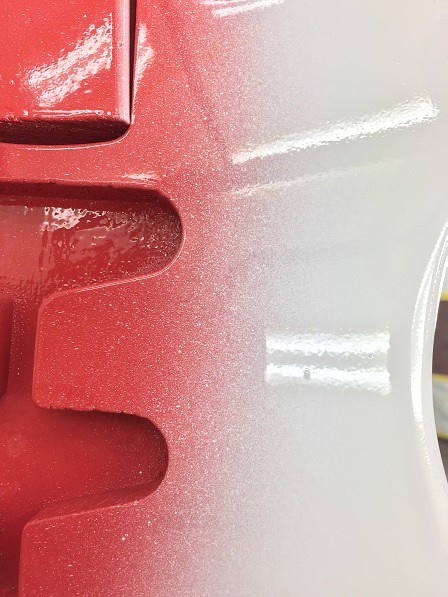
reproducing the coarse edges around the jackplate

35783403421_8e27591c98_z.jpg


making sure I don't miss that 'birth mark' on the elbow contour and making sure the coarse edge is still showing

35783403351_1294a6d96b_z.jpg


perfect!?

35527142600_c0e7808de3_z.jpg


back side too

35106126723_d54fb99981_z.jpg


Being nervous and due to extreme concentration I was sweating so hard I could probably have a gold fish or two in my glasses. Despite the mess that I am in, I think I did pretty well in imitating the use of a spray can in the days. 

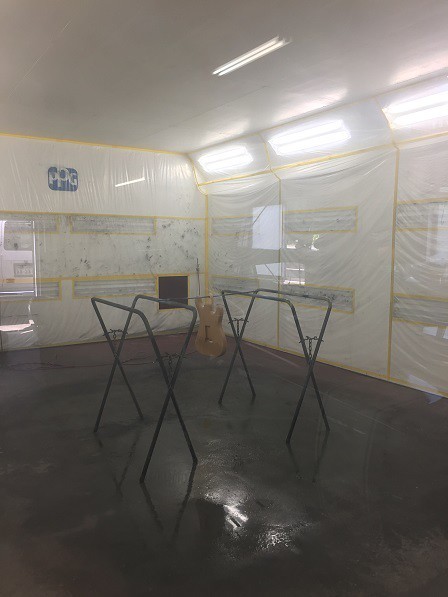
and now, time for some clear finish for this.

35527142390_9622a0f2e8_z.jpg


the gradation seen inside the upper horn

35783403141_9b9587b05a_z.jpg


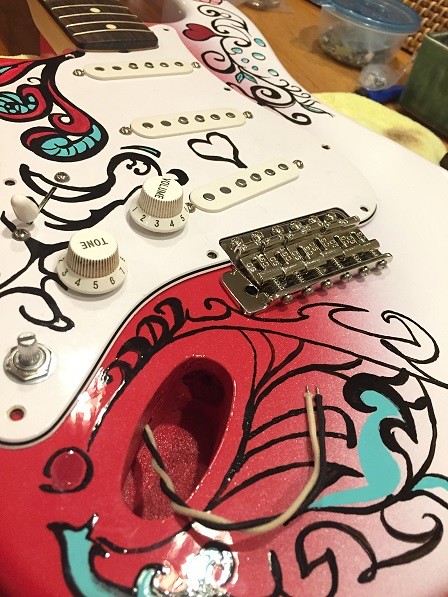
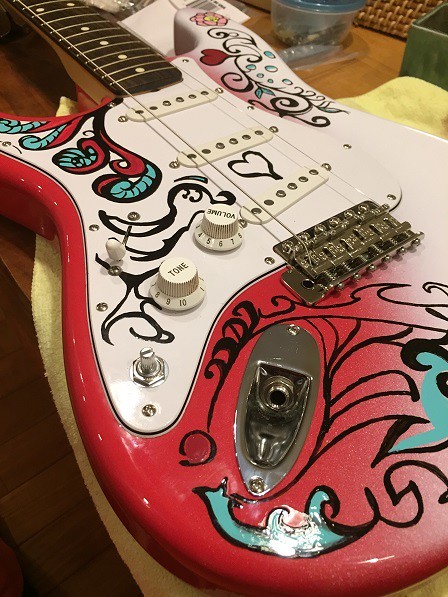
the coarse gradation around the pick guard

35527142230_d005f93a7d_z.jpg


again the coarse gradation around the bridge and jackplate

35783403071_b694a8d7e6_z.jpg


around the side contour

35783402981_dfc8f6aeea_z.jpg


the uneven gradation

35783402871_6e025a74cc_z.jpg


The sense of drive, roughness, ambience, texture

Might be hard to imagine from the images, but I believe that I've brought this finish to a perfect reproduction of that strat. Mind you, I have not reproduced the finger touches around the upper horn, also none of the scrapes and scratches done.

When checking the web for this Monterey finish, I see individual builders using spray cans or craftmen using spray guns.

With the spray cans finishes, people seem to be hoping for the accidental outcome of coming close to the Monterey strat. However, modern spray cans are too well built you may be able to get the sense of drive in the spray, but there is nothing close to the roughness seen on the Monterey strat.

With spray gun finishes, these are really well crafted. Rather, too well crafted, it's sooooooooooo smoothe and doesn't come near to what the Monterey strat was.

I think I'm the only that's crazy enough to go to the extent of using a spray gun and reproducing the traits of a '60s spray can paint.

As I mentioned I'm aiming to make this the perfect mirror, there's no other way I'd have it.

To reach the level that I'm aiming for, compared to the real thing, I have altered the order of how this was painted, the paint itself is 'harder paint' compared to the '60s, I've coated it with clear layer to help the current finish to last. So it's not exactly the same as the original. But from the outcome that I have reached, I am proud to say this is 'perfect'.

<Original blog from May 30th 2017>
http://avici.blog.fc2.com/blog-entry-346.html
 
Looks good. How did you get the coarse gradation with a modern spray gun?
 
Rgand said:
Looks good. How did you get the coarse gradation with a modern spray gun?
Thanks! Basically it was through a trial and error process. I tested different paint viscosity, air pressure and nozzle size numerous times and came up with the ideal scattering of the spray.
 
2zee said:
Rgand said:
Looks good. How did you get the coarse gradation with a modern spray gun?
Thanks! Basically it was through a trial and error process. I tested different paint viscosity, air pressure and nozzle size numerous times and came up with the ideal scattering of the spray.
Thanks, I was wondering.
 
I'm finding this thread to be truly amazing! 2zee, your attention to detail, and dedication to giving your customer the absolute best work possible, is inspiring. Bravo, I hope "Jimisen" appreciates the artistry that went into his "Perfect Mirror"!
:yourock:
 
BigSteve22 said:
I'm finding this thread to be truly amazing! 2zee, your attention to detail, and dedication to giving your customer the absolute best work possible, is inspiring. Bravo, I hope "Jimisen" appreciates the artistry that went into his "Perfect Mirror"!
:yourock:
Thanks for the compliment!!
I am truly happy being able to share my build with people like you who understands the precision of work I've placed into this strat.
Jimisen's also mentioned how he finds every detail astonishing and really digs this build  :) 
One super happy builder I am!
 
[Jimi Project 09]
While I was working on the body, I've also worked on adding a coat of clear finish on the pickguard as well.

35075381004_9da9177697_z.jpg


Doesn't look too different, but when you look at an angle...

35075380964_cd21ce8ae6_z.jpg


you can see that the clear coat is very thin and hasn't spoiled the texture seen from the brush marks.

35075380904_513649b97e_z.jpg


Due to the clear coat it's now got a glossy look, but the 'feel' of the brush paint is still there.

That's it for the coating, so now to assemble the electronics.

35075380844_ed1f5049e0_z.jpg


As I mentioned the hardware in my 5th blog,
CTS250K lefty vintage potentiometers
Lindy Fralin's Woodstock '69 with lefty pole pieces
Ceramic capacitators, Montreux's Retrovibe Cap “F66”
..with some upgrades, still keeping the balance to match the original

35075380814_4dd745feb5_z.jpg


Placed the knobs on. I didn't have any lefty knobs so used righty ones as a placeholder(which I found out later that there are no lefty knobs...)
The mid tone knob isn't missing. You Jimi fans understand, don't you ;)

35075380724_967d436069_z.jpg


Lookin good!!

btw, Jimisen's also posted a few posts on this guitar on his official facebook page too.
Might be worth while taking a peek as you might see this from a different angle as well.
It's basically in Japanese, but a picture's worth a thousand words right :D
https://ja-jp.facebook.com/jimisenjapan/

<Original blog from Jun 1st 2017>
http://avici.blog.fc2.com/blog-entry-347.html
 
Hey!  I think you've been holding out on us regarding some elements of this build!

... ether that or some other guy has done exactly the same thing and entered the GOM...
 
It's a Warmoth body, see http://www.unofficialwarmoth.com/index.php?topic=28310.msg402756#msg402756
 
Rgand said:
Beautiful work, there. I like the clear coat on the guard, too.
Hey thanks! I was afraid to see the paint scratch off on the first gig, so added this coat for a protective measure...not sure how much it would resist, but I guess it's better than nothing :)
 
Mayfly said:
Hey!  I think you've been holding out on us regarding some elements of this build!

... ether that or some other guy has done exactly the same thing and entered the GOM...
Yup, I've entered this for August's GOM!

Not sure what element you're referring to, but I'm not holding out anything about my build. If you're referring to the blog entries not being completed yet, they're on their way. As I don't want to rely on machine translations on the web, it takes some time to get these done. Currently 6 more to go, within the 6, 3 of them are build related. cheers
 
[Jimi Project 10]
The hardest part of this perfect mirror, in my opinion, was reproducing the white paint in different dynamics and shades.
With Nakamura's detailed advice, I've nailed this and now it’s time to paint the body. 

I've taken a couple dozen screen captures of the Monterey vid which I refer and pencil in the drafts.
35915173215_491ed9576e_z.jpg


Although these are drafts, I've taken good care in doing them as neat as possible.

35915173115_8bceaee8e1_z.jpg


When painting, I'm making sure that it's not just painted. I'm making sure that I don't miss any of the brush stroke so that I express the parts where the paint is thinner than the other parts.

35915172985_44b9d5b0e4_z.jpg


Also making sure that the haziness in brush stroke is also present where adequate.

35915172865_45899a0dc5_z.jpg


Some places in a rough tone.

35915172765_e22da97472_z.jpg


What I see as a difference with replicas seen till date is that I don't thickly paint all lines equally. It's the brush strokes and the rough tone at places that make this a perfect mirror.

35915172415_5cc5a59b30_z.jpg


From this fragment of the real guitar, I'm doing my best to observe how this is now and also using my imagination to 'see' how it was in the days.

I'm guessing that Jimi painted in the order of 1)pickguard, 2)bodyside, 3)jackplate.

Compared to 1) and 2), 3) definitely shows a different taste.
Maybe he lost concentration, the magic ended, or maybe he was pressed with time.
The lines on 3) look pretty careless.

Now touching up on the black lines.

35915172325_27a58f6817.jpg


Also doing this for the paint around the jackplate.

35915172665_06409256ee.jpg


well...it's a miniscule touch up that I applied so unless you're eyeballing the vid all day long, you wouldn't be able to catch the difference.

and now to add color

35915172565_9811a6db79_z.jpg


layered parts and parts with less opacity

35915172505_dd17124567_z.jpg


I forgot to have Nakamura tone the color for the flower so that'll be done on a later day.

35915172215_b8aae390d7.jpg


So, everything other than the flower's been painted.

Similar to the white spray paint, if I were to be asked "what's the need for all this detail?"
I can't think of an answer other than "Cuz I wanted to..."

It's like a reverse spot the difference game.
Because the actual guitar only exists as a fragment now, it's all about observation from the fragment, vids, photos and making an estimated guess. Why go to that extent? As I'm building this axe as a present to Jimisen, I need to build this beyond all expectations that Jimisen would have towards a Monterey strat. I can't afford to have Jimisen say "It would have been perfect if this was yadayada... that were yadayada..." To be able to proudly present this to him, I need to build this as the Perfect Mirror.

Some may laugh and say what I'm doing is over kill, but that's fine as everyone entitled for their own opinion.

But if I'm able to share this build with people who understand this feeling, that's my joy in writing this blog.

<Original blog from Jun 9th 2017>
http://avici.blog.fc2.com/blog-entry-348.html
 
Jimi Project 11
Once again I'm here at Jerry's Auto Restoration to have Nakamura tone the pink and yellow for the flower.

35527224760_300d403339_z.jpg


I might as well finish up the paint while I'm here.

35106201383_7f94af56ab_z.jpg


The center of the flower is drawn with black paint in detail, then I added the yellow paint in blotches covering some of the black paint. By doing so, this will result in reproducing lighting effects causing the black lines to appear, disappear and also smear depending on the angle and lighting towards the guitar.

35527224670_20be546cff_z.jpg


The leaves don't show in the intro vid so I've referred to where he plays the guitar behind him.

35106201203_ca40b4d67e_z.jpg


So, I'm done handpainting the upper horn.

35527224450_501ba3be35_z.jpg


Rather, it's more like I'm done handpainting.

35106201043_979324c6b5.jpg


One last thin layer of clear coat applied and I'm done with the finish.

Perfect! Once it's dry I can move on to assembling the guitar.

35527224240_7d0e2f2522_z.jpg


Right before I assemble the neck, I just needed to gently smoothe out the pocket to get a perfect fit. As the clear coat was thin, wasn't that much of a hassle to get this done. 

35527224150_ffb2979932_z.jpg


The electronics have already been done on the pickguard so that's easy enough.

35527224040_ed85278a16_z.jpg


Assembling done in no time.

btw, you might think that it's a bit over "red" for Fiesta red in the days.

35527223880_db2ac829b4.jpg


Well, just by changing the angle of the lighting, here we are with that shade of Fiesta red seen at Monterey. I've tested this out with the sample paint at the live house Ikebukuro Adm with Jimisen.

This isn't a guitar to hang on the living room wall and enjoy the looks. It's built to become the Monterey guitar when lit up with stage light.

Once Jimisen plays this on stage, that's when this really becomes the "Perfect Mirror".

Now, I'm left with fine tuning here and there. Gotta stay sharp and make sure all is brought far beyond satisfaction.

<Original blog from Jun 26th 2017>
http://avici.blog.fc2.com/blog-entry-351.html
 
Back
Top