TimesNewRoman
Junior Member
- Messages
- 64
This seems be be a universally lauded item so I choose it for my 7/8 strat build. First thing is that I realized that all the saddles had to be removed in order to mount it on the body. I didn't see this coming and tiny parts with springs looked daunting. But, the thing is so well engineered that both removal and replacement was easy. I made sure to keep track of which saddle went where in case the slots are sized (I'm not sure if this matters).
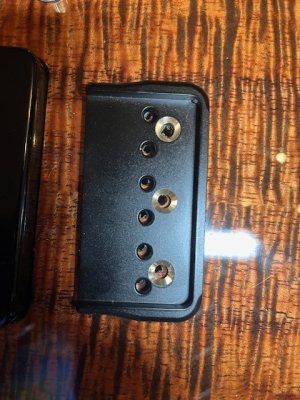
Next, the holes drilled by Warmoth seemed too small to me. Even using thread lubricant, it took an uncomfortable amount of force to drive the screws, so I enlarged then by 1/64- perfect. Next issue, the mounting screws sit proud of the plate and it looked to me like the saddles would trip over them and end up crooked. So I deepened the chamfer to get the screws flush and it looked like this :

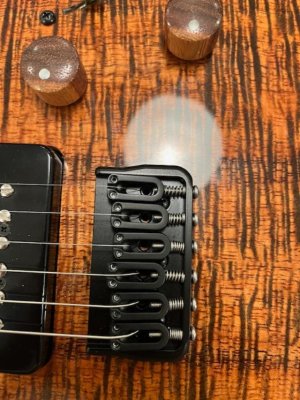
I know that enlarging the holes and reaming out these chamfers will both weaken the mounting but I think it will be ok. Turns out I again was worrying pointlessly because when I set the action, all 6 saddles were raised to where they would have easily cleared the mounting screws anyway.
My last concern was whether the process of making the black version would insulate the strings from the plate ground. All strings are perfectly grounded.
So now I love this thing like everybody else but thought my experience might be of use (or amusement) to others.
Next, the holes drilled by Warmoth seemed too small to me. Even using thread lubricant, it took an uncomfortable amount of force to drive the screws, so I enlarged then by 1/64- perfect. Next issue, the mounting screws sit proud of the plate and it looked to me like the saddles would trip over them and end up crooked. So I deepened the chamfer to get the screws flush and it looked like this :

I know that enlarging the holes and reaming out these chamfers will both weaken the mounting but I think it will be ok. Turns out I again was worrying pointlessly because when I set the action, all 6 saddles were raised to where they would have easily cleared the mounting screws anyway.
My last concern was whether the process of making the black version would insulate the strings from the plate ground. All strings are perfectly grounded.
So now I love this thing like everybody else but thought my experience might be of use (or amusement) to others.


