Leaderboard

My latest little project

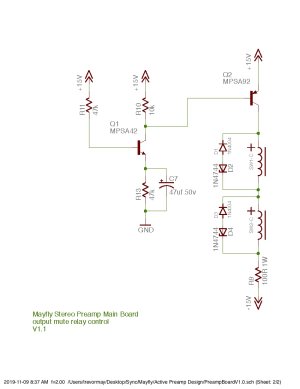
The relay control was tricky.  My goal was to detect the sag of a collapsing power supply and flip the relays before the supply was completely gone.  That is, while the electronics are still operating correctly.  Here's what I came up with:

index.php


How it works is when power is applied, the base of Q1 is driven 'on', which pulls down the base of Q2, which turn the relays on.  The relays are wired to be 'off' when there is no power, or when Q2 turns off.  The trick is in the cap/resistor pair on the emitter of Q1.  Those guys have a large enough time constant to hold their voltage when the +15V supply starts drooping.  When that happens, the voltage on the base of Q1 drops below the voltage sitting on C7, which shuts off Q1, and then Q2.  I tweaked the circuit so this happens at about 80% of the supply voltage, which ensures that the electronics are still running. 

When Q2 turns off, the relays turn off, and the balanced outputs are crowbared to ground.  The diode/Zener series pair around the relay windings is to protect Q2 against back EMF spikes, but still pull the power out of the coil reasonably quickly.  R9 is just for current limiting in the relays.
 

Attachments

  • PreampBoardRelayControl.jpg
    PreampBoardRelayControl.jpg
    79.5 KB · Views: 279
Thanks Rick!

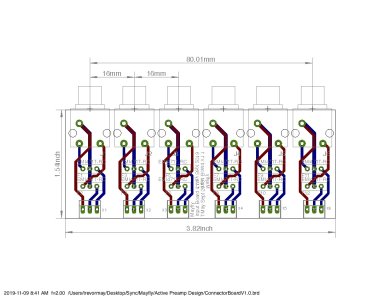
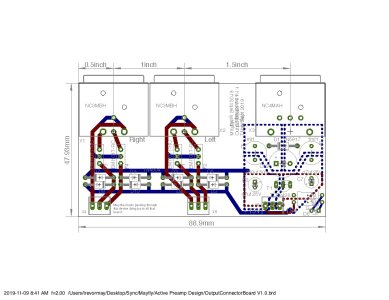
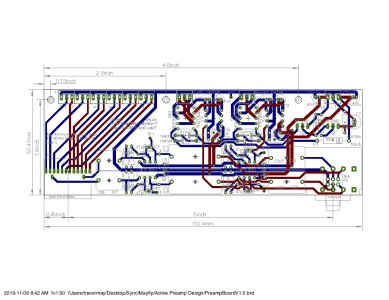
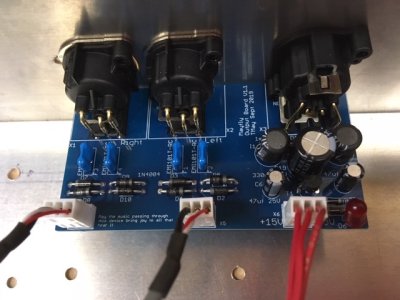
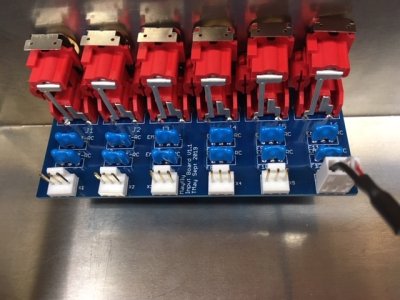
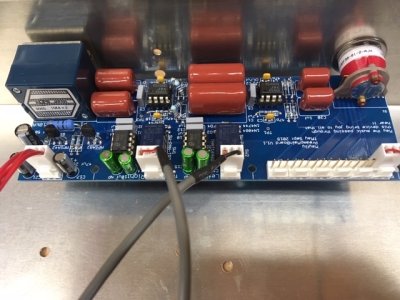
ok - time for less chat and more pictures.  Here are the three boards:  the input connectors, output connectors / power supply, and the preamp board:

index.php


index.php


index.php
 

Attachments

  • ConnectorBoardPCB.jpg
    ConnectorBoardPCB.jpg
    155.9 KB · Views: 257
  • OutputConnectorPCB.jpg
    OutputConnectorPCB.jpg
    155.3 KB · Views: 269
  • PreampBoardPCB.jpg
    PreampBoardPCB.jpg
    224.6 KB · Views: 254
and here are the boards back from the board shop.

I used Seeed this time.  The boards look great!

index.php
 

Attachments

  • IMG_4565.JPG
    IMG_4565.JPG
    131.6 KB · Views: 236
I barely know what I'm looking at but you, on the other hand, understand it at a design level. This is mighty impressive.  :icon_thumright:
 
Thanks man!  Your guitars are mighty impressive as well.

If you need any PCBs done, I'm your man :)
 
Thanks, much appreciated.

I'll keep you in mind if I need anything of the sort.
 
Ya know, I was following along, right up until the point where you lost me!

But anyway, that's some impressive stuff. And some fast turn around from the board shop! I mean, you only started posting about this a day or so ago, and you already have product in hand!  :icon_jokercolor:
 
BigSteve22 said:
But anyway, that's some impressive stuff. And some fast turn around from the board shop! I mean, you only started posting about this a day or so ago, and you already have product in hand!  :icon_jokercolor:

ok fine!  I had the boards before I started posting! 

I have the parts too....
 
Mayfly said:
BigSteve22 said:
But anyway, that's some impressive stuff. And some fast turn around from the board shop! I mean, you only started posting about this a day or so ago, and you already have product in hand!  :icon_jokercolor:

ok fine!  I had the boards before I started posting! 

I have the parts too....
That's music to my ears, Means there will be more, faster, updates. Carry on, Brother!
 
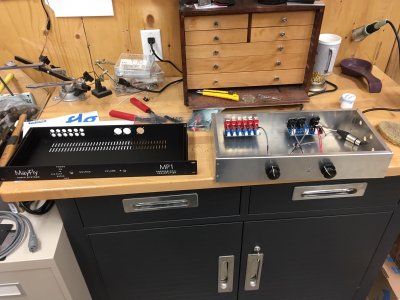
ok - boards are stuffed and loaded into a temporary enclosure:

Input board:
index.php


preamp board:
index.php


output / power supply board:
index.php


The biggest PITA was the connectors.  I elected to use Molex KK-0.1 connectors on this guy and even splurged on a very expensive genuine molex crimp tool for it.  It sucked.  I destroyed more connectors than I managed to make.  The connector would get stuck in the tool and I had to use an awl to pry it out.

BUT - the circuit actually performed as expected!  I had a scare when I was hearing some hum with the test rig (the PA), but the hum turned out to be just a ground loop in the PA itself. 

After I verified the noise and frequency response, I tested the output relays and they even worked as advertised!  I can power up and down the preamp all day and no clicks or thumps in the amps.

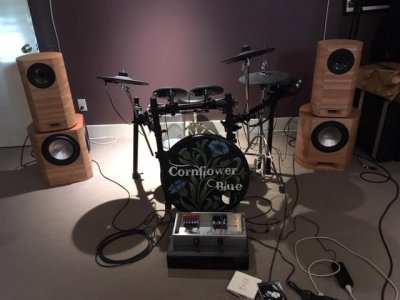
Finally, I've got these hooked up to the speakers using my CD player as the source.  It's fantastic.  Really good fidelity, super bass response, really clear treble and mid, no noise even with the volume wide open, and silent on power-down.  All my design goals have been met!! 

That never happens  :)

index.php


Attachments

  • IMG_4559.JPG
    IMG_4559.JPG
    37.6 KB · Views: 364
  • IMG_4562.JPG
    IMG_4562.JPG
    100.8 KB · Views: 359
  • IMG_4561.JPG
    IMG_4561.JPG
    115.9 KB · Views: 359
  • IMG_4563.JPG
    IMG_4563.JPG
    125.2 KB · Views: 352
Mayfly said:
After I verified the noise and frequency response, I tested the output relays and they even worked as advertised!  I can power up and down the preamp all day and no clicks or thumps in the amps.
That, by itself, is worth the price of admission! Congrats on another successful project!  :headbang:
 
No kidding. Buddy of mine who's a sound man used to cry all the time about losing horns or crossovers due to unregulated/disorderly shutdowns.
 
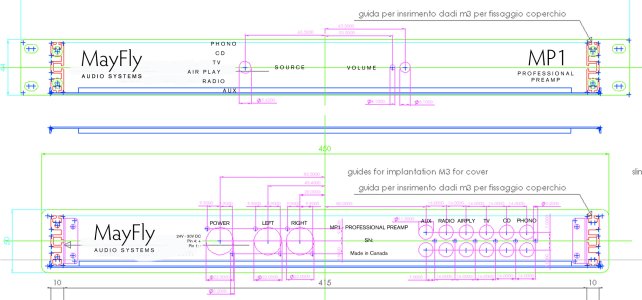
Now's the time for the mechanical design.  Spent all afternoon on it while listening to Pink Floyd "the Wall".  I'm trying HiFi2000 instead of front panel express this time.  Here's what I got so far:

index.php
 

Attachments

  • Lettering.jpg
    Lettering.jpg
    437.7 KB · Views: 350
Nice progress, there.

Mayfly said:
The biggest PITA was the connectors.  I elected to use Molex KK-0.1 connectors on this guy and even splurged on a very expensive genuine molex crimp tool for it.  It sucked.  I destroyed more connectors than I managed to make.  The connector would get stuck in the tool and I had to use an awl to pry it out.
I bought a selection of Molex connectors, the crimping tool and a removal tool when I was wiring radios into my airplane. Nothing complex, just runnng wires to connect everything so things could come out and/or go back in quickly and cleanly. The crimping tool didn't do well as a method to itself so I started soldering the ends on and using the crimper just to get the tabs rolled in. That worked great.
 
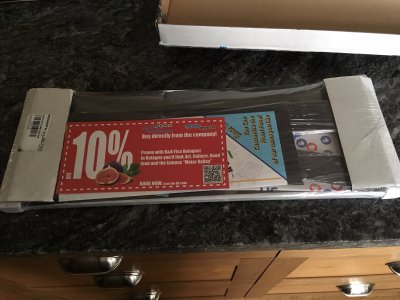
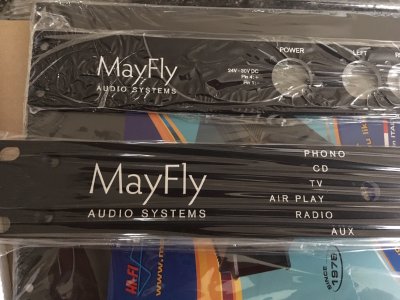
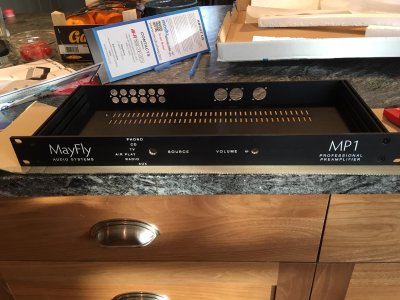
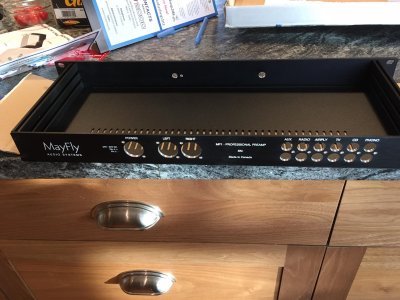
The metalwork is in from HiFi 2000.  A nice alternative to front panel express:  They are about 2/3 the price and the front panel is thicker:

index.php


index.php


index.php


index.php


Now the moment of truth:  Will the stuff fit??

index.php
 

Attachments

  • IMG_4587.JPG
    IMG_4587.JPG
    973.4 KB · Views: 333
  • IMG_4588.JPG
    IMG_4588.JPG
    1.1 MB · Views: 336
  • IMG_4589.JPG
    IMG_4589.JPG
    374.7 KB · Views: 312
  • IMG_4590.JPG
    IMG_4590.JPG
    369.9 KB · Views: 355
  • IMG_4591.JPG
    IMG_4591.JPG
    307.7 KB · Views: 321
Back
Top