My first guitar build

StogiePatriot

Junior Member
Messages
89
When I meet folks for the first time I have to tell them that I'm a little "touched" - when I get something in my head it just won't stop until I've scratched the itch.  Case in point; bought my first body/neck combo from Warmoth and am waiting for the magic boxes.

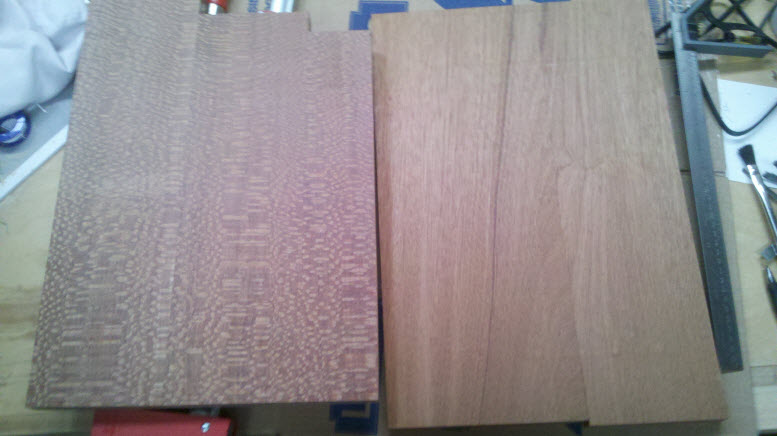
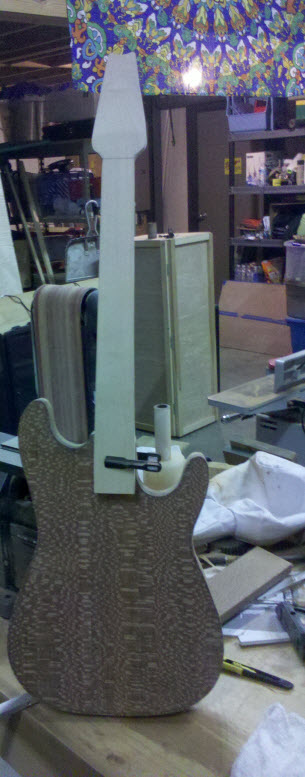
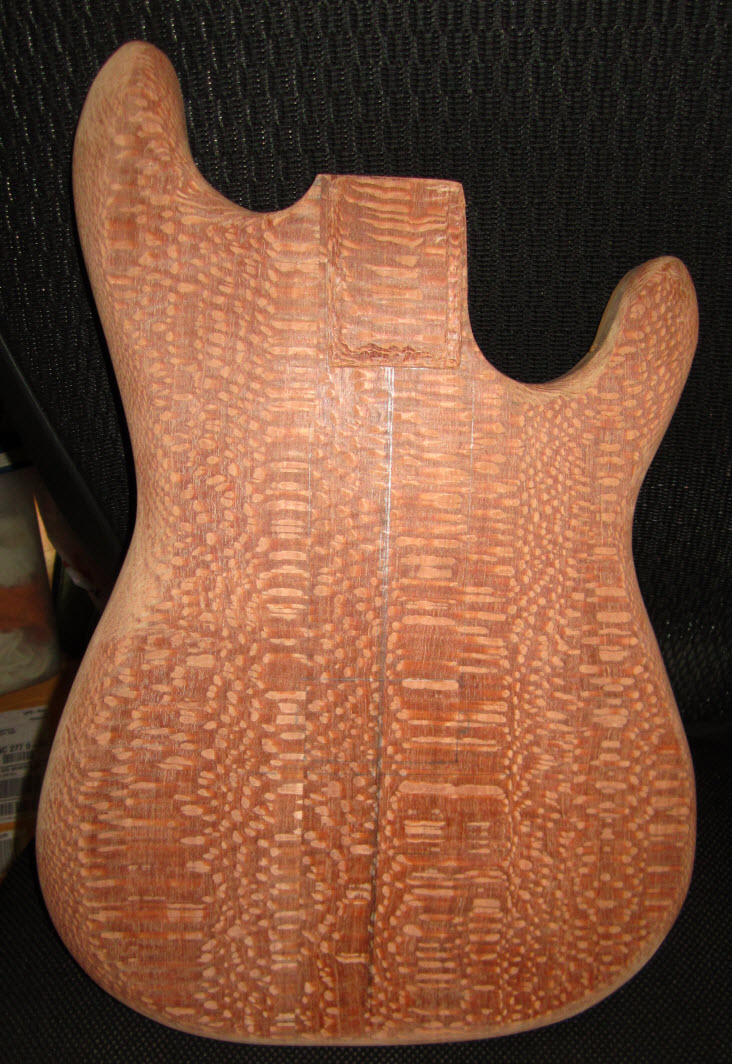
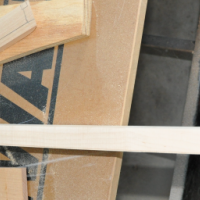
Waiting's never been my strong suit; so I ran down to the local woodworking shop and got tigerwood and quilt maple for a guitar that I'd make while I'm waiting.  Probably to sell, but I'm not telling my wife that yet... ;-)  In looking at all this wicked wood for a neck through design, I realized that I didn't want to experiment with the expensive woods.  So I started to build out the ghetto git today.  I started on the neck, with a 3x3 billet of hard maple and cut it up and started to make it happen.

thumbs_01_raw_stock_3x3.png
thumbs_02-rough_out.png
thumbs_03_body_blank_template.png
thumbs_04_more_cutout.png
 
thumbs_05_final_roughout.png
thumbs_06_drawknife_n_sanders.png

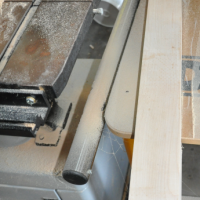
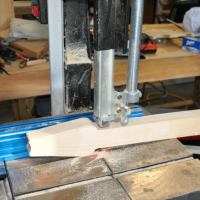
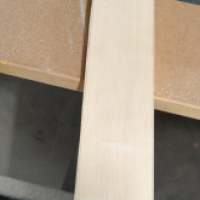
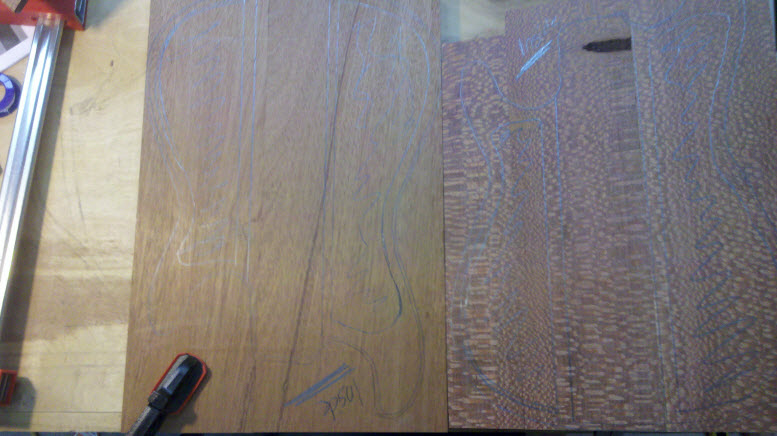
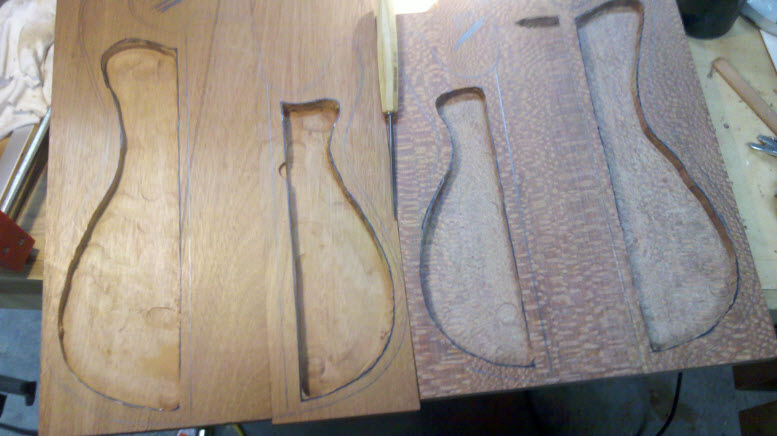
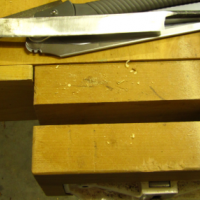
So after the rough shaping and getting a 3x3 block 36" long to a 1.5 inch block of the proper size and shape, I set about making the blank a little more like a neck.
thumbs_07_start_finish_shaping.png
thumbs_08_tools_o_da_trade.png
thumbs_09_shaping_up.png
thumbs_10_blurry_close_up_of_shaping.png
thumbs_11_final_shape.png
thumbs_12_final_shape_2.png


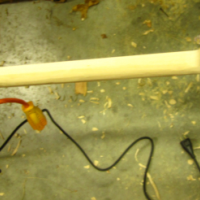
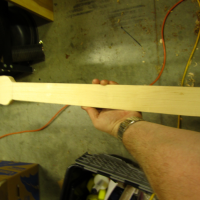
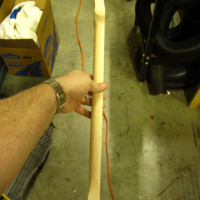
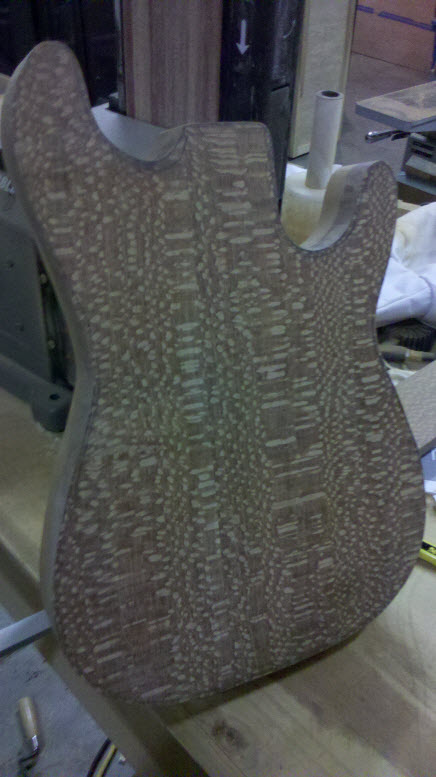
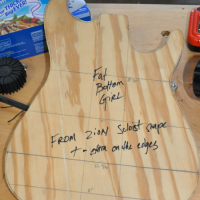
So this is still sans a truss rod, frets and the whole gamut of other stuffins that make up a proper neck, but for a few hours work on a Saturday, I'm not dissatisfied with the result...

Take care and enjoy your Memorial Day weekend (US folk) and your weekend nonetheless.
 
Looks like great fun!  Thanks for sharing; I look forward to seeing more of this.  I'd tell you to enjoy your holiday, but it looks like you already are!

-Mark
 
Thank you Mark!  Yeah, it's been fun thus far, but I have a question for those nutters that make necks from raw stock  (or have the knowledge therein)...

I'm using rock maple for the whole neck and could easily use the existing surface as the fret board (an all in one) BUT I'm cornfused about the truss rod installation...  Would you go in through the back of the neck and route out a pocket, install the rod and then put colored epoxy or a filler rod to cover the truss?

Suggestions are welcome and desired!
 
StogiePatriot said:
I'm using rock maple for the whole neck and could easily use the existing surface as the fret board (an all in one) BUT I'm cornfused about the truss rod installation...  Would you go in through the back of the neck and route out a pocket, install the rod and then put colored epoxy or a filler rod to cover the truss?

Right. I'm sure you've seen 'em a million times. It's commonly called a "Skunk stripe".

VS916B.jpg

Except you don't want to put epoxy or anything like that in the trough you make - the rod has to be able to move. So, you just make a cover for it, glue that in place and blend it into your neck's profile.
 
yup route a channel in the back and drill from the ends to meet that channel. but first you need to know what type of trus rod you will use. a traditional rod sits in a curved channel so you need to make a routing fixture to get that curve. when it pulls against the wood it tries to straiten out and pusses against the high point of the curve. a modern truss rod is actually 2 rods or a rod and a flat strip but there are different layouts. when one rod is tightened it becomes shorter than the other and since they are attached at the ends it curves the longer rod. these rods go into a strait channel.
 
Waiting's never been my strong suit

Well you certainly get brownie points for enthusiasm!  :hello2: :blob7: :hello2:

Sometime people start asking questions and reading books before they've torn into a big pile of wood; fencesitters....

It's kind of normal to install the trussrod, fingerboard and any and all "wings" for the tuners (if you need them) before you get close to the final shaping of the neck. One absolutely cool trick is buying fingerboards that are already pre-radiused and slotted for frets, to whatever scale length and number of frets you want. It takes a HUGE bite out of some difficult and exacting measurements. Stewart-MacDonald sells them:
http://www.stewmac.com/shop/Bodies,_necks,_wood/Electric_guitar_fingerboards/Slotted_Fingerboard_for_Fender_Guitar.html

But they just buy them from LMII and raise the price, might as well go to the source:
http://www.lmii.com/CartTwo/Secondproducthead.asp?CategoryName=Fingerboards
http://www.lmii.com/CartTwo/thirdproducts.asp?CategoryName=Fingerboards&NameProdHeader=Fingerboard+Radiusing
http://www.lmii.com/CartTwo/thirdproducts.asp?CategoryName=Fingerboards&NameProdHeader=Fingerboard+Slotting

Both Stew-Mac and LMII sell excellent double and single trussrods, there are fans of both. There's an entire community of people who do this stuff if, umm, you ever want to ask a question....
 
Thanks everyone for the advice and kind words; I've made a significant investment in tools at Stew-Mac for fretting (cuz I'm that way) and hopefully I won't booger it up too much.

I turned my attention to the body for this rig - a leopardwood and mahogany semi-hollowed for weight (the spotted monster is HEAVY...)  So I started by dimensioning and gluing up the two blanks.
dimensioned_stock.jpg

Once there, I took the fat bottomed girl template and gave myself a quarter inch margin around the template (because I was skeerded -  :sad: ). Then I drew out the chambers that I'd carve out using my fabulous Festool router....  If you're gonna spend money on a router, don't screw around and spend right the first time.
Then I carved them out...
belinda_patterned.jpg
 
belinda_hollowed.jpg


The marriage in glue is now taking place in the shop and I'll trim it out later tonight and get the body shape in place and maybe start the shaping process if all goes well (re: if it doesn't end in tears... lol)
 
StogiePatriot said:
If you're gonna spend money on a router, don't screw around and spend right the first time.

That goes for any tool. It usually only costs a little more to go first class, and you're rarely sorry. The inverse is to cheap out, where you're almost always sorry. Most people don't realize that cheap tools are extraordinarily expensive because you're constantly replacing them, and often either wrecking whatever it is you're working on or spending too much time getting things done.
 
That goes for any tool. It usually only costs a little more to go first class, and you're rarely sorry. The inverse is to cheap out, where you're almost always sorry. Most people don't realize that cheap tools are extraordinarily expensive because you're constantly replacing them, and often either wrecking whatever it is you're working on or spending too much time getting things done.

And dangerous - one of the worst injuries that I have ever received was using cheap carving gouges.  Fighting cheap tools might seem like part of the price of buying crud, but that fight usually leads to bites.

Ok, well here's the end of memorial day weekend efforts - I really appreciate this place; it's nice to be able to share with like minded folks (whether i'm bunk or half-way decent)
2012-05-28_21-39-03_81.jpg

More evidence of the Bertha thing....
2012-05-28_21-42-20_657.jpg

And I couldn't help myself, I had a neck blank, a newly minted body and a clamp - I think you can see where this is going....
2012-05-28_21-42-08_568.jpg
 
Marty Goats, thanks!  Incidentally I realize that I've got a In progress build thread in the general discussion - Wyliee if it makes sense to move the post please feel free....

I got started on shaping the body yesterday evening; with a combination of draw knives, spokeshaves, carving gouges and sandpaper (and a lot of effort) I made a significant dent in the shaping.  One lesson learned is when you have a git that is soft on one side and much more dense on the other, to take a break between shaping to remind yourself that the mahogany is much softer than the leopardwood and aggressive shaping only counts for one side...  :icon_jokercolor:
Picture quality improves as it goes....
lm001_sm.jpg
lm003_sm.jpg
lm002_sm.jpg
 
lm004_sm.jpg


I spent a fair bit of time doing a mini-tummy cut relief on it because I'm skeered of going through to the chamber inside.  I've created a depth gauge for some way of knowing when I've gotten to my magical depth of 3/8" from the back/front.  Both are an inch thick, so as long as I keep a flat spot on the back and front it'll make like easier in routing pup channels, back cavities and the like and make depth measurements possible.

I toyed with the idea of not using the leopard for this project, but I put some laquer thinner on it yesterday and whoa, am I glad I did.  The figure just pops off the axe - content at this point.

How do you all remove all the dips and divits from the axe before your first sanding sealer coat?  Any tricks or is it long boards and hard work  :headbang:

That's all for now - I marked up the neck but will route the channel and cut the frets probably on Saturday or Sunday.  Gotta get some tuning machines and decide on the bridge for this one...
 
>> How do you all remove all the dips and divits from the axe before your first sanding sealer coat?  Any tricks or is it long boards and hard work  :headbang:

If it was me, I'd put up a notice on the message board at the local woodworkers store that said:

FREE BEER!

I need 10 minutes on a drum sander.

Run an 11" x 22" block through to surface both sides, and it's worth a 12 pack of your choice!


call 555-867-5309 and ask for Mr. Patriot

That way, you have a starting point. Get some Dura-Blocks for the finish work.

 
Cagey said:
>> How do you all remove all the dips and divits from the axe before your first sanding sealer coat?  Any tricks or is it long boards and hard work  :headbang:

If it was me, I'd put up a notice on the message board at the local woodworkers store that said:

FREE BEER!

I need 10 minutes on a drum sander.

Run an 11" x 22" block through to surface both sides, and it's worth a 12 pack of your choice!


call 555-867-5309 and ask for Mr. Patriot

That way, you have a starting point. Get some Dura-Blocks for the finish work.
ROFLMAO - naw, I have a planer that will take this body straight for that work; it's the sides and getting all of the compound curves to behave.... Ur a trip, Cagey!
 
Hehe! Well, it worked for me and a buddy of mine years ago on a project we were building. Couldn't justify the cost of the tool because it wouldn't be used very often, and it's the sort of tool that tends to sit unused much of the time for that very reason. It's a good way to make new friends, too. Nothing like sitting around drinking beer and rehashing war stories about how different woods had done us wrong and how we'd taught them a lesson.

If it's sides and fillets/chamfers/round-overs you're looking to save time on, a spindle sander and router table are handy. You might want to read through this Strat build thread by Ron Kirn. He makes some nice instruments, and the thread is long, detailed, and very well done. He basically starts with raw lumber, and ends up shipping a beautiful Strat. Something like 450 pictures of the whole process, along with notes. Includes finishing, wiring, the whole shebang.

CyberneticGhostOfChristmasPast.png


It's a long story. You may want to get some refreshments.
 
Oh my GOD how the bloiting blit did I not notice the Dead in this thread. I love your taste, Stogie. This is very cool so far - particularly the bears! As it happens, I have two Jerry Garcia ties hanging up with my suits. High five!
 
Tipperman - thanks and I'm just stumbling like Jerry thru this one....  This weekend introduced a new guitar and some horror stories I'll share for somewhere else.  Slotted and fretted the neck and for a first time (with the right tools) it didn't come out half bad.

Not to say the same for the truss rod.  It's functional but low and behold you don't "normally" install a StewMac Hot Rod truss on a one piece for many reasons.  I boogered the slot cavity so much I changed my design and added a serpentine stripe instead of the straight thin one.  Nor can I claim anything but pain and learning from the headstock, which I was told (gently, thank you lil brother) was too close to the plain of the frets and wouldn't ever be 'right'.  So more blood and treasure into laminating a second piece of maple onto the back of the headstock to allow me to push the tuner bed down 3/8".

So this thing is now the python soloist - dressed like one, and with the serpentine stripe and the snake head stock it ought to be OK with MUCH more work.  One thing my carving master taught me was when you F up, change the design and roll with it...  :rock-on:
 

Attachments

  • 2012-06-02_17-51-36_522.jpg
    84 KB · Views: 274
Mmm... serpentine!

I think that's French for "Why didn't I design a better jig?" <grin>
 
Cagey said:
Mmm... serpentine!

I think that's French for "Why didn't I design a better jig?" <grin>

LMAO; more like "why didn't I route that slot while the neck was still a block of wood, instead of it having a 14 radius already sanded into the darn neck..."  - Live and learn....

P.S.: Ass <grin>; keep em coming though; not a better teacher than sarcastic shame in front of ppl who know better....
 
Back
Top