Megatron
Junior Member
- Messages
- 94
The build is underway!
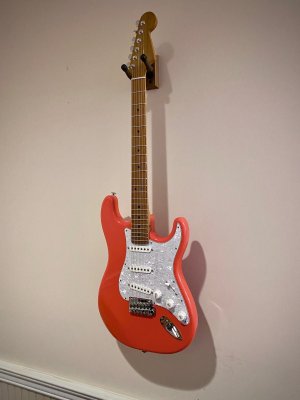
Actually the build is pretty much complete (pics coming soon).
I'm wondering if I can get some help regarding setup. I'm totally new to tremolos, having only ever played fixed bridges before (string-through, stop bar tail pieces, acoustic bridges). There's definitely quite a dance when tuning it up and dealing with the tug of war between the strings and the trem springs.
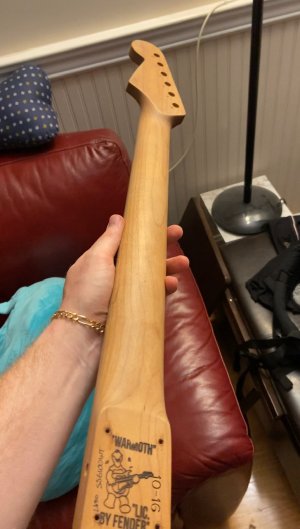
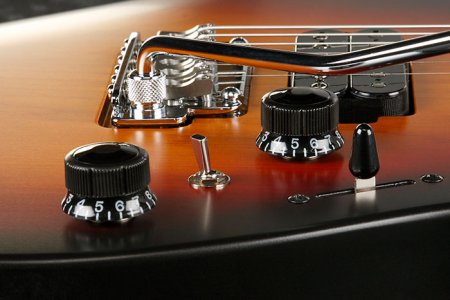
I'm using a Gotoh 510T-BS1 bridge which has a locking two-point post system, similar to the one in the Ibanez image below. My Warmoth neck is a modern construction (side adjust mechanism) with a 10-16 compound radius fretboard and SS6100 jumbo frets. I attached 3 springs in the back for "standard" tension, and am currently setting the bridge to float. I strung it up with 9's, and everything was looking terrific until I noticed that the strings were almost right on the frets. I didn't anticipate that the fretboard would be so high, which I guess is expected on strats with a pickguard (as highlighted in the Warmoth neck depth image below). To adjust the action to a playable level, I raised the two trem posts ~2 mm (hard to measure) and then raised the saddles individually while maintaining a 16" radius. I also set the strings to tuned tension and used my notched straight edge neck check tool to check the bow after a couple hours - I needed a quarter turn of the side adjust mechanism on the neck. I'll revisit this today as the neck may have settled a bit more under tension.
So, I've raised the posts a bit and the saddles are quite high to achieve my desired buzz-free string action (the 6100 frets not being so helpful here...). I've seen many pictures of guitars with the posts pretty low (flat with the studs), but it seems that on a strat without the 720 mod, this would be impossible.
Question 1: On a strat with a 2 point trem system, is there a recommended way to set action? Is it normal to have the posts set high?
Also, I bolted the warmoth roasted neck to the warmoth roasted body, both with standard pre-drilled holds. I used a gotoh neck plate and screws. The neck fit very well in the pocket and I screwed it on by hand tightening screws in a criss-cross pattern, the way you'd mount a tire, so as not to tighten one screw fully before the others are even in. It was a bit creaky and tight, and is working great, but it was definitely a bit stressful. I've heard that after the string tension is on for a day or so, the neck "settles" and some individuals recommend tightening it again.
Question 2: What is the recommended way of bolting on a neck? Do you tighten or reset it after a period under string tension?
Any help you can offer would be greatly appreciated. Thanks in advance!!
Actually the build is pretty much complete (pics coming soon).
I'm wondering if I can get some help regarding setup. I'm totally new to tremolos, having only ever played fixed bridges before (string-through, stop bar tail pieces, acoustic bridges). There's definitely quite a dance when tuning it up and dealing with the tug of war between the strings and the trem springs.
I'm using a Gotoh 510T-BS1 bridge which has a locking two-point post system, similar to the one in the Ibanez image below. My Warmoth neck is a modern construction (side adjust mechanism) with a 10-16 compound radius fretboard and SS6100 jumbo frets. I attached 3 springs in the back for "standard" tension, and am currently setting the bridge to float. I strung it up with 9's, and everything was looking terrific until I noticed that the strings were almost right on the frets. I didn't anticipate that the fretboard would be so high, which I guess is expected on strats with a pickguard (as highlighted in the Warmoth neck depth image below). To adjust the action to a playable level, I raised the two trem posts ~2 mm (hard to measure) and then raised the saddles individually while maintaining a 16" radius. I also set the strings to tuned tension and used my notched straight edge neck check tool to check the bow after a couple hours - I needed a quarter turn of the side adjust mechanism on the neck. I'll revisit this today as the neck may have settled a bit more under tension.
So, I've raised the posts a bit and the saddles are quite high to achieve my desired buzz-free string action (the 6100 frets not being so helpful here...). I've seen many pictures of guitars with the posts pretty low (flat with the studs), but it seems that on a strat without the 720 mod, this would be impossible.
Question 1: On a strat with a 2 point trem system, is there a recommended way to set action? Is it normal to have the posts set high?
Also, I bolted the warmoth roasted neck to the warmoth roasted body, both with standard pre-drilled holds. I used a gotoh neck plate and screws. The neck fit very well in the pocket and I screwed it on by hand tightening screws in a criss-cross pattern, the way you'd mount a tire, so as not to tighten one screw fully before the others are even in. It was a bit creaky and tight, and is working great, but it was definitely a bit stressful. I've heard that after the string tension is on for a day or so, the neck "settles" and some individuals recommend tightening it again.
Question 2: What is the recommended way of bolting on a neck? Do you tighten or reset it after a period under string tension?
Any help you can offer would be greatly appreciated. Thanks in advance!!

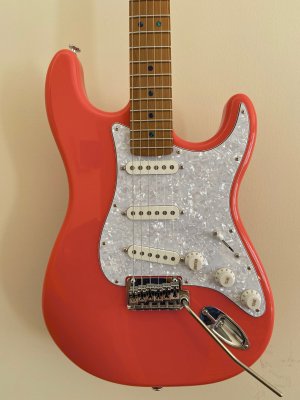
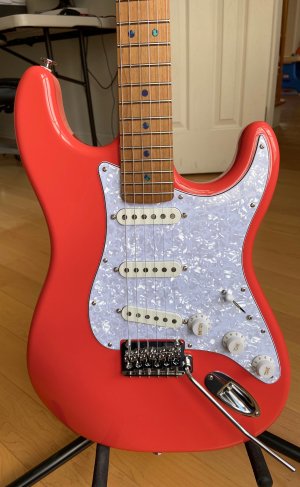
 for 2/3 the price of a new fender american professional. The body and neck are Warmoth, the pickups are Fender Yosemites, all the hardware is MIJ Gotoh. The star of the show is the fiesta red color - it's got a pink hue to it that I've tried to capture by adjusting the white balance on my camera. Gorgeous! Body is roasted alder and neck is roasted maple, which made screw insertion a bit stressful as roasted woods are more prone to cracking. Drilling pilot holes and applying screw wax made this a lot smoother. The neck is raw (no finish) which makes it super fast, but sometimes I think I may have preferred a satin nitro finish from an aesthetic point of view. The azurite malachite dots really pop in the right light, and I think it gives the guitar a little flare to highlight that it's a custom build. Loving the jumbo stainless steel frets - reminds me of my old Ibanez. The nut installed by Warmoth seems to be perfectly cut for my 9's, and I've observed zero binding over the last few days. Everything has been staying in tune very well. I also really like the white nut contrasted on the roasted fretboard. The Gotoh bridge is so incredibly polished and stable and very comfortable for palm muting. No complaints with the sustain. I installed Gotoh HAP-M adjustable post automatic locking tuners so I could lower the strings and avoid a string tree. So far nothing has popped out of the nut, so they may be working. However, they took me over an hour to figure out. Having figured them out, I highly recommend them - the auto locking mechanism using string tension is very clever.