Leaderboard

My Fallout 4 Wasteland Baritone Tele

Sci-Fried Dobbs

Junior Member
Messages
42
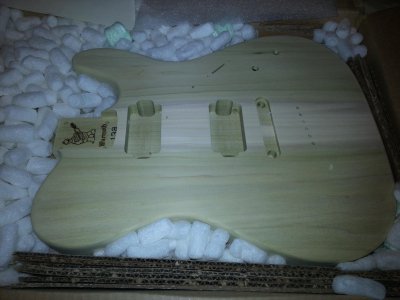
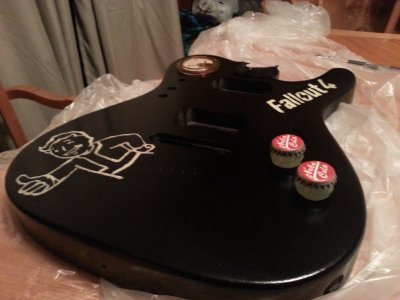
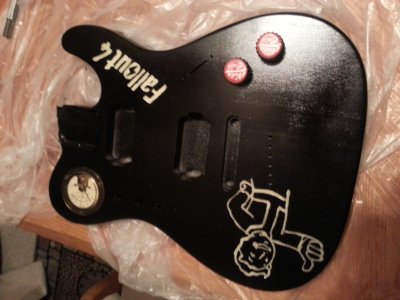
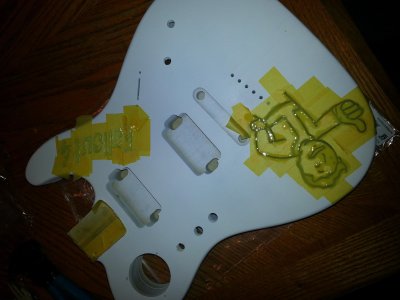
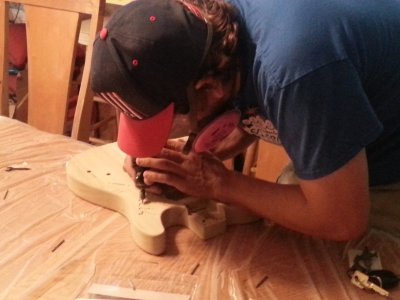
I'm currently nearing the finish line on my 5 month process of building my Fallout 4 guitar. I took photos along the way and tried to chronicle as much as I could with video, as well. Sadly, a lot of the videos were lost due to an SD card error. There's a link to my youtube below so, please check it out if you're in to the Fallout series and, obviously, Warmoth guitars.

https://www.youtube.com/channel/UCGVmtipI6C-WH4biGQamWJg
 

Attachments

  • 1.jpg
    1.jpg
    694.7 KB · Views: 10
  • 6.jpg
    6.jpg
    1.7 MB · Views: 35
  • 5.jpg
    5.jpg
    1.8 MB · Views: 58
  • 4.jpg
    4.jpg
    534.1 KB · Views: 20
  • 3.jpg
    3.jpg
    1.4 MB · Views: 11
  • 2.jpg
    2.jpg
    269.5 KB · Views: 10
Very original. I'm really curious to see it when complete. Did you try to let a repair program do its work on that SD card? I was able to recover a good deal of data when my SO trashed a card. She had the habit of doing a lot of editing on the card (deleting the not 100% successful pics, rotating upside down or sideways pics) before copying to HD (once it's on the HD it automatically gets backed up to a NAS AND to an offsite backup service). And that went dramatically wrong one day but the rescue software did an admirable job. There's no guarantee it will succeed but once you've copied everything that's still accesible to your PC there's not much to lose either.
 
Thank you for your interest! I'll be adding more videos to youtube, though none will be me doing the actual work, as they're gone forever. I appreciate your tips for recovering the data. Sadly, I've already exhausted my options at recovery. :( It's kind of sad that I lost my opportunity to show the first video of somebody combining the use of casting resin/glow powder and paint in the same project. Oh well, at least I took photos. I'll be attempting to put together a DIY instructional soon. I'll definitely follow up when more gets finished. I'll be making more guitar knobs today and will make a video of that. This forum has been a wealth of help to me, though I've never posted or asked direct questions as every question I ever had was already covered and I'm "that guy" that actually uses the search function. Lol
 
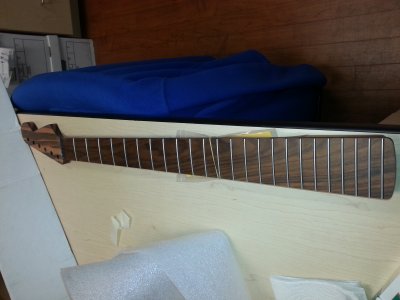
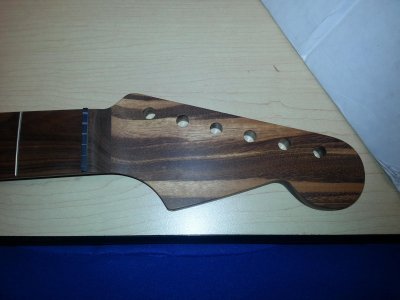
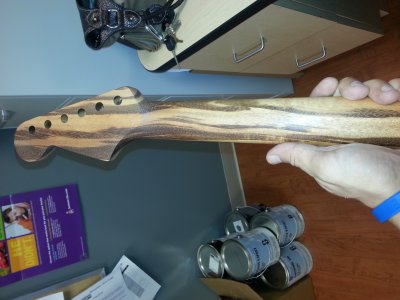
I forgot to mention that this is a baritone project and that I didn't post pics of my Zebrawood neck with Pau Ferro fretboard. I corrected the title of the thread. Here are a few neck pics.
 

Attachments

  • 20151104_140011.jpg
    20151104_140011.jpg
    1.7 MB · Views: 14
  • 20151104_140017.jpg
    20151104_140017.jpg
    689.5 KB · Views: 10
  • 20151104_140025.jpg
    20151104_140025.jpg
    1.8 MB · Views: 23
Not showing those neck pics before was an act of cruelty. Or maybe just very smart. I suspect that there are those who would kill for it. Man, what a looker. This is defintely going to be a very unique instrument when it's complete.
 
I was so pleasantly surprised when I unboxed this neck. The stock image they use to show Zebrawood necks don't do them justice, as it showed very little grain. I fell in love with this neck instantly. I've since purchased some Zebrawood guitar picks to go along with it lol
 
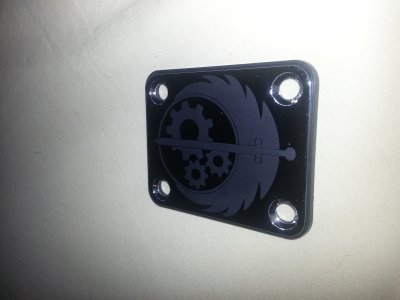
The drawing of Vault Boy and "Fallout 4" are routed in to the wood. I painstakingly routed them by hand with a Dremel tool and then filled the cavities with a mixture Glow Inc V-10 glow powder mixed with a clear casting resin. Thus, they glow in the dark. I stole this idea from a guy that made a really cool glow in the dark table using pecky cypress wood. Hardware will include Grover locking tuners, Tunomatic bridge, Lace "Dissonant Aggressors" pickups, Bourns Volume and Tone pots,  a custom neck plate that I had made (pictured below), and custom knobs that I made. I made the knobs by cutting the mouth off of glass Coca Cola bottles. I then secured some Nuka Cola bottle caps , purchased on Etsy, to the top and then filled them with the same glow powder/casting resin that I used to fill the routing on the guitar. It is a royal pain in the butt to make them but they came out pretty cool. I am trying to make several more before I take them to the drill press, as I figure I'll ruin a few lol. Also, I want at least two backups. I still have to make a custom backplate for the rear routing for the lights and Rad meter. With any luck, final assembly will begin on Wednesday!
 

Attachments

  • 1.jpg
    1.jpg
    1.9 MB · Views: 7
It is raw. I selected Zebrawood because I wanted a raw neck, having loved my old Warwick bass that had a raw neck. I didn't think it would be this pretty, though. That was such a pleasant bonus!
 
...I hadn't even considered it. However, I think it's high time I consider it greatly. I have plenty of sandpaper here. I have P400, P600, P800, P1000, P1200, P1500, and P2000 here for sure. I also have polishing pads and polish. I'm going to continue reading on that thread. Do you think it's worth doing? Any drawback that you can think of? I don't mind putting in the work at all.
 
Do I think it's worth doing? Yes. Matter of fact, reading that thread made me want to get a raw neck and burnish it. (You can see my neck on the final page.) Were I to embark on another Warmoth build I would do it again. Also: the work is minimal: approx. 90–100 minutes of polishing time. Can't recommend it highly enough.
 
Fantastic! I'll continue reading and give it a shot. I suppose that now is the time to do it, as it will be easier while disassembled.
 
There are no drawbacks other than the time it takes to do it. On the plus side, you'll have one of the finest-feeling necks you've ever played. I can't imagine not doing it.
 
Ok, so I'm at 1500 grit and it's still looking a little dull. It's CRAZY smooth but looks less pretty than before I started. Will it start to get shiny again at 2000 grit?
 
At 1500, it should be getting some shine on already. But, be aware that it's never going to look glossy. To see how fine the finish is, you have to look at it edge-on against something lighted to get the reflection.

IMG_1775_Sm.JPG
IMG_1778_Sm.JPG

IMG_1772_Sm.JPG
IMG_1777_Sm.JPG

IMG_1773_Sm.JPG
IMG_1776_Sm.JPG

When you look at it straight-on, it's basically just gonna look like raw wood.

Also, keep in mind that the finer the abrasive, the longer it takes to make a difference because your cuts are getting progressively smaller.

 
Well, I made it through P1500 before I realized that I've somehow misplaced all of my P2000. That's 8-10 sheets that are somehow missing. I suppose I'll have to finish tomorrow after a run to the store, assuming I don't locate them. As I mentioned before, I do have buffing pads and polish. Would this be counterproductive after I'm done sanding?
 
Actually, I've never tried polishing/buffing with an agent so I'm not sure what would happen. I can't imagine it improving anything, and you'd be left with a coating on the wood which may or may not be a Good Thing.
 
Back
Top