Leaderboard

First Build Thoughts

bobsessed

Junior Member
Messages
60
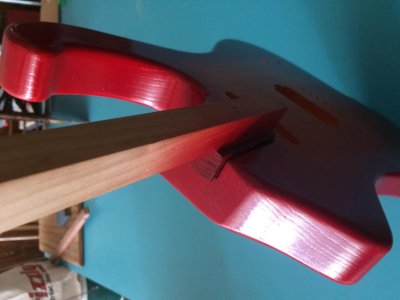
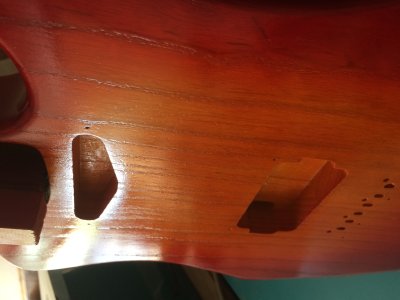
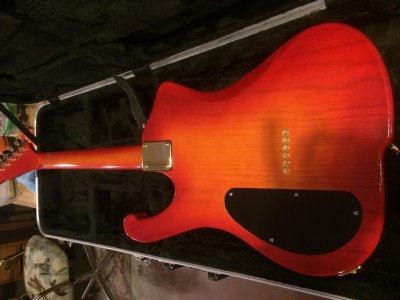
A few weeks ago I started a thread in "hardware" to get suggestions for bridge placement. Thanks to all who replied, I got the help I needed. Now....I've put multiple coats of nitro on the body and neck, using StewMac spray cans. The cans actually spray pretty well as long as you keep the paint warm and keep your technique consistent. I do believe though, that there is certainly an art to getting the body filler right. I gooped that slab of ash so thick that I thought I may never be able to sand it all off. Apparently I didn't manage to get the grain filled. I can't imagine what the result would have been if I hadn't used filler at all. The result is a body that shows much of the "low" lines of the grain, even after about 9 coats of color and clear. It actually looks good to me, but some may not like it. I've assembled a few guitars , but this is my first paint job. I've been working on it long enough now to get sick of waiting, so I'm gonna sand it a little and buff it out soon. I can't wait to assemble it and PLAY IT! Any thoughts or suggestions?
 

Attachments

  • IMG_0582.JPG
    IMG_0582.JPG
    488.6 KB · Views: 35
  • IMG_0583.JPG
    IMG_0583.JPG
    1.4 MB · Views: 47
What did you use for grain filler? It looks like whatever you used had too high a viscosity and so woudn't make it into the grain. Products for patching are like that. Or, perhaps just the opposite - it was far too thin and didn't fill at all.

Proper grain fillers are sorta like paint, but with a higher quantity and size of solids. The solids tend to fall out of solution and collect at the bottom of the can, so a thorough stirring is in order with lotsa scraping of the bottom and sides of the can. You should end up with something about the consistency of gravy. Otherwise, all you're applying to the wood is the filler's vehicle, which really doesn't fill at all.

Another thing is some woods, Ash in particular, have some pretty prominent grain. You might have to go three passes on that before the surface is really level.
 
Ran into the same problem the first time I tried to finish ash. It's easy to get filler to get in there, but it's the sheer depth that I found I underestimated. Giving it at least a second pass is definitely the way to go. FWIW, some clear fillers can be used on top of nitro paint, and then if you're going to clear coat it fully after that, it all blends in and you'd never notice the difference between filling then painting or painting then filling. (In fact Mayones make a range of finishes for their 'goth' models which are purposefully painted first and then coloured filler is used second.)

Though, personally, after using Wudtone for a few bodies I've come to just like having the grain unfilled. I still fill 'em when it's someone else's body, but for my own, I just go for paint + clear on ash now.

Keep it if you like it, certainly nothing wrong with doing so. If it ends up bothering you, look into clear filler to go between the paint and the clear coat. And of course worst comes to worst, you can always strip everything back and do the whole thing over.
 
I used the Color Tone water-based filler from StewMac. I mixed it to a peanut butter consistency and spread it on thick. When I sanded it, it looked like it was filled, but I guess you really can't tell by looking. I do like the way it turned out though. I wish it were flat, but by golly the next one will be. For now though, I'm going to polish it up a bit, put it together and play it. It has a few other blemishes, but 5 feet away most folks won't notice. Thanks for your encouragement! 
 
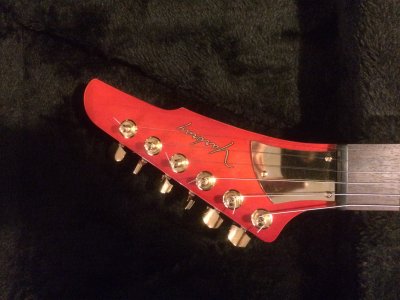
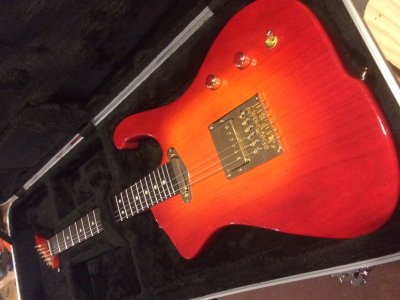
So I rubbed it out by hand. I was afraid to use the foam pads on my first job. I think it turned out great. Yeah I guess some won't like that I put my name on the head, but .....I did it. I fabbed a TR cover from a sheet of brass. Schaller M6 mini tuners, SS 6150 frets, Duncan p'ups, Switchcraft gizmo's.......and I haven't even plugged it in yet. The acoustic tone is great....it sounds good un-amplified. The frets will need polishing, but the thing intonates well even before a setup. Here are a few iPhone pics. Sorry, I thought my computer would "clock" my pics, but no.....they came out wonky.
 

Attachments

  • IMG_0598.JPG
    IMG_0598.JPG
    1.2 MB · Views: 18
  • IMG_0600.JPG
    IMG_0600.JPG
    1.2 MB · Views: 29
  • IMG_0601.JPG
    IMG_0601.JPG
    552.8 KB · Views: 13
Long story but......illness in the house. I want to get it into the Marshall....that will happen soon...
 
I understand and sympathize. In a similar situation myself at the moment.
 
So what should a person do about brand-new frets that don't feel .....shiny.....These SS frets are immaculately well done, I mean they're perfect, but they feel rough. Bending strings just feels and sounds gritty. Suppose those eraser deals work well? Or what?
 
Are you sure they're stainless? I've never heard that complaint about them before.

Myself, I go through a polishing process with gradually increasing grit abrasives until they're almost like little convex mirrors. Start with 600 grit, go through about 12-14 increasingly finer grades up to 18000 and finally polish them with MAAS metal polish. Takes a while, but in the end it feels like you're playing on greased glass.
 
Stainless 6150 is what I ordered from Warmoth, they look like stainless, and the neck is marked SS6150. These are my first stainless frets. Even though I've never actually worn out a set of frets, I just always wanted to try them.
 
Not in the traditional sense. They call them "polishing papers", and they're not really paper. They're more like an abrasive cloth. 3M makes the stuff, and it comes in two forms. The first they call polishing papers that run from the equivalent of 400 to 8000 grit. I usually only use up to the 4000 grit in that form, cut into strips and used to strop the frets.

In the second form they call it "MicroMesh", which goes much finer and the price jumps substantially. A set of that will run up to 12000 grit, and is used for polishing optical quality surfaces. While pricey, a set will last quite a while.

With those, i polish by riding from side to side on the frets, then lengthwise along the dressed ends. If your ends aren't dressed, you may want to avoid trying to polish them unless you wanna wreck some expensive abrasives.

Once that's done, they should look pretty damn nice, but the final step is to take some MAAS metal polish, and buff them out with that.

Note that the fretboard needs to be taped off for all this, or you'll make a mess of it.

If you don't like your frets after all that, then you just don't like frets  :laughing7:
 
I've seen the 3M papers at StewMac and around, but was skeptical, especially at those prices. To tell the truth, I'm just not really used to having my frets that pretty. I'd probably change my mind if they ever once got that way though. I just ordered some 1000 grit erasers. I'll try those and see if my strings quiet down when they bend across the frets. If that cuts that awful *ping*grunt*, then I'm okay. Thanks for that info!
 
Yeah, once you have a neck set up properly you get spoiled and nothing less will satisfy.
 
Just so we're clear here, I didn't touch his other three guitars  :laughing7:
 
Back
Top