Leaderboard

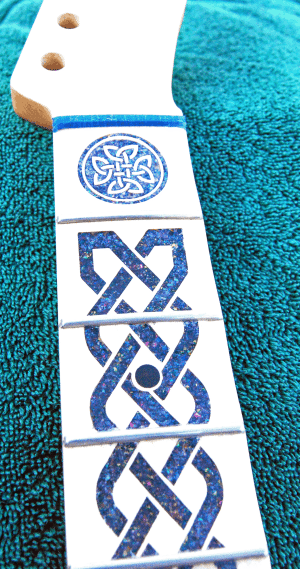
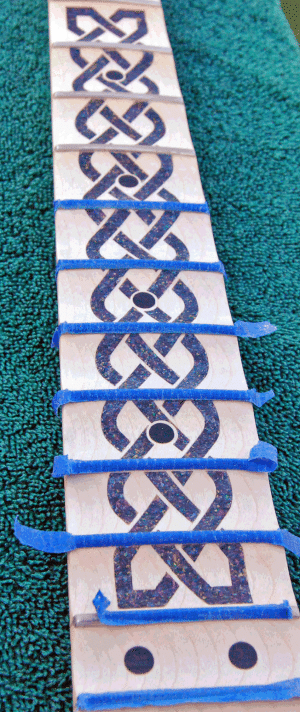
Engraving Inlay completed Time to Dye

JPOL007

Senior Member
Messages
470
After hours of sanding and hobby knife surgery...it's ready for dye. Had to remove C A glue buildup at the base of the frets with a hobby knife kit from Woodcrafters. Filled in any voids that showed wood through the crushed MOP.Then sanded everything to 400 grit finish.

Sanding the back of the neck and headstock tomorrow morning and applying dye. Decided to use TransTint Honey Amber and shoot for a vintage color finish. Sealing with shellac and then doing Tru-Oil top finish.
 

Attachments

  • Inlay Done 1.gif
    Inlay Done 1.gif
    1.7 MB · Views: 28
  • Inlay Done 2.gif
    Inlay Done 2.gif
    1,004.4 KB · Views: 22
Been watching this come together in another thread. Looks like a tremendous amount of time and effort went into that. That is truly, a magnificent result, great work!  :headbang:
 
BigSteve22 said:
Been watching this come together in another thread. Looks like a tremendous amount of time and effort went into that. That is truly, a magnificent result, great work!  :headbang:
Thanks, Now I just need to not screw up the color and finish coats. I'm a little nervous right now.
 
JPOL007 said:
BigSteve22 said:
Been watching this come together in another thread. Looks like a tremendous amount of time and effort went into that. That is truly, a magnificent result, great work!  :headbang:
Thanks, Now I just need to not screw up the color and finish coats. I'm a little nervous right now.

It is looking very good. Just take your time with the finish and you are on a home run.
 
Nice work!!! Your inlay is impeccable.
Boy I wish I could do inlay that good.
Guess I had better stick to lamination work. Very cool!!.
 
49peterbilt said:
Nice work!!! Your inlay is impeccable.
Boy I wish I could do inlay that good.
Guess I had better stick to lamination work. Very cool!!.
Thanks, This is my first time doing any kind of inlay work. Your lamination skills put you ahead of the curve if you want to try doing an inlay project. Check out the crushed materials videos on You-Tube...that's what I did.
 
stratamania said:
JPOL007 said:
BigSteve22 said:
Been watching this come together in another thread. Looks like a tremendous amount of time and effort went into that. That is truly, a magnificent result, great work!  :headbang:
Thanks, Now I just need to not screw up the color and finish coats. I'm a little nervous right now.

It is looking very good. Just take your time with the finish and you are on a home run.
Thanks, Spent the day yesterday with dye and denatured alcohol. This is going to be slow and steady.
 
A tiny spot at the heel that can't be seen once the neck is mounted is a great test.
That's what I ended up doing on my recent soloist build; I saw the heel accepted the stain well and then proceeded with the entire neck (otherwise I'd just have clear-coated it).
 
I couldn't tell from the other threads whether this is a Warmoth neck, and if so whether it was ordered without their penetrating sealer ? A test on the heel will tell you how the headstock/back of the neck will react, but parts of the neck that have been sanded (fingerboard?) will likely react quite differently (absorb more dye ?)
 
docteurseb said:
I couldn't tell from the other threads whether this is a Warmoth neck, and if so whether it was ordered without their penetrating sealer ? A test on the heel will tell you how the headstock/back of the neck will react, but parts of the neck that have been sanded (fingerboard?) will likely react quite differently (absorb more dye ?)
Thanks for the information. This is a WarMoth showcase neck that had a nitro satin finish. The finish has been sanded down to bare wood all over the neck. The idea to engrave the neck came after it arrived. Will plan better in the future and save some headaches.
 
Back
Top