Leaderboard

Drilling neck hole without a drill press

FARCrow

Newbie
Messages
11
Hey folks, I've received my first Warmoth neck (vintage modern, roasted maple, Rosewood fretboard, 10-16 compound radius, SS6150 wide & tall frets) to replace the neck on my Fender American Pro 2 Strat. I love the profile & finish of the stock neck, but can't get along with the narrow tall frets on it and I've had the guitar for over a year and a half. It's my favorite one to play, but all my other guitars are medium jumbo which I prefer so I got this Warmoth neck to address my fret size preference (we don't have any local Luthiers here in Kuwait so refretting isn't an option for me). I also took the opportunity to try my hand at dyeing my Warmoth neck to darken it to better match my Dark Night themed Strat (I never liked the bright yellow of the stock neck) with mixed results but that's a post for another day :LOL:

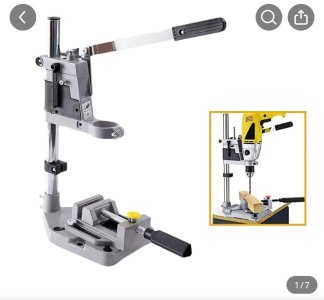
I took most people's advice and got HipShot locking tuners with the UMP plate to avoid drilling tuner screw holes, but due to the AM Pro 2 non-standard tapered heel I need to redrill one of the 4 holes for the offset one. I don't have a drill press and won't be doing enough drilling to warrant one. After researching different ways of drilling straight holes in the neck I found a possible solution that's seems to be a reasonable compromise between using a drill press or free hand drilling through the body (too risky with the possibility of damaging the body) and came across this drill guide which has a 1/8" guide hole for the neck screws:

Milescraft 1312 Drill Block - Handheld Drilling Guide
(can't post the link to Amazon probably cause I'm new?)

Anyone use this or something similar to drill straight neck holes accurately?e

Besides all the following:
  • Measuring the screws (smaller inside radius)
  • Measure the drill bits & taping off
  • Marking the hole using one of the screws through the existing neck hole
  • Then drilling using this drill block/guide, and
  • Using wax with the screws while tightening them very slowly

    Is there anything else I should be aware of or consider for my first neck swap/upgrade? I'd really appreciate any advice or tips.
 
Last edited:
I’ve used a similar product. For small holes where perfect verticality isn’t critical, like mounting tuners, it works fine. I wouldn’t use one for drilling holes to mount a bolt-on neck.

Bill, tgo
Was it not stable enough or where the holes alignment not accurate? What else would you use in that case?
 
Was it not stable enough or where the holes alignment not accurate? What else would you use in that case?

The little guide will never be as stable and accurate as a drill press. Getting neck mounting holes accurate is critical. I have a small desk-top drill press I got on Amazon for less than $100. In a pinch, if you have a Dremel, you can get a drill press attachment for under $50. Here’s a link to the one I use.


Bill, tgo
 
The little guide will never be as stable and accurate as a drill press. Getting neck mounting holes accurate is critical. I have a small desk-top drill press I got on Amazon for less than $100. In a pinch, if you have a Dremel, you can get a drill press attachment for under $50. Here’s a link to the one I use.
...
Bill, tgo

Thanks for the explanation and recommendations. Unfortunately I can't order those powered drill presses online (power compatibility and customs import issues) and can't find any locally, but when I searched for the Dremel attachment I found a manual drill press stand where you clamp on a regular drill and has a manual press that also comes with a vice. I'll give that a try and hopefully it'll be stable enough for this work.
 

Attachments

  • Screenshot_20250318_205336_Temu.jpg
    Screenshot_20250318_205336_Temu.jpg
    72 KB · Views: 2
I’m going to sound like a contrarian here but there’s no reason you couldn’t wing it, they don’t have to be perfectly straight to function. A drilling block would be fine. Put a little tape flag on the bit to mark your max depth and go for it.
 
Thanks for the explanation and recommendations. Unfortunately I can't order those powered drill presses online (power compatibility and customs import issues) and can't find any locally, but when I searched for the Dremel attachment I found a manual drill press stand where you clamp on a regular drill and has a manual press that also comes with a vice. I'll give that a try and hopefully it'll be stable enough for this work.

That looks perfect! And the above suggestion to mark the intended depth with tape on the drill bit is great advice. The “wing it”, not so much. Ask how many people here would buy a guitar they knew had off-vertical or off-center neck mounting screws? I’ve never read instructions, or seen a youtube, that advises drilling neck mounting holes freehand or just with one of those little guides. A drill press, like the one you found, is the way to go. Good luck with your project.

Bill, tgo
 
I’m going to sound like a contrarian here but there’s no reason you couldn’t wing it, they don’t have to be perfectly straight to function. A drilling block would be fine. Put a little tape flag on the bit to mark your max depth and go for it.

I've drilled neck holes by hand, with a hand drill many times. Here's one example, with a Fender Am Pro II, no less! (Neck stuff starts about the 5:45 mark.)

 
A drilling block would be fine. Put a little tape flag on the bit to mark your max depth and go for it.

Thanks for that reminder & tip Hodgo 🙏

I've drilled neck holes by hand, with a hand drill many times. Here's one example, with a Fender Am Pro II, no less! (Neck stuff starts about the 5:45 mark.)


Thanks a lot for that video Aaron. Very appropriate that you're doing the opposite here (using the AM Pro 2 neck on a Warmoth body) but just as relevant. You make it look quite easy using the neck plate as a guide essentially. I don't trust myself hand drilling as you did, but it's good to know it's possible and results in a playable guitar. Maybe when I get a few Warmoth builds under my belt (I'm sure this won't be my last neck, I've already got my eyes on an all rosewood neck for the future) :giggle:
 
Thanks for that reminder & tip Hodgo 🙏


Thanks a lot for that video Aaron. Very appropriate that you're doing the opposite here (using the AM Pro 2 neck on a Warmoth body) but just as relevant. You make it look quite easy using the neck plate as a guide essentially. I don't trust myself hand drilling as you did, but it's good to know it's possible and results in a playable guitar. Maybe when I get a few Warmoth builds under my belt (I'm sure this won't be my last neck, I've already got my eyes on an all rosewood neck for the future) :giggle:
You should check out Milehouse guitars on YouTube if you want to see a luthier winging nearly every step of a scratch build. It’s fun to get nerdy about this stuff, but there are very few critical dimensions on a guitar and Warmoth takes care of all of em extremely well. Keep in mind that guitars with one, two, and three screw designs exist and function just fine - the Fender four screw standard is extreme overkill as far as clamping forces are concerned.
 
You should check out Milehouse guitars on YouTube if you want to see a luthier winging nearly every step of a scratch build. It’s fun to get nerdy about this stuff, but there are very few critical dimensions on a guitar and Warmoth takes care of all of em extremely well. Keep in mind that guitars with one, two, and three screw designs exist and function just fine - the Fender four screw standard is extreme overkill as far as clamping forces are concerned.

Thanks I'll check 'em out. No doubt these things can be done on the fly by experienced luthiers or tinkerers as Aaron demonstrated, but now you've got me curious about experimenting with bolting it on with just 3 screws until my drill press arrives. Might test it out this weekend and see if the neck sits flat or not. I did check the other 3 screws alignment the other day and they're spot on 👍
 
Update: I got my manual drill press & vice today and while they were flimsy, they were good enough to do the job. I used @aarontunes above video (and a few others) to measure everything out correctly, drilled a 9/64" (3.5mm) neck screw hole and then used a countersink drill bit to round out the top of the hole (didn't even know what those were before buying this neck and watching a ton of Warmoth videos:ROFLMAO:). I almost forget to check the level of the neck before drilling, but remembered that last minute 😅 The other 3 holes fit and aligned perfectly!


Here's a review of my first Warmoth neck (roasted maple w/rosewood fretboard, vintage/modern, standard thin, 10-16 compound radius, 43mm nut, SS6150 wide & tall stainless steel frets):

- I was honestly really worried that it was overkill replacing the whole neck just to have different frets, but now I regret not splurging and getting a custom exotic wood neck instead and sooner (got my eye on a Wenge/Rosewood neck).
- Hipshot tuners with UMP dropped in easily with some minor reaming (probably from the paint coating). Thanks to all the people that recommended those on these forums!
- The wood feels and smells beautiful! My Fender AM Pro 2 satin neck was my best feeling neck, but the Warmoth neck trumps it hands down in terms of feel.
- I prefer the thinner profile, it will take me a little while to get used to it but I already feel it's a better fit for my small hands.
- Frets are all well leveled which I'm extremely grateful for.
- I love the wide & tall frets (great in-between size from the stock narrow-tall and the medium jumbos on all my other guitars).
- The stainless steel frets feel amazing while bending.
- Being my first compound radius neck, I must say I'm converted! Great for chord strumming and a beauty for bending (no fretting out on higher frets anymore!).
- I've managed to get the action on this neck down to 1.25mm low E, 1mm high E with capo at the 1st fret which is much lower than all my other guitars (1.5mm low E, 1.25mm high E). It's a whole new experience playing at such low action (less pressure for barre chords and less movement in general needed for legato).
- Neck holes fit & aligned perfectly (just needed to drill the off-set hole for the tapered heel).
- Neck fit easily, not as snug as the stock one, but that just made it easier to adjust the string alignment.
- Truss rod action was perfect and didn't need adjusting.
- I thought the stock Fender neck was a premium neck until I replaced it with this Warmoth that is just better in every way.
- Staining the neck was almost a disaster (learned after the fact that roasted maple doesn't take stains/dyes very well), but on the plus side I learned and practiced sanding the neck a lot! The end result while splotchy, matches the color theme of my guitar that I was going for, dark night, cloudy look. I much prefer it to the bright yellow of the stock neck (it's actually darker looking in person than in the photos).
- This Warmoth neck took my favorite guitar and made it even better by solving the uncomfortably narrow & tall frets. All the hype is well warranted. I dare say it's near perfect now 😍

Thanks to everyone for the recommendations in this thread and to the whole community for all the other helpful posts and info 😊🙏


Fender AM Pro 2 Strat (after Warmoth neck install):


Warmoth neck before staining:


Warmoth neck after staining:

 
Last edited:
Update: I got my manual drill press & vice today and while they were flimsy, they were good enough to do the job
Coward! Jk jk. That’s a beautiful guitar, I would’ve thought twice about whipping out the hand drill too (at least until my impatience got ahold of me).

Dyes are fickle beasts, but I think your neck came out great. Wood is imperfect.
 
Coward! Jk jk. That’s a beautiful guitar, I would’ve thought twice about whipping out the hand drill too (at least until my impatience got ahold of me).

Dyes are fickle beasts, but I think your neck came out great. Wood is imperfect.
No argument there 🤣 I hate drilling and whenever I had to do it, it rarely went well (usually because I get frustrated and impatient which leads to mistakes). So this was a real test of patience for me.

Glad how it all turned out in the end overall 😊
 
Last edited:
Did you use color dye or wood stain? Been curious... but haven't experimented.

I used Monty's Montypresso for the fingerboard (it also worked nice on the back of the neck if you just want a richer more vibrant natural wood color, turned it into a rich golden caramel).

For the headstock and back of neck:

- I initially used Minwax Polyshade (stain & poly finish) which was a horrible mistake. It's runny, difficult to apply on a neck, and didn't stain evenly. So I sanded the neck back down and tried this instead:

- Minwax Wood Finish (oil based stain) this worked a little better, easier to apply and more consistent.

- Then treated both the fingerboard and neck with Monty's Instrument Food (I also used it on another plain Maple neck that I had sanded off the gloss finish and applied this wax instead for an amazing natural satin smooth wood feel).

The overall result was still blotchy, from what I read and understood is that Roasted Maple specifically (unlike regular Maple) is more resistant to stains and dyes and the recommended approach is to finish first (with poly for eg.) and then dye on top of that to maintain the original wood grain. Hindsight and all that 😉

If I had to do it again, I'd probably have tried something more guitar wood specific and water based like StewMac's ColorTone Liquid Stain.
 
Drilling block worked perfectly for me. Of course I had to drill only one hole.

Thanks for sharing your experience and I'm glad that worked for you!

I actually ordered both but the drilling block took longer to arrive so ended up using the drilling press. I guess it just comes down to how skilled and comfortable you are with a drill and how accurate the drilling needs to be for the particular work you're doing.
 
Back
Top