Leaderboard

Contoured heel and neck screws?

Last Triumph

Senior Member
Messages
261
How do people deal with the issue that with a contoured heel, the neck plate does not sit parallel to the mounting surface of the neck and therefore the screw heads do not sit evenly in toe countersinks of the neck plate?

The rear of my VIP looks ugly as one half of the screw counter sunk head is sitting proud in the neck plate countersink hole, due to the angle of the contoured heal area.

Any ideas, or is it just one of those things you have to put accept with a contoured heel?
 
This is the only contoured heel I have. After tightening the screws, as much as I could by hand, it's hardly noticeable. Maybe the plastic inset/spacer/frame makes a difference.... Also, are you using shorter screws on the short side of the plate?
vAPtBBx.jpg
 
Yes, shorter screws, but the length doesn't change the angle they go through the plate, they;'re about 15 degrees out, which is about the contour of the heel.

Maybe the black hides it well on yours, but the machine screws (neck inserts) on my gold neck plate look terrible.
 
Logrinn said:
Do you have a picture of it?

Not currently, I've got it apart as I'm removing and plugging the neck insert threaded screws as I don't like them.

Imagine holding a neck plate in your had in the flat horizontal position with the screws hanging vertically below. Now angle the screws about 15 degrees and see what happens to the heads of the screws - one side sinks lower in the countersink of the neck plate, one side then stands proud and looks bad.

Maybe it's a combination of silver stainless machine screws standing out against a gold neck plate, in addition that the the machine screw heads are maybe not a a great match for the countersink in the neck plate.

When I've finished plugging the neck, I'll see what it looks like with conventional neck screws.

Out of interest, what size holes should I drill in the neck in prep for the neck screws to bite?
 
I've thought about this as well, regarding an upcoming build.  I decided to just ditch the neck plate completely and use ferrules for the neck bolts - that way I can have the contoured heel, and everything still be nice and level.  Also makes for a clean, sleek, modern look IMO.
 
Zebra's idea is a good one. I bought a set of these to use on a future project. I'll still use the threaded inserts but this will eliminate the odd angle.
s-l1600.jpg
 
Forgive me if I'm being dumb, but how do those solve the problem of the odd angle - the cup will sit flat against the contoured body face, whilst the screws will go through them perpendicular to the neck face, hence the odd angle will still exist as the tow elements are not on the same reference plane.

I can't ditch the neck plate as the previous one has left an imprint in the lacquer.

What size pilot holes should I drill in preparation for the neck screws?
 
Last Triumph said:
Forgive me if I'm being dumb, but how do those solve the problem of the odd angle - the cup will sit flat against the contoured body face, whilst the screws will go through them perpendicular to the neck face, hence the odd angle will still exist as the tow elements are not on the same reference plane.

I can't ditch the neck plate as the previous one has left an imprint in the lacquer.

What size pilot holes should I drill in preparation for the neck screws?

Holes are drilled for the ferrules, which are inserted into the wood.

https://imgur.com/kAqeoYQ

That pic is of a Godin Freeway I used to have.  Most comfortable neck joint I've experienced.

I understand why it wouldn't be a viable solution for you with this current project - I know that an imprint from a previously installed neck plate would drive my OCD-infected mind crazy!  Just something to consider for future builds.  :icon_thumright:
 
This one of mine has the contoured heel and an angled pocket, which increases the effect. This photo is from the wrong (more 'flattering') side, but it's really not that noticeable.

idA3gsQ.jpg


Last Triumph said:
Forgive me if I'm being dumb, but how do those solve the problem of the odd angle - the cup will sit flat against the contoured body face, whilst the screws will go through them perpendicular to the neck face, hence the odd angle will still exist as the tow elements are not on the same reference plane...

Because you rebate them parallel to the neck pocket face, like this:

rLzqVYv.jpg


(From Tomatonator's recent build thread - hope he doesn't mind me using the photo, but it's a nice example.)

Last Triumph said:
...What size pilot holes should I drill in preparation for the neck screws?

I think 1/8" is the norm for #8 screws, but wait for confirmation from someone who doesn't make a habit of just saying the first thing that comes to mind!
 
Pete is right about insetting those ferules so the screws are going into them straight. If you already have marks in the clear coat from the neck plate, though, I can see why you might not want to use them.

I measured the pilot holes in the Warmoth neck I have waiting to get drilled for the threaded inserts and they measured .120 - .127 which would put them at about 1/8".

This Bolt Depot chart shows a pilot hole for a #8 wood screw to be 1/8".

Be sure to use beeswax or the equivalent on the screws before you screw them in for the first time.

 
Zebra said:
Last Triumph said:
Forgive me if I'm being dumb, but how do those solve the problem of the odd angle - the cup will sit flat against the contoured body face, whilst the screws will go through them perpendicular to the neck face, hence the odd angle will still exist as the tow elements are not on the same reference plane.

I can't ditch the neck plate as the previous one has left an imprint in the lacquer.

What size pilot holes should I drill in preparation for the neck screws?

Holes are drilled for the ferrules, which are inserted into the wood.

https://imgur.com/kAqeoYQ

That pic is of a Godin Freeway I used to have.  Most comfortable neck joint I've experienced.

I understand why it wouldn't be a viable solution for you with this current project - I know that an imprint from a previously installed neck plate would drive my OCD-infected mind crazy!  Just something to consider for future builds.  :icon_thumright:

The other factor is that it already has a finish, so unless it was utterly perfectly flush with zero gap between the ferrule and the body, it would show naked wood which would be terrible.

Plus, I also have holes in the neck pocket making it difficult to centre a Forstner bit.

When I drill the pilot holes in the neck for conventional screws, what size should I make the pilot hole?
 
I'm having trouble getting the neck screws sold by Warmoth for contoured neck heels go all the way into a curved-top Tele.

Has anyone tried installing threaded inserts for a neck bolted onto a contoured heel? Could the threaded inserts be installed at an angle, allowing the bolts to be square relative to the neck plate? I think the holes in the body would need to be plugged, or ideally start with no holes at all. Is there a professional builder that offers this as a service?
 
There's no angle involved, per se. Whether you use wood screws as per standard or machine screws with threaded inserts, they both have to go in at 90° to the neck. It also doesn't matter if the body top is carved. But, in the case of a contoured heel, two of the screws are 1 1/2" long, and two are 1 3/4". Otherwise, all 4 are 1 3/4" long.

If you use threaded inserts and machine screws, the 90° angle is critical. If it's not perfect, the inserts will cross-thread and start a waking nightmare. This is why it's important to use a drill press and great care installing them. It's not hard to do; I've done it hundreds of times. You just have to be careful.

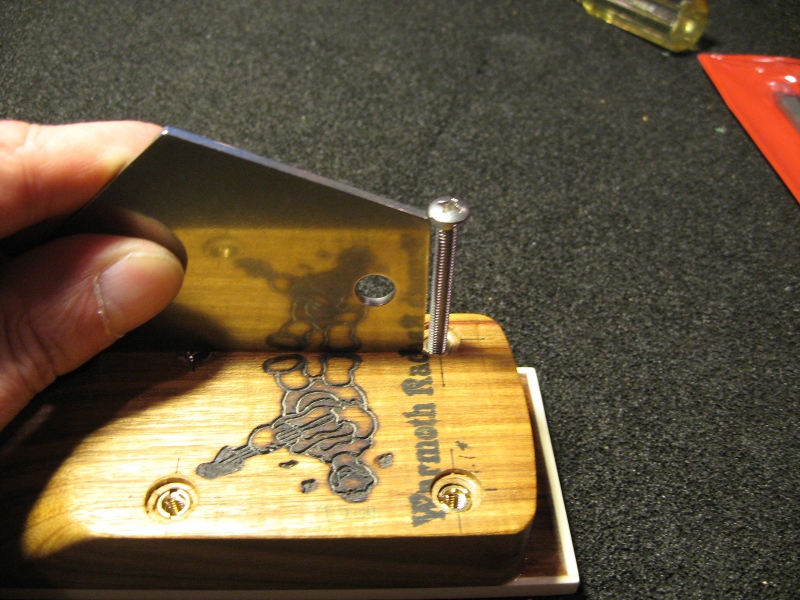
If you've got the inserts installed already, try threading in a screw to the neck heel before it's attached, and check it with something square to make sure they went in right...

IMG_2863_Sm.JPG
IMG_2862_Sm.JPG

If the screw doesn't want to go into the insert properly even with the neck off the body, then you've got other problems with the inserts. For instance, it's possible the hole wasn't drilled deep enough, or the worst case - the threads in the insert or bad for some reason. If that's the case, the insert will have to be replaced.

It's also possible the spacing of the inserts is slightly out of dimension with the spacing of the holes in the body. If that's the case, you may be able to just open up the thru-holes in the body a little bit. The screw shouldn't thread in the body at all - that's supposed to be a clearance hole. It'll be slightly larger than 1/8" (about 5/32" or 11/64"), so the screw will basically just about drop through were it not for the head.

If you need to have it done, PM me. I know a guy who knows a guy who does that sort of thing here all the time  :laughing7:
 
I think the question aguyinaustintx was asking is if anyone has deliberately put threaded inserts in at an angle so the heads sit in the neck plate without issue.

If that was done the angles needed would need to be extremely precise. Probably a world of potential frustration to get it right.
 
On review, I think you'r right. I misunderstood. And you're right on the solution, too.
 
Another possibility might be using a Dremel within a neck plate that is thick enough to allow the higher edge of the screw to sit slightly lower relatively than at the other end.
 
Correct, Stratamania. I was wondering if the routes for the bolts could be drilled square to the neck plate on a contoured heel. They would enter the neck at the angle of the contoured heel (93 degrees?). The "upper" neck plate holes would need to be driller farther from the edge than normal, so that the end of the bolts stay inside the neck. Something like the following:

contoured-heel2.png


Regarding precision, pilot holes could be drilled through the body and into the neck while the two were held together -- perhaps with dual-sided tape. Also, a jig of some kind would be needed to hold the neck plate area square to the drill bit. I don't have a drill press, and was wondering if someone has already done this.
 
I am sure if someone jigged up for it and did some prototyping it would be possible. But for the person assembling from premade parts, I think it might be a step too far. You would probably need a body and neck without holes as a starting point. I would think it unlikely anyone has done it.

One thing I did think about was a neck joint that Anderson does that only relies on two machine screws, but the joint itself is quite different. I don't know if the machine screws are angled or not.
 
Back
Top