Started doing some work on my soloist body today.
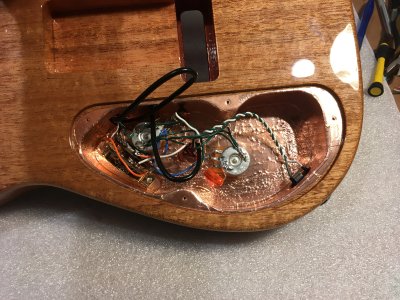
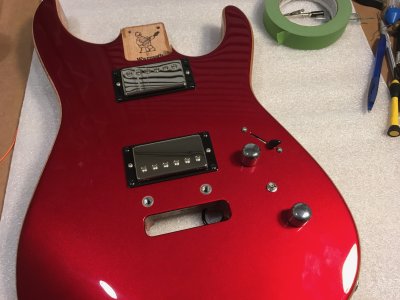
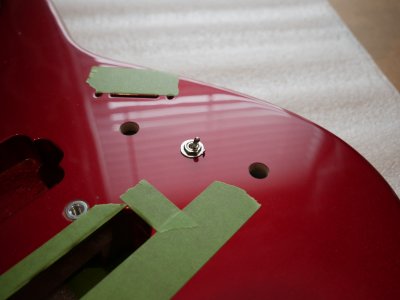
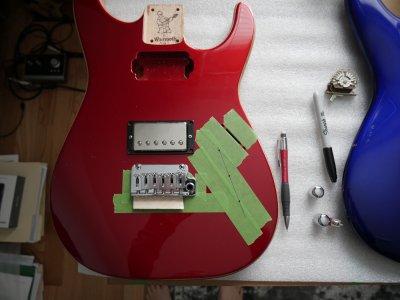
I don't like the standard Strat placement of volume knob so I had Warmoth not drill the knobs. I had no way of making a selector switch slot so I did have them put that in. Laid out the holes in similar layout to my (old) Ibanez 540r. I think Jacksons, Chavels and many others have a similar volume knob placement. I added a switch to split the neck humbucker. I'm copying Suhr's Pete Thorn pickup wiring except I decided to make the switch separate instead of a push-pull.
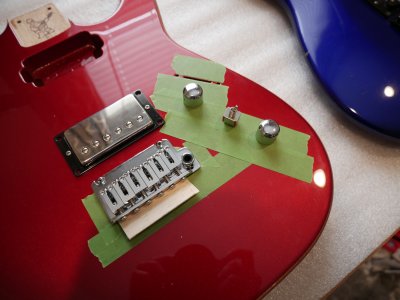
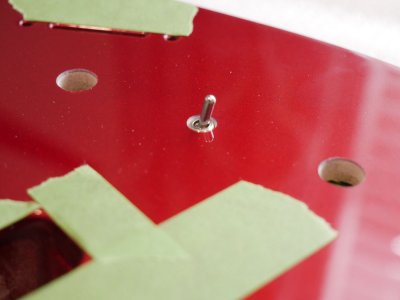
Drilled the holes using drill bits for acrylic. They cut through the clear coat and paint nice and clean. But the holes were too tight to fit in the pots (3/8") and switch (1/4") so I rolled up some sandpaper and within a few minutes they all fit perfect.
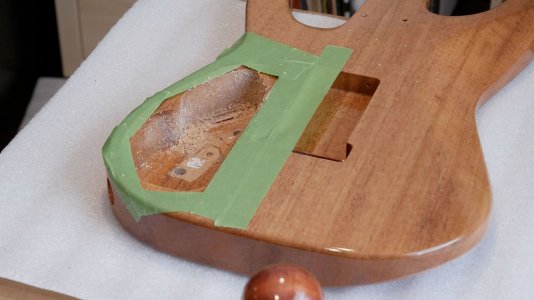
This my first build and I'm finding out all different parts from different sources don't really have consistent or reliable measurements. Example is the DPDT mini switch. The shaft isn't long enough to penetrate the body. Sooo I looked all over the internet for a longer one but couldnt find one. Some specs I saw out there were only about 2mm longer than what I had and that still wasnt going to cut it.
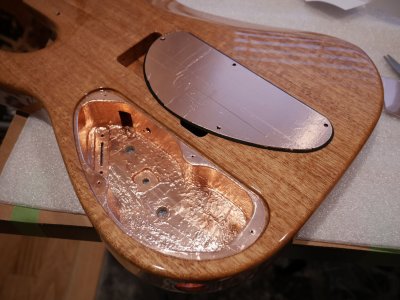
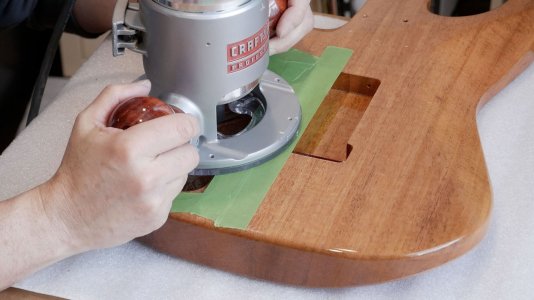
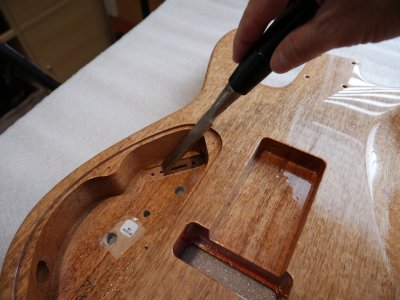
I considered many things including sanding the crap out of the cavity but I decided to route out the area since I have one. Was very apprehensive about it, but it literally took 2 minutes to do. Once I was done I kind of wanted to do the entire surface of the cavity to just smooth it it out and clean it up. It ships in really rough.
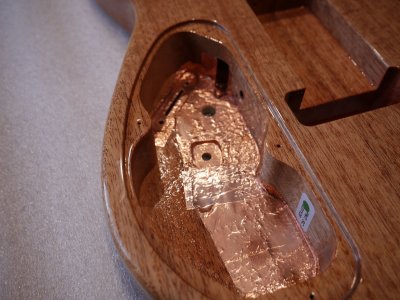
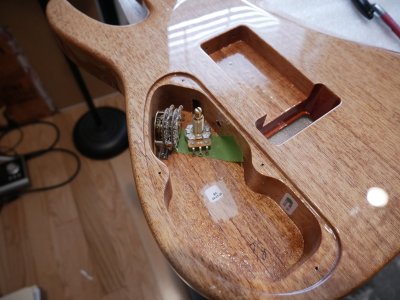
Next up was to add the shielding. Debatable whether it makes a difference or not, but it's cheap and everything is wide open.
So next up this week is wiring. Also waiting for chrome electroform headstock stickers to arrive from china. I've got 2 coats of laquer on the headstock so it's ready to go. Have done a bunch of practice on some scrap wood and have been able to polish it up to a mirror, so I'm kind of excited to see how the real thing will come out.
Hopefully this information will helps someone in the future like many of these posts have helped me.
I don't like the standard Strat placement of volume knob so I had Warmoth not drill the knobs. I had no way of making a selector switch slot so I did have them put that in. Laid out the holes in similar layout to my (old) Ibanez 540r. I think Jacksons, Chavels and many others have a similar volume knob placement. I added a switch to split the neck humbucker. I'm copying Suhr's Pete Thorn pickup wiring except I decided to make the switch separate instead of a push-pull.
Drilled the holes using drill bits for acrylic. They cut through the clear coat and paint nice and clean. But the holes were too tight to fit in the pots (3/8") and switch (1/4") so I rolled up some sandpaper and within a few minutes they all fit perfect.
This my first build and I'm finding out all different parts from different sources don't really have consistent or reliable measurements. Example is the DPDT mini switch. The shaft isn't long enough to penetrate the body. Sooo I looked all over the internet for a longer one but couldnt find one. Some specs I saw out there were only about 2mm longer than what I had and that still wasnt going to cut it.
I considered many things including sanding the crap out of the cavity but I decided to route out the area since I have one. Was very apprehensive about it, but it literally took 2 minutes to do. Once I was done I kind of wanted to do the entire surface of the cavity to just smooth it it out and clean it up. It ships in really rough.
Next up was to add the shielding. Debatable whether it makes a difference or not, but it's cheap and everything is wide open.
So next up this week is wiring. Also waiting for chrome electroform headstock stickers to arrive from china. I've got 2 coats of laquer on the headstock so it's ready to go. Have done a bunch of practice on some scrap wood and have been able to polish it up to a mirror, so I'm kind of excited to see how the real thing will come out.
Hopefully this information will helps someone in the future like many of these posts have helped me.
Attachments
-
 Cavity work - 01.jpg273.9 KB · Views: 22
 -
 Cavity work - 10.jpg359.4 KB · Views: 18
 -
 Cavity work - 09.jpg336.5 KB · Views: 16
 -
 Cavity work - 08.jpg177.6 KB · Views: 14
 -
 Cavity work - 07.jpg210.2 KB · Views: 18
 -
 Cavity work - 06.jpg221.3 KB · Views: 15
 -
 Cavity work - 05.jpg176.8 KB · Views: 12
 -
 Cavity work - 04.jpg360.9 KB · Views: 13
 -
 Cavity work - 03.jpg264.1 KB · Views: 15
 -
 Cavity work - 02.jpg347.6 KB · Views: 18