WindsurfMaui
Senior Member
- Messages
- 329
I'm documenting my boatneck sanding project I have mentioned in other threads that my vintage/modern boatneck has a different neck shape than my modern build boatneck. The 1 piece vintage/modern starts the boatneck V just under the top of the fret board and runs in an almost straight line, with a little soft arc, to the skunk stripe which acts as the base of the V. The modern build has more of a D shape that starts under the seam of the fret board and has a strong arc to the an almost flat bottom except for the protrusion of a V bottom from the middle of the D shape. This difference was a great disappointment to me. I love the "hard" V shape of the 1 piece vintage/modern but always wanted an ebony (Black) Strat neck so thought an Ebony over roasted maple would feel exactly the same as the vintage/modern shape. It isn't . So I am taking sand paper in hand and am trying to custom shape the modern build neck. I will document the phases here.
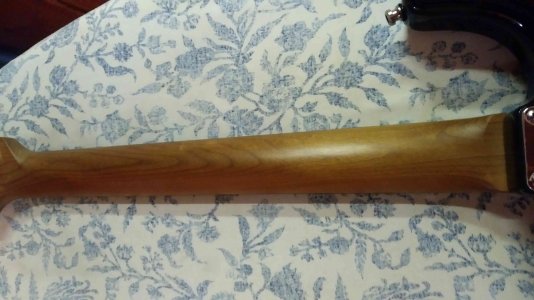
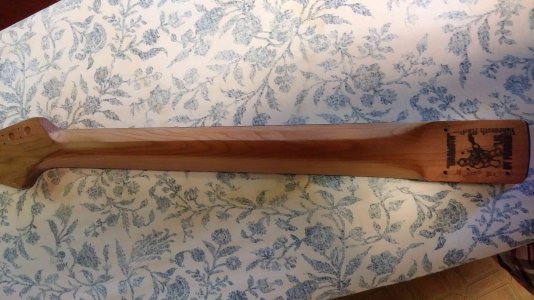
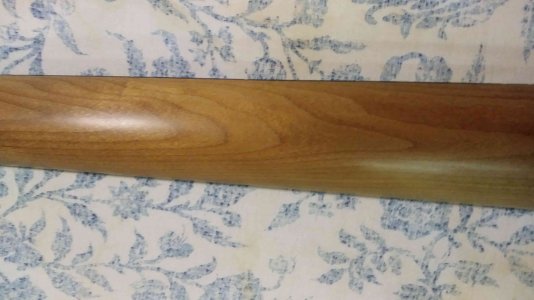
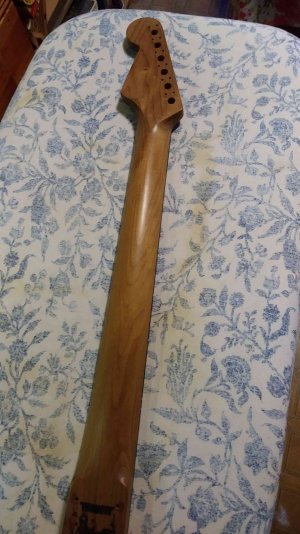
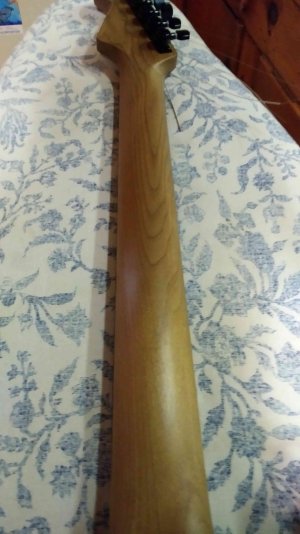
Since I am not very handy with tools I decided to take a number of days to do this project. Sanding needs to be done cautiously and purposely because I was afraid I would either take too much off or maybe worse sand the neck unevenly and have a low spot some where along the neck. I started day 1 with 150 grit sand paper and a stiff non wood sanding block. Using full length strokes of the neck on each side. stopping every 10 strokes to feel the neck to make sure no mistakes were being made. I started near the seam between the finger board and the shaft. This would take down a little more of the shoulders. I had hoped to mimic the vintage/modern build profile and start the V just around where the side dots are but this ebony is a very hard wood and no matter how much I sand it nothing seems to be removed. So I took the shoulders down after the seam a little and then tried to flatten the hard arc leading to the bottom of the neck into more of a straight line. After about an hour of sanding it started to feel like the shape was changing. I spend the rest of the night just feeling the neck and feeling I had made good progress. However, when I woke up the next day the neck felt like it had returned to it's original shape and nothing had been removed. Almost like it grew back over night. Although obviously something had been done because you can see in the enclosed pictures the full colored neck and the neck where only the "skunk stripe" of original shading is still on the bottom of the neck.
Day 2 I started sanding the lower part of the neck to flatten the arc more and again with 150 grit sand paper after an hour it started to feel like the vintage/modern build shape. I was quite happy and thought rather than rush the process to stop there and spend a day just feeling the neck to make a good assessment of how much more needed to be done.
I then decided to try and work on softening the top of the finger board sharp edge. I decide to do this on the bass side only since that is where the pain is and I won't be bothered by a curled edge there since I don't plan on doing any string bending on the 6th string. I started with sandpaper but didn't seem to get anywhere at all. Then I tried the razor blade edge technique and that didn't seem to get anywhere either. I want to be cautious that I only roll the edge of the board and don't change the shape of the board. Sometimes when I feel those edges I feel they are a little softer and other times they feel as sharp as always. Again I went to bed thinking I had made good progress and woke up to feel that although there is a change in the shape it wasn't nearly as much change as I had felt the night before. I decide to take a day off and will resume the sanding tomorrow.
I have attached a couple of photos. The before sanding and the after sanding where only the "skunk stripe" of the previous finish of the roasted maple is apparent. It is hard to capture the shape differences by camera When I take a measure of the circumference of the neck at various frets along the neck the differences in the before and after are less than a millimetre. But the neck does feel different although it feels like a lot more has to be done.
I want to say that hand sanding is very therapeutic. It makes me forget about the quarantine and all the other issues in the world. After I finish this project I may just buy a couple of very cheap unfinished maple necks and hand sand them down to tooth picks just for the fun of it. :>)