Tonar8352
Hero Member
- Messages
- 2,199
Here is a 3.11 oz single piece alder body that is being finished in a 1960 vintage style 3 tone sunburst. In order to reproduce the finish accurately the wood has to be bleached. This is the body reprofiled and with the dowel pins added.

Here is the bleach I use. Part A starts the process and part B neutralizes the wood so it can be stained. Notice I mark eveything to keep it seperated since you do not want to mix the 2 parts. Make sure to follow the directions and use rubber gloves. This stuff will burn your skin and turn it as white as snow.

Here it is with part A. The wood gets really dark at this point but it is ok.

Here it is still wet with the B component. Notice how much lighter it is and it is still wet. I will let it hang overnight and add pictures of it right before I stain it and contine with pictures throught the bursting process.
Peace to you all!

Here it is after the bleach has done it's work. I have lightly sanded it to clean it up and the stain is next.

Here is the yellow stain. The first time I did this I freaked out because the yellow seemed so bright. It will look great after the burst is shot.

Here it is with the black edge. The red will get shot tomorrow,

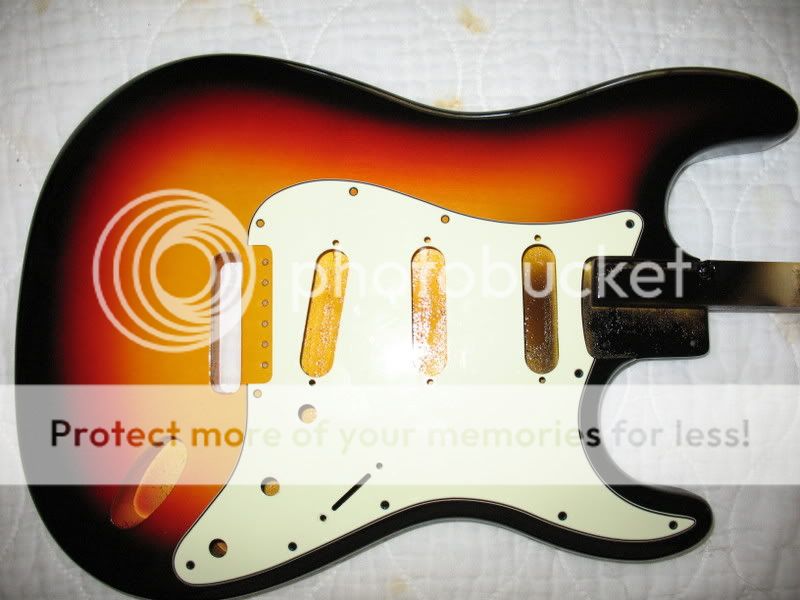
And the red. Now all it need is 4 coats of clear and a polish and she will be ready to be put together.

Here is the bleach I use. Part A starts the process and part B neutralizes the wood so it can be stained. Notice I mark eveything to keep it seperated since you do not want to mix the 2 parts. Make sure to follow the directions and use rubber gloves. This stuff will burn your skin and turn it as white as snow.
Here it is with part A. The wood gets really dark at this point but it is ok.
Here it is still wet with the B component. Notice how much lighter it is and it is still wet. I will let it hang overnight and add pictures of it right before I stain it and contine with pictures throught the bursting process.
Peace to you all!
Here it is after the bleach has done it's work. I have lightly sanded it to clean it up and the stain is next.
Here is the yellow stain. The first time I did this I freaked out because the yellow seemed so bright. It will look great after the burst is shot.
Here it is with the black edge. The red will get shot tomorrow,
And the red. Now all it need is 4 coats of clear and a polish and she will be ready to be put together.
")