70s Vibe Pentatonic....Caster?

kevin_guitars

Junior Member
Messages
74
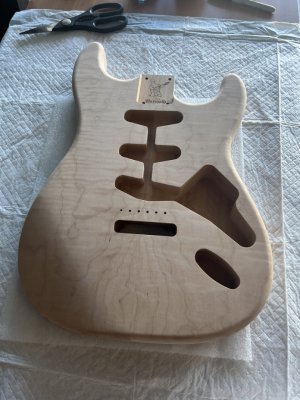
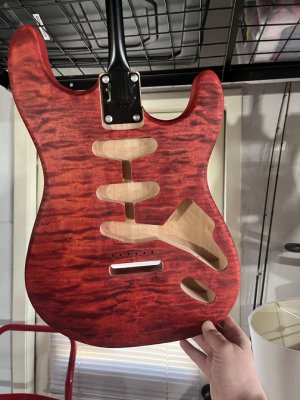
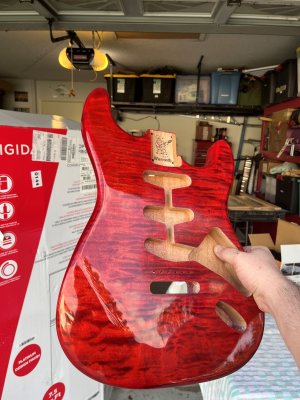
Showcase "screaming deal" Strat
Alder body
Flame maple top
Somehow I snagged one where the flame top was cheaper than showcase bodies without
*Unfinished

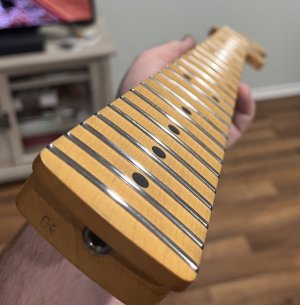
Showcase CBS Strat Neck
Maple Shaft/Maple board
Stainless frets, standard thin profile 10"-16"
I opted to have Warmoth apply a satin tinted nitro to the neck on this one

My buddy and I both are making very no frills, straight to the point, slightly hot rodded Strats. Going for tones like Mayer, or SRV. He's calling his a blues-caster. I'm settled on Penta-caster. We joke that there will be only one scale played on them. I've made some good headway this week on the Strat, while also doing my Z-body build. Many late nights after work in the garage.

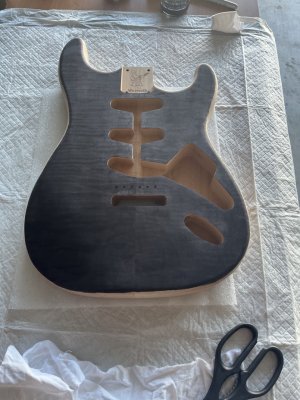
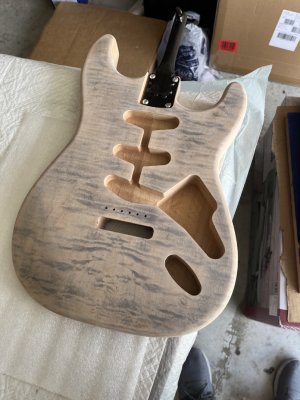
First up is to dye the top black and sand it back to sink into the flame. For this I used undiluted Rit Dye
 

Attachments

  • IMG_7755 Large.jpeg
    IMG_7755 Large.jpeg
    303.6 KB · Views: 62
  • IMG_7756 Large.jpeg
    IMG_7756 Large.jpeg
    319.2 KB · Views: 29
  • IMG_7770 Large.jpeg
    IMG_7770 Large.jpeg
    286.3 KB · Views: 31
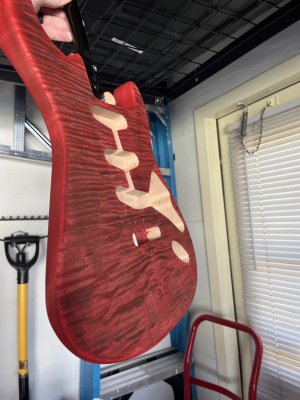
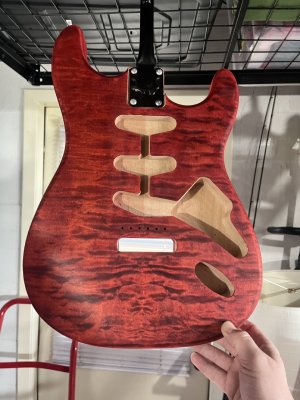
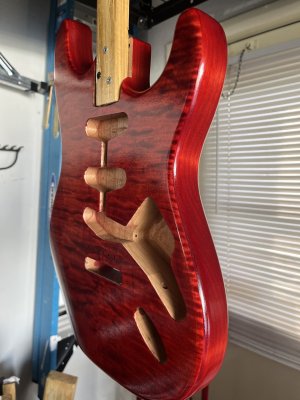
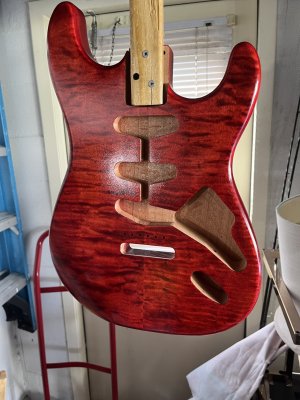
Next was Keda Crimson Red liquid dye with denatured alcohol on the top, sides and back. I want the back and sides to have the slight variation in red across the end grain. I then sanded the top back and applied a coat of Keda Powder Yellow. Then I sanded that back and applied a third pass with Transtint liquid diluted to be almost pink. The combination of colors stacks up in the flame nicely, can't really see in the photo but it presents red but as you move the body around the flame top give a lot of movement with orange and multiple shades of red and brown.
 

Attachments

  • IMG_7771 Large.jpeg
    IMG_7771 Large.jpeg
    264.4 KB · Views: 31
  • IMG_7772 Large.jpeg
    IMG_7772 Large.jpeg
    247.6 KB · Views: 28
  • IMG_7841 Large.jpeg
    IMG_7841 Large.jpeg
    279.5 KB · Views: 30
  • IMG_7839 Large.jpeg
    IMG_7839 Large.jpeg
    296 KB · Views: 32
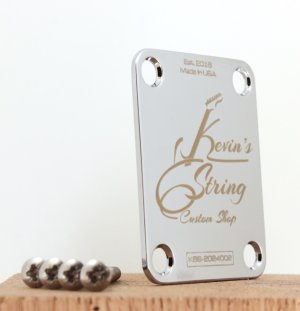
I always intended to do a custom neck plate for the Tele build I did back in 2016 so during the 1-2 month waiting period for my Warmoth order to come in I had some fun and designed a logo for "Kevin's 6 String" custom shop. It's cheesy I know. I found a guy on Etsy who does actual laser engraving (not etching like many of them) and he was able to make me 3 amazing plates for the old Tele, this red Strat, and the Z-body build in my other thread.

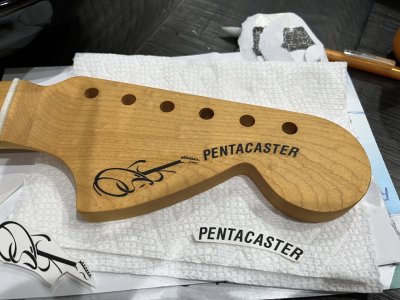
I decided to take the little logo, turn it on its side, and print a waterslide decal for the headstock. When I finish the body I'll throw some coats on the front of the headstock to busy the edge of the decal.
 

Attachments

  • IMG_7598.jpeg
    IMG_7598.jpeg
    93.1 KB · Views: 32
  • IMG_7825 Large.jpeg
    IMG_7825 Large.jpeg
    340.7 KB · Views: 35
Next was Keda Crimson Red liquid dye with denatured alcohol on the top, sides and back. I want the back and sides to have the slight variation in red across the end grain. I then sanded the top back and applied a coat of Keda Powder Yellow. Then I sanded that back and applied a third pass with Transtint liquid diluted to be almost pink. The combination of colors stacks up in the flame nicely, can't really see in the photo but it presents red but as you move the body around the flame top give a lot of movement with orange and multiple shades of red and brown.
Doing a great job. Should we be at all concerned about your installation of a "cage" ceiling structure? I mean you don't keep any people in there right?
 
I’m not going to complain though she encourages me and my guitar addiction so she can have all the decorations that she wants as far as I’m concerned
 
I’m not going to complain though she encourages me and my guitar addiction so she can have all the decorations that she wants as far as I’m concerned
I have a holiday illumination problem myself so I totally get it. I have weaned myself off of the mechanical moving reindeer on the roof however, so progress is being made!!
 
Well at least the neighbors weren’t taunting you and you fell off the roof putting him up.
Ya, no more roof or winding them up 40ft in the oak tree after wife saw me slip on roof/ladder getting down. Thats all in the past now!😂
 
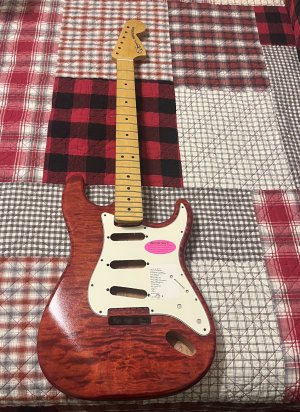
4 coats of sanding sealer and 10 thin coats of nitro all done. I battled some blushing along the way because it's so damn humid here in Florida. Now it's time to wait about a month to cure before I wet sand but I snapped a quick picture of it laid out with the neck and parchment pick guard to get a sneak peak of how I hope it all comes out in the end.
 

Attachments

  • IMG_7933.JPG
    IMG_7933.JPG
    800.3 KB · Views: 28
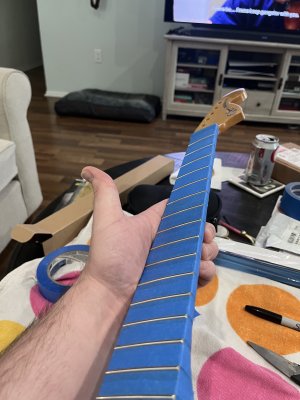
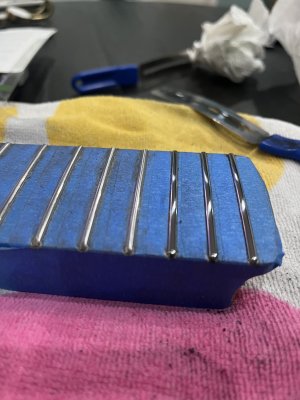
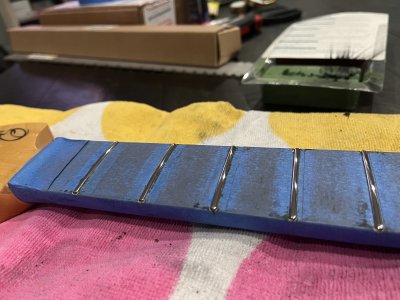
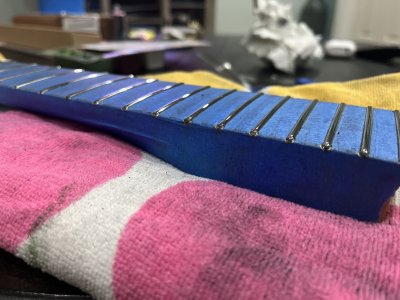
Update: I have about 2 more weeks for the nitro to dry so last night I took to the frets.
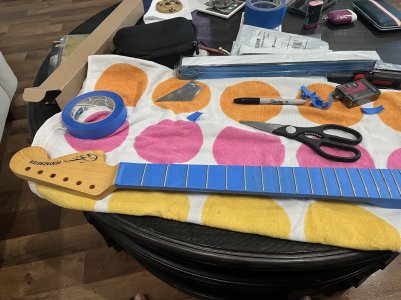
1) squared up the neck with a notched straight edge
2) taped up the frets -- this took an hour :|
3) Sharpie and fret level w/ 240 grit then 400 grit
4) Crowned frets with Hosco file. I read online how stainless wears out tools so not sure how long or how many necks I can do with a new file like this?
5) Dressed fret ends as best as I could. Not factory perfect ball ends but I've never done this before so I'm happy with it
6) Sand frets in grits working my way from 800 all the way to 1500 grit
7) Dremel time with some green jewelers rouge I use at my job (I make eyeglasses for a living)
8) Holy crap the stainless turns to a mirror and feels like ice under my fingernail when done!

**Last pic here shows frets after sanding before polish on the left and after polish on the right**
 

Attachments

  • tape job.JPG
    tape job.JPG
    714.2 KB · Views: 13
  • tqpe.JPG
    tqpe.JPG
    617.2 KB · Views: 15
  • half and half.JPG
    half and half.JPG
    661.1 KB · Views: 14
Few more pics of the job all done there is still some black residue from polish on the last pic before I wiped it down. My only experience with this is a long time ago with the Telecaster in my profile pic and I was not as thorough, also those frets were nickel. I learned a bit of technique I'm looking forward to applying on the neck for the Z Body project I have in my other thread.
 

Attachments

  • shiniy.JPG
    shiniy.JPG
    693.4 KB · Views: 14
  • shiny.JPG
    shiny.JPG
    643.4 KB · Views: 16
  • untaped.JPG
    untaped.JPG
    585.6 KB · Views: 26
Last edited:
Alrighty time went by fast and I got 3 1/2 weeks of dry time on the Nitro so time to get to work.

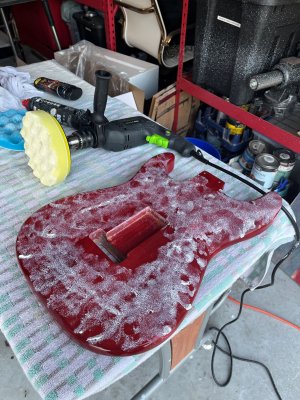
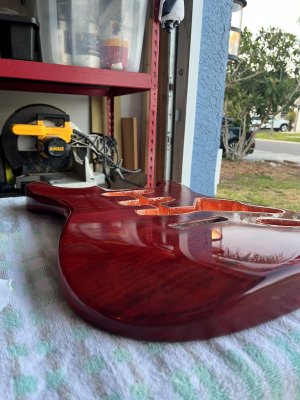
Wet sanded from 600, 800, 1000, 1500, 2000, and then 2500** Then got out my trusty Harbor Freight Drill with a buffing chuck adapter (I save my nicer drills for actual housework) and buffed it with 2500 rated medium cut compound. Followed by Mcguires Scratch and Swirl remover. I also did the old copper tape routine cutting and fitting into all the nooks and crannies.

**I had to go back and redo all of this because I started with 800 grit wet sanding and I'll be darned if there wasn't dozens of little orange peel marks leftover. Not many, I don't think anyone but me would notice and it was annoying doing it all over again but well worth it in the end. I don't know how I missed it along the way but starting at 600 did the trick. I've only done 1 Warmoth build before finished in Truoil so I had no experience with Nitro. I'm sure others have a better buffing mechanism than me and would have worked around it but for me starting at 600 grit is the lesson learned. That and be patient and willing to go back 10 steps to make it perfect.
 

Attachments

  • IMG_8110.jpg
    IMG_8110.jpg
    964.9 KB · Views: 18
  • IMG_8122.jpg
    IMG_8122.jpg
    799.9 KB · Views: 18
  • IMG_8123.jpg
    IMG_8123.jpg
    733 KB · Views: 18
  • IMG_8124.jpg
    IMG_8124.jpg
    958.1 KB · Views: 18
Last edited:
Back
Top