Washed black dye finish - Will be trying this soon, but I need a little help....

Dolando

Senior Member
Messages
336
Hello,

I'm looking to order a gecko with a quilt maple top, and I'd like to do a washed black dye myself. So any advise on how to achieve the finish below. What kind of dye etc...

The burst around the edge, could this be achieved with dye or is that a spray job? I was hoping to just use dye, and then tru oil over the top if that would work...

Thanks for your help.
 

Attachments

  • image.jpg
    37.7 KB · Views: 530
That kind of finish is kinda difficult to do. The process is simple on the surface (no pun intended), but it's tough to get consistent enough results to just leave it black. Most of the time some color dye is put on top.

Basically, what you have to do is dye the whole thing black, then sand it back until you're happy. Then, you may or may not try to burst it with dye, but I suspect most shoot the edges for consistency's sake. Cover all that with whatever clear finish floats your boat, and call it a love story.


Right ok, I'm not completely against having a colour over the top.So, in theory I could do the black and see where I stand, then if not ill add a coupler over the top. I have a lime/leaf green kind of colour that might look quite cool over the top.
 
That could work. For instance...

Ps7375A.jpg

Dyed all black, sanded back, dyed green, coated clear. Not sure if they shoot the edges or are just careful about the sandback.
 
That's definitely food for thought. On a side note, how easy is a tobacco burst with dyes? And what dyes can take tru oil as a top coat?
 
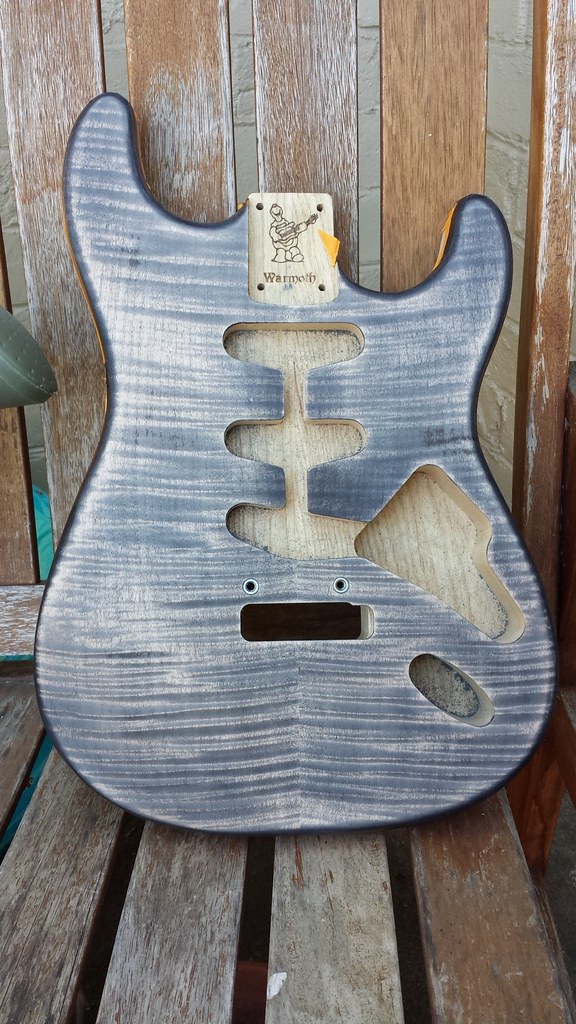
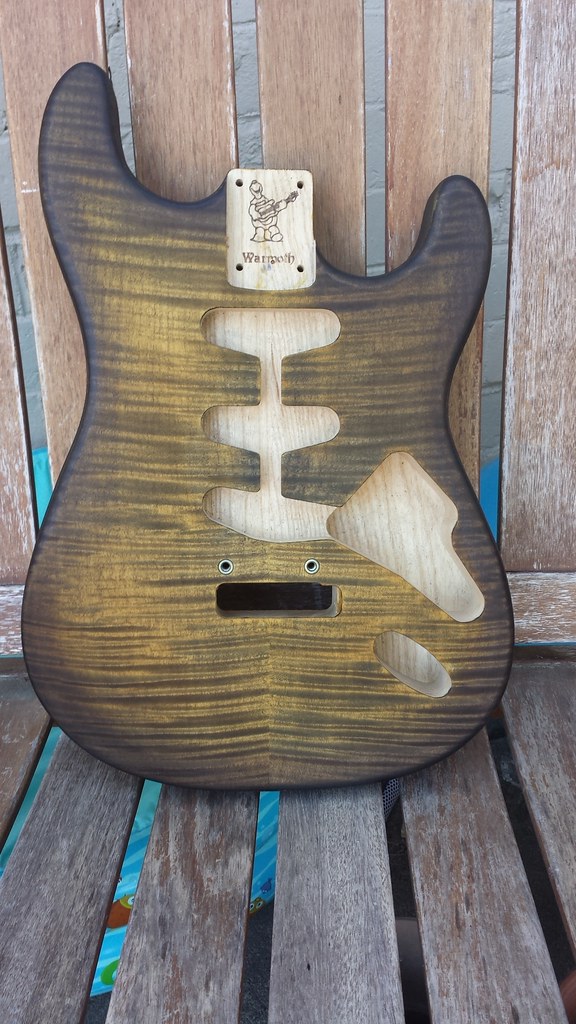
What doesn't work is using either a water-based finish right on top of water-based dyes, or an oil-based finish right on top of oil-based dyes. In those cases, the finish is going to be trying to pull the dyes up out of the wood and into the finish*. So, using water-based dye, then Tru-oil on top of that works fine. That particular process is also relatively stink-free, you can do it in your (air-conditioned, NOT-so-humid) kitchen as long as you have some closet or something where you can hang the body for a month to let the last coat of Tru-oil cure completely. For some reason, Tru-Oil doesn't advertise that part too clearly? :dontknow:

I've done several guitars with water-based dye, then a sealer coat of wax-free shellac - Zinnser Sealcoat is the stuff -
https://www.google.com/#fp=633e4ade33ba97d5&psj=1&q=zinsser+sealcoat
- and then  water-based poly on top of that, The shellac keeps the poly and the dyes from makin' whoopie with each other.

The one big selling point of the oil-based dyes, MEK-based in particular, is that they can get the absolute most-intense colors on there - Paul Reed Smith & them sort use the MEK stuff. MEK is some kind of awful death-dealing synthetic doomsday goop, if you flush a drip down your toilet your whole town gets brain cancer the next day - so of course if works great! :icon_thumright: Actually I think the big worry there is if you're using a compressed-air gun, you HAVE to use a real respirator mask and you'd be foolish not to wear rubber gloves.

Having said all this, I have seen people here get amazingly deep finishes with water-based dye, get absolute glass-smooth finishes with Tru-Oil (and a LOT of elbow grease); there are even people who, as a matter of course, do this (*) as a matter of course - water-based poly over water-based dyes - but, they've done a hundred of them, they know exactly how the specific chemicals and brands they use will interact, they. like, measure stuff and take notes and other dreary worky-sounding behaviors. :tard:

I am not a big "finish guy", primarily because I don't have room to spread stuff out that doesn't need to be put back ("What do you mean YOUR Tupperware, honey? I though it was OUR Tupperware"...) It wouldn't hurt to hit the library and see what they have on wood finishing, and if you just root through the "finishing" threads here, there's at least one of everything, and if you see something plausible you can PM the guy who did it - just tell 'em how cool they are, they'll spill the beans for sure.

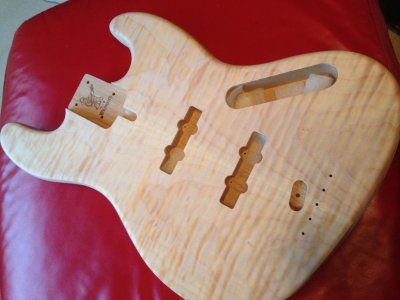
Oh - yes, people have done bursts with regular hand-rubbed dyes; no, I've never done it. I am sure you'd want separate pads for the amber, red, and brown dyes,  and a few others for the blending. The hardest part about that would be knowing when to STOP.

"It's done! It's done!"
"A little  bit more, just a little bit..."
"It's done! It's done!"
"A little  bit more, just a little bit..."
"It's done! It's done!"
"A little  bit more, just a little bit..."

Etc. Fortunately, if you HAVE to bail, common household bleach will bust you back to clean wood instantly. And then, you have to get the bleach off.... :sad1:
 
My approach to that finish would be something along these lines:

Use alcohol soluble aniline dye. 

Start with a spit coat of dewaxed shellac (1/2 lb cut.. in other words 8oz denatured alcohol + .5oz dewaxed shellac flakes).  This is to keep the black dye from penetrating too far into the grain which gives you more control over the process and means you won't have to sand back so much.

Then do a light coat of the black dye, don't let it sit too long, wipe it off after a few minutes.  Wait about 30 minutes for it to dry and then lightly sand to knock down the raised grain and remove some of the dye from the less porous sections.

If the black is not intense enough I'd do another wash of black dye.. else move on to another spit coat of shellac followed by another light sanding.. then do a white wash and let it sit for significantly longer than the black dye.. then sand again very lightly and then a final coat of shellac followed by whatever finish you prefer. 

Would not recommend oil finishes though on a white wash since they will give it a yellow cast.. best to use a water based or solvent based finish over white, unless you are going for that aged off-white look

Strongly suggest you test any finish techniques like this on scrap pieces before you try on a guitar body..
 
Wow! Thanks for all the information. I think I need to re read it to take it all in, so you may get a message some point asking to explain something if thats ok. Some great advice and tips, so cheers gents.

Basically, I know I want to do a fretless, either a gecko 5, deluxe jazz, or G5. Just not sure what way I want to go with it. For my zebrawood jazz, I knew exactly what I anted to do, so for this I'd like something different whether it be darker woods or a completely different finish like this dye idea. I've always fancied trying this kind of dye effect. I was thinking maybe mahogany or a walnut with a maple top would be pretty nice. :)


I did this one with alcohol dyes and it came out.

Smal-Angle_View-Fire_Dye_Tele.jpg


I dyed it black, sanded, dyed it red and sanded, and then dyed it yellow.  I then added the black to the edges with a q-tip and blended it in with acetone.  MEK is almost acetone, but one carbon bigger.  I sprayed it with lacquer, and it bled into the lacquer, so a sealer coat would have been better.  I also found that for a washed look, a more dilute, a lot more dilute dye solution helps a lot, but doesn't look quite right.  It doesn't have the contrast, so I moved to just sanding to get what I wanted.
Patrick

 
Thanks for the input. That finish looks really cool, and very similar style to what I'm after. Out of interest was that quilt top a standard or a unique choice top?
 
Standard, it was before the unique choice option.  I bought some figured maple on eBay and did a lot of test runs before trying the procedure on that body.  I would suggest trying that so that you are familiar with things before committing to the process on the guitar body.  It made the blending procedure something I knew I could do, and that gave me a lot more confidence.
Patrick

 
Patrick from Davis said:
Standard, it was before the unique choice option.  I bought some figured maple on eBay and did a lot of test runs before trying the procedure on that body.  I would suggest trying that so that you are familiar with things before committing to the process on the guitar body.  It made the blending procedure something I knew I could do, and that gave me a lot more confidence.
Patrick

Yea ill definitely be doing plenty of test pieces. I wasn't sure what type of figure you get as standard, not sure if its worth getting a unique choice option.

I was going with a walnut top with tru oil, but I've done that and I'm maybe thinking I should try something a little different this time. :)

Cheers,

Adam
 
Dolando said:
I wasn't sure what type of figure you get as standard, not sure if its worth getting a unique choice option.


Hey, Adam -


The advantage of unique choice is often certainty about what you're getting, rather than getting something that's objectively "better" than run-of-the-mill.  If you order over the phone and describe specifically what you'd like to see, you'll probably be okay without dropping the extra coin.


Good luck!


Bagman
 
I went for a different gecko in the end, but I have got my hands on this flame maple jazz body. :) Not sure what I'm going to so yet, but I'll start with a washed black dye and see if I fancy putting a colour over it. Maybe tigers eye, a sunburst or a light green.

With the sanded back dye finishes, do I need to apply some sort of sealer coat before the black dye?


Attachments

  • image.jpg
    image.jpg
    653 KB · Views: 455
I am planning on actually doing this finish on the Jazz body i've got above. But I have a couple of questions...

Should I do this with alcohol based or water based dye? I'll be finishing with nitro, not sure if that makes a difference.

and

Should I spray a couple of coats of sanding sealer or something to stop the dye going too deep into the wood?
 
That's a handsome J you got there.


Patrick from Davis's job described above will give you an idea how he approached it with alcohol and acetone.  Alcohol will boil off a lot faster than water, and so your working time is compressed a lot. 


I did this body with water-based dyes, starting with an ebony which I let dry completely and then sanded back.
9740032432_ba7509f08d_b.jpg


Here it is after sanding back.  The darker spots are actually still wet from the naphtha I used to wipe it down after sanding:
9741487627_7c2e13ac4b_b.jpg


After sanding back the ebony dye, I wetted the entire body and applied an amber dye, then used a walnut-brown and more of the ebony to make the burst.  The result before finishing (with Tru-oil) looks like this:


9761906575_d4b96ebd5d_b.jpg


This was one I did with a black sandback.  The 1st photo you see with black color was AFTER I sanded back.  I could have just clears at this point but I sprayed some color and burst on it.

To answer your question I used black dye in water.  It raises the grain and gets it into the deep grains well.  I did not seal.  Sand back with 220 and then 400 and you can clear unless you want to add color.  If you are going to wipe on additional color...I would use alcohol for that.  However I prefer to spray if I can for the second color.

http://unofficialwarmoth.com/index.php?topic=22901.0
 
Thanks guys! I knew I'd read that a couple of people had done something similar. I'll basically be doing something like Dmraco but with a translucent black burst around the edge. I keep toying with a deep red or something but i'm not sure...
 
Back
Top