graceshredder
Junior Member
- Messages
- 58
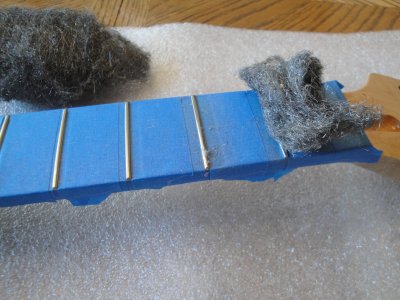
First things first . . . the neck. I had to dress the frets before anything else, so I taped off the fretboard, leaving the frets exposed, with the blue painter's tape. Easy to remove and leaves no residue. Then I took steel wool and lovingly and laboriously removed all the lacquer from the fret wires. It is surprising how much was on those frets, but with the 'glass-like' look of the neck I guess I shouldn't have been surprised. I carefully examined the frets with a magnifying lens to make sure the lacquer was completely removed. Nice. Frets clean and no scratches.
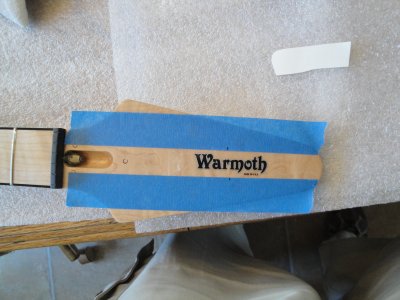
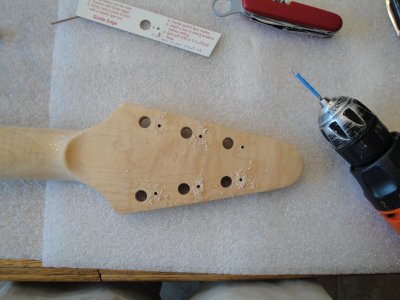
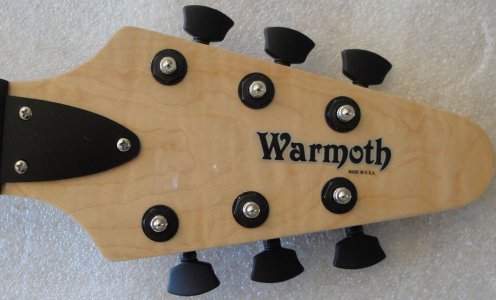
Then I decided to install the tuners, truss rod cover, and decal. The little guide that Sperzel provides was a great help in the hole placement. You know, no matter how many times I drill holes in a headstock, it still makes me a little apprehensive. The blue tape you see on the drill bit gives me perfect depth, so there's one less worry. The decal I installed by carefully taping and marking the exact center of the head from the tip of the truss rod to the tip of the headstock. Then I took a piece of regular scotch tape and stuck it on my shirt and removed it two or three times to make it less sticky. This piece I then used to pick up the decal itself. Then I carefully marked the exact center of the decal so I could line it up with the center of the headstock. I peeled off the protective backing, placed the decal just where I wanted it, and then smoothed it down by pressing on the scotch tape I'd used to pick it up with. After pressing the decal firmly onto the surface, I then peeled off the 'less-than-sticky' scotch tape. Cool.
Then I decided to install the tuners, truss rod cover, and decal. The little guide that Sperzel provides was a great help in the hole placement. You know, no matter how many times I drill holes in a headstock, it still makes me a little apprehensive. The blue tape you see on the drill bit gives me perfect depth, so there's one less worry. The decal I installed by carefully taping and marking the exact center of the head from the tip of the truss rod to the tip of the headstock. Then I took a piece of regular scotch tape and stuck it on my shirt and removed it two or three times to make it less sticky. This piece I then used to pick up the decal itself. Then I carefully marked the exact center of the decal so I could line it up with the center of the headstock. I peeled off the protective backing, placed the decal just where I wanted it, and then smoothed it down by pressing on the scotch tape I'd used to pick it up with. After pressing the decal firmly onto the surface, I then peeled off the 'less-than-sticky' scotch tape. Cool.


