Leaderboard

Bridge grounding

Messages
1
Hi,

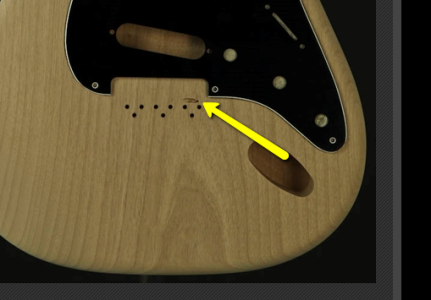
I'll be getting a HSH strat body from Warmoth in few weeks with a hardtail Fender American standard flatmount bridge. I don't beleive the body is drilled for a ground wire to be solder after the bridge... What do you suggest me to do in order to be able to ground it?

Thanks

Jeff
 
Two things:


1.  In the attached photo, you'll see how they drill the ground wire hole.  This image is of a vintage hardtail, but it will be true for the AmStd Strat flatmount as well.


2.  No need to solder - just expose the ground wire and clamp it to the surface of the body using the bridge itself.  Voila!
 

Attachments

  • Hardtailgroundwirehole.png
    Hardtailgroundwirehole.png
    166.7 KB · Views: 4,936
I soldered mine to a hunk of copper foil and mounted the bridge on that.  Dunno if that was a good idea or not.
 
I have always gotten good contact doin' it the Bagman's way; I fan out the individual copper strands of the exposed wire so as to not cause any lift of the bridge plate... dunno why having a glob of solder and a slip of foil crammed under there would be considered "proper" over having direct contact.  :icon_scratch:
 
It wasn't a slip. It was shaped to the bridge and getting the holes cleared was a bloody nightmare.  The glob of solder was in the area where the wire came in. 
 
I slightly enlarged the opening where the wire comes out to the bridge, so it was big enough for a wire to be soldered to a piece of copper tape and still sit flush in the hole. Then I brought the tape out on to the surface of the body, and then across the entire width of the bridge right next to the screw holes where the bridge is held down. That's a good square inch or so of surface area of contact to the bridge plate - way more than 20-ish strands of copper wire provide.

I use a similar strategy on Tele bridge grounding:

d8591103-2215-4dfe-a4a1-d18715c09392_zps4e2b1a9e.jpg
 
'cept where the foil meets the wire, it's still only touching twenty or so strands, so...

-If that's a guy's version of building a better mouse-trap, then he should knock 'imself out and have fun doin' it.
 
Sure, but it's not 20 strands that are just being clamped between two mostly flat surfaces. When you solder a wire, firstly it's not just a mechanical connection any more, and secondly the entire surface area of every wire is in contact with the solder.

Obviously the clamping method works fine. The reason I stopped doing it was because:

1. It's a bit fiddly holding the wire in place while screwing everything together
2. If the strands move back together a bit, you end up with the bridge lifted
3. When you remove the bridge, the wire moves again and you have 1 and 2 to worry about when you put it back

With the tape method, all three of those are negated. It's like the "wax your screws" or "threaded neck inserts" of bridge grounding for me - you're almost always fine without it, but if you're taking your time over a custom-built guitar, you can go the extra mile.
 
I think it would take a pretty touchy meter to demonstrate the difference in conductivity between mechanical contact and the dab-of-solder method... but I don't have to buy-in. To each their own; everyone's got their personal idea of what "fiddly" might be. But if it helps to increase the enjoyment of the build, then, by all means, foil it up!  :icon_thumright:

The stay-put factor for multiple disassembly/reassembly operations wasn't something that crossed my mind; once I have a bridge installed, I most generally leave the thing put together.
 
I agree. My talking about surface area and stuff was a red herring, really. The three reasons I gave above are the true ones that led me to the tape thing. It's just a personal convenience thing.
 
JJ, I gotta say, (-I've been thinking on it over the day) if one had a Telecaster, and liked to try different bridge pickups on any frequency at all, your set-up would definitely be the way to go. (-A very neat and tidy job you did on the pictured example, too, by the way!)

With my P & J-basses and my hard-tail Strat, I just never really come across scenarios where I hafta pull the bridge... I gotta remember that for every practice there is an application.
 
Jumble Jumble said:
It's like the "wax your screws" or "threaded neck inserts" of bridge grounding for me - you're almost always fine without it, but if you're taking your time over a custom-built guitar, you can go the extra mile.

It is NEVER ok to not wax your screws. It's an absolute necessity, unless you enjoy snapped screw heads.
 
Jumble Jumble said:
I slightly enlarged the opening where the wire comes out to the bridge, so it was big enough for a wire to be soldered to a piece of copper tape and still sit flush in the hole. Then I brought the tape out on to the surface of the body, and then across the entire width of the bridge right next to the screw holes where the bridge is held down. That's a good square inch or so of surface area of contact to the bridge plate - way more than 20-ish strands of copper wire provide.

I use a similar strategy on Tele bridge grounding:

d8591103-2215-4dfe-a4a1-d18715c09392_zps4e2b1a9e.jpg

Nice work!  I did something similar with a Jazz Bass that didn't have a ground wire hole to the bridge.  Nice attention to detail... what's the rest of the guitar like?
 
Wow! I especially like the brass saddles on a no-sidewalls bridge plate, -comfortable and beautiful at the same time!  :toothy10:
 
Thanks, it's a Hipshot stainless steel bridge. Or at least, I think it is. I ordered it from eBay and it doesn't have the Hipshot engraving on it - but everything else about it seems to be fine, and it's a nice solid part. So if it's a fake, it's an adequate one!
 
The sidewalls on traditional tele bridges sorta dig into my hand, and so does the height-adjustment screws on steel saddles; brass ones seem to come with less screw(?)...

Anyway, nice chunka hardware. -And a beautiful build! -Classy inside and out!
 
Back
Top