Transparent burgandy Tele with Rosewood/Maple neck

jim232777

Junior Member
Messages
38
So nearly everything is in.  Only lack the neck plate (going to order one with a logo etched on it) and some screws for the pickup I think.
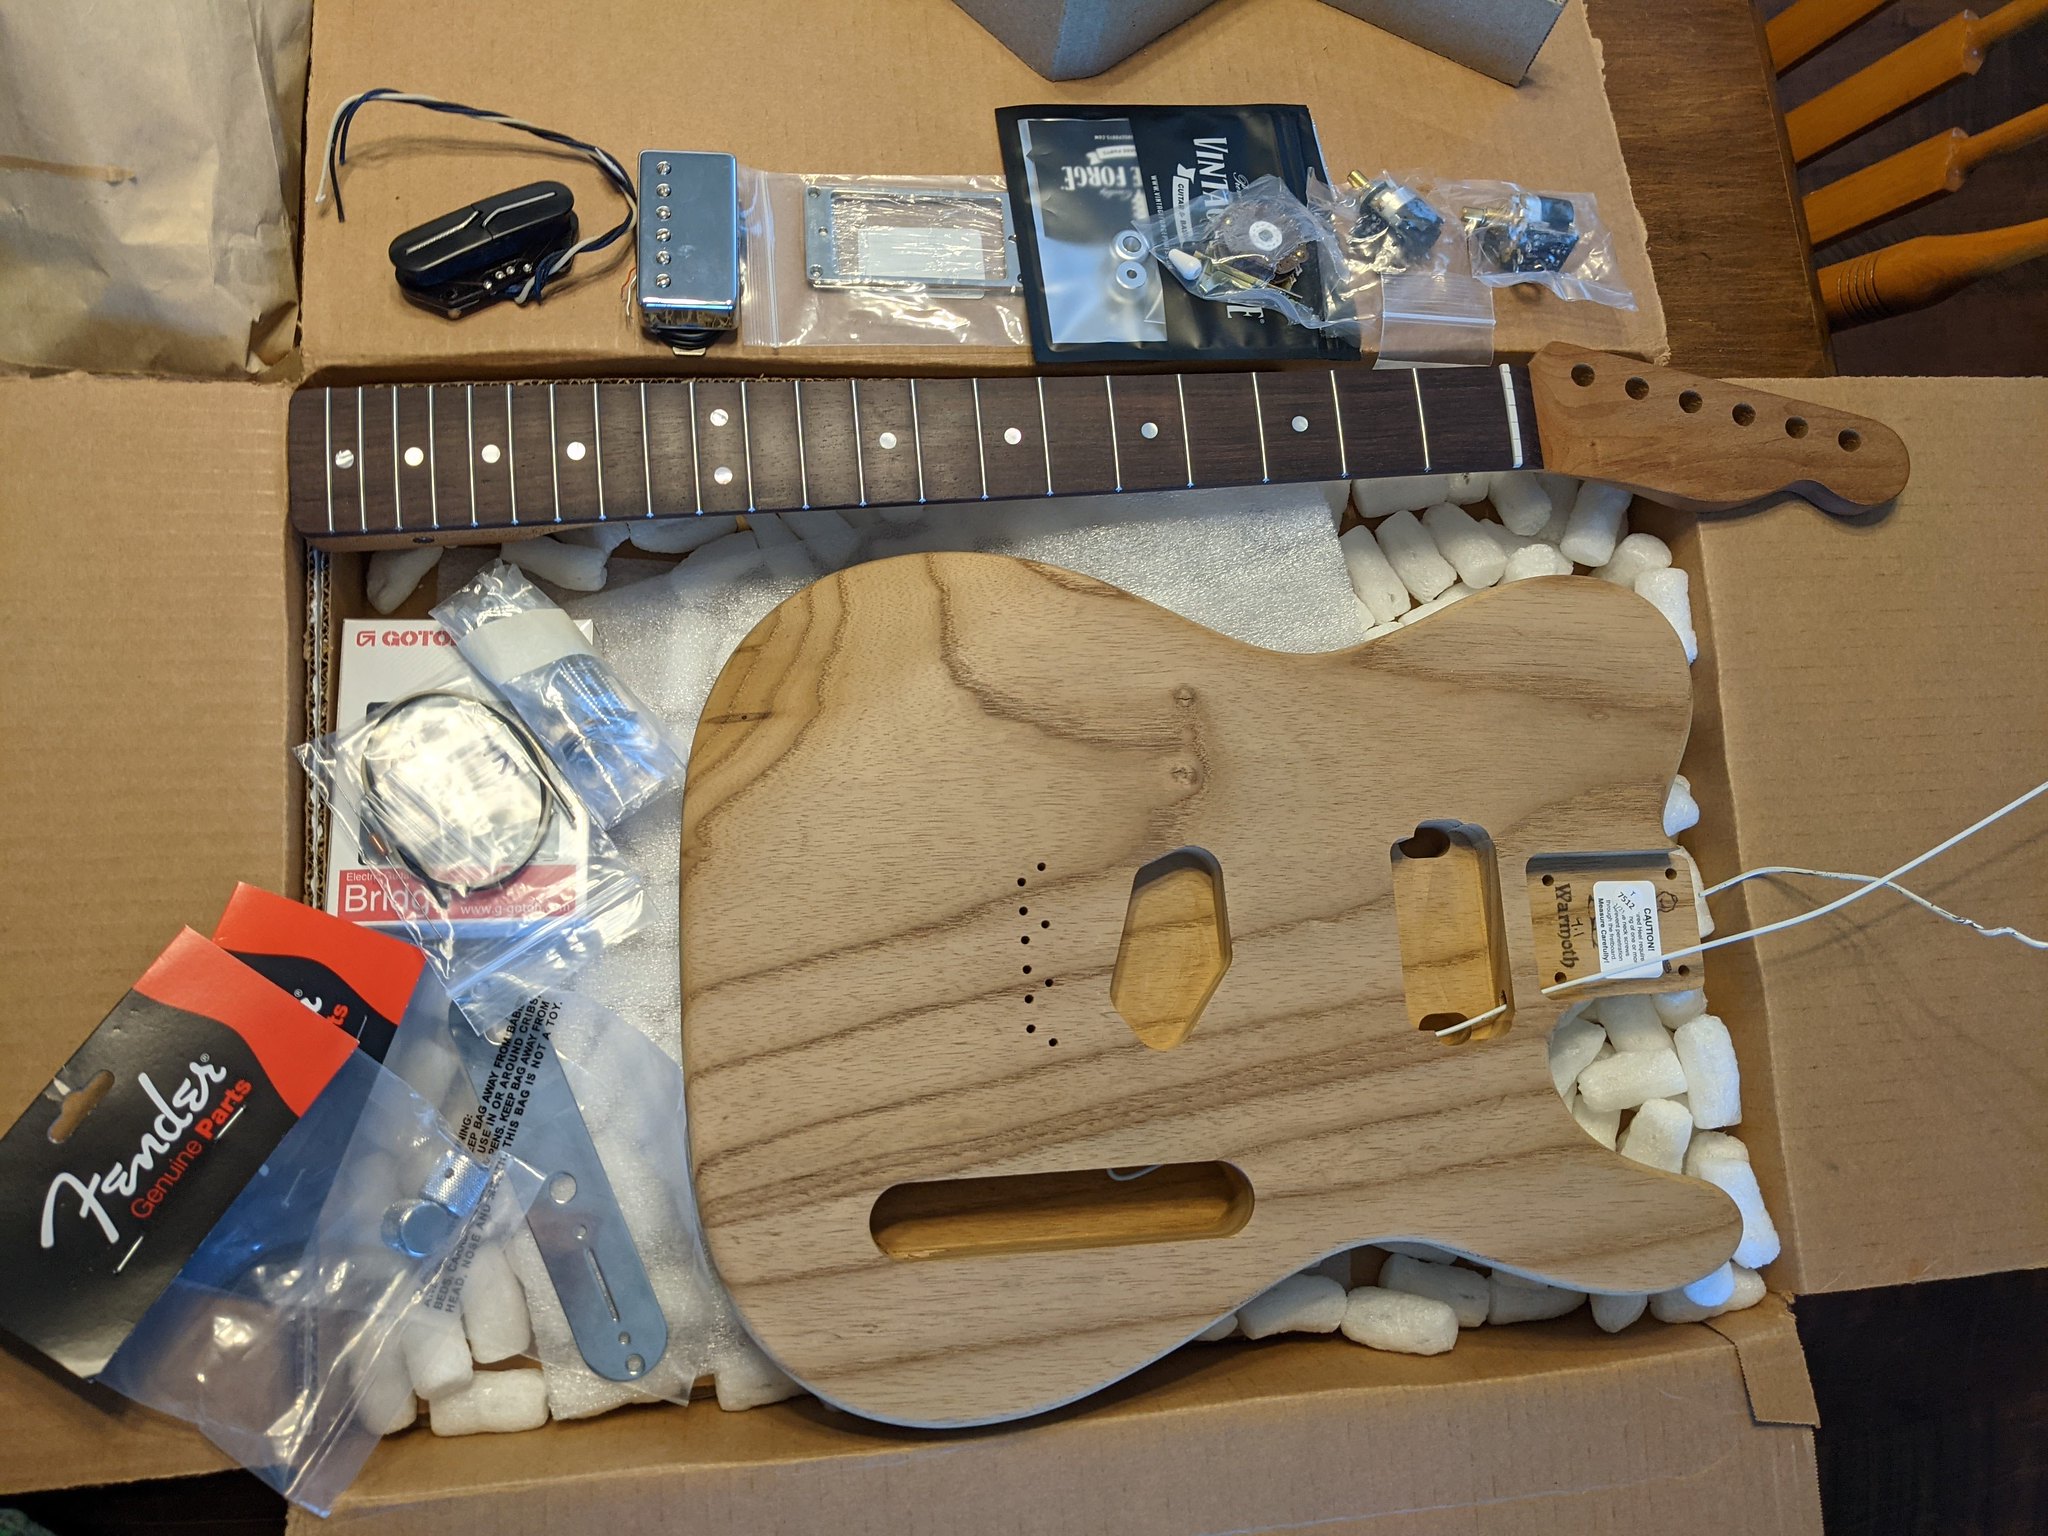
Here are the parts:

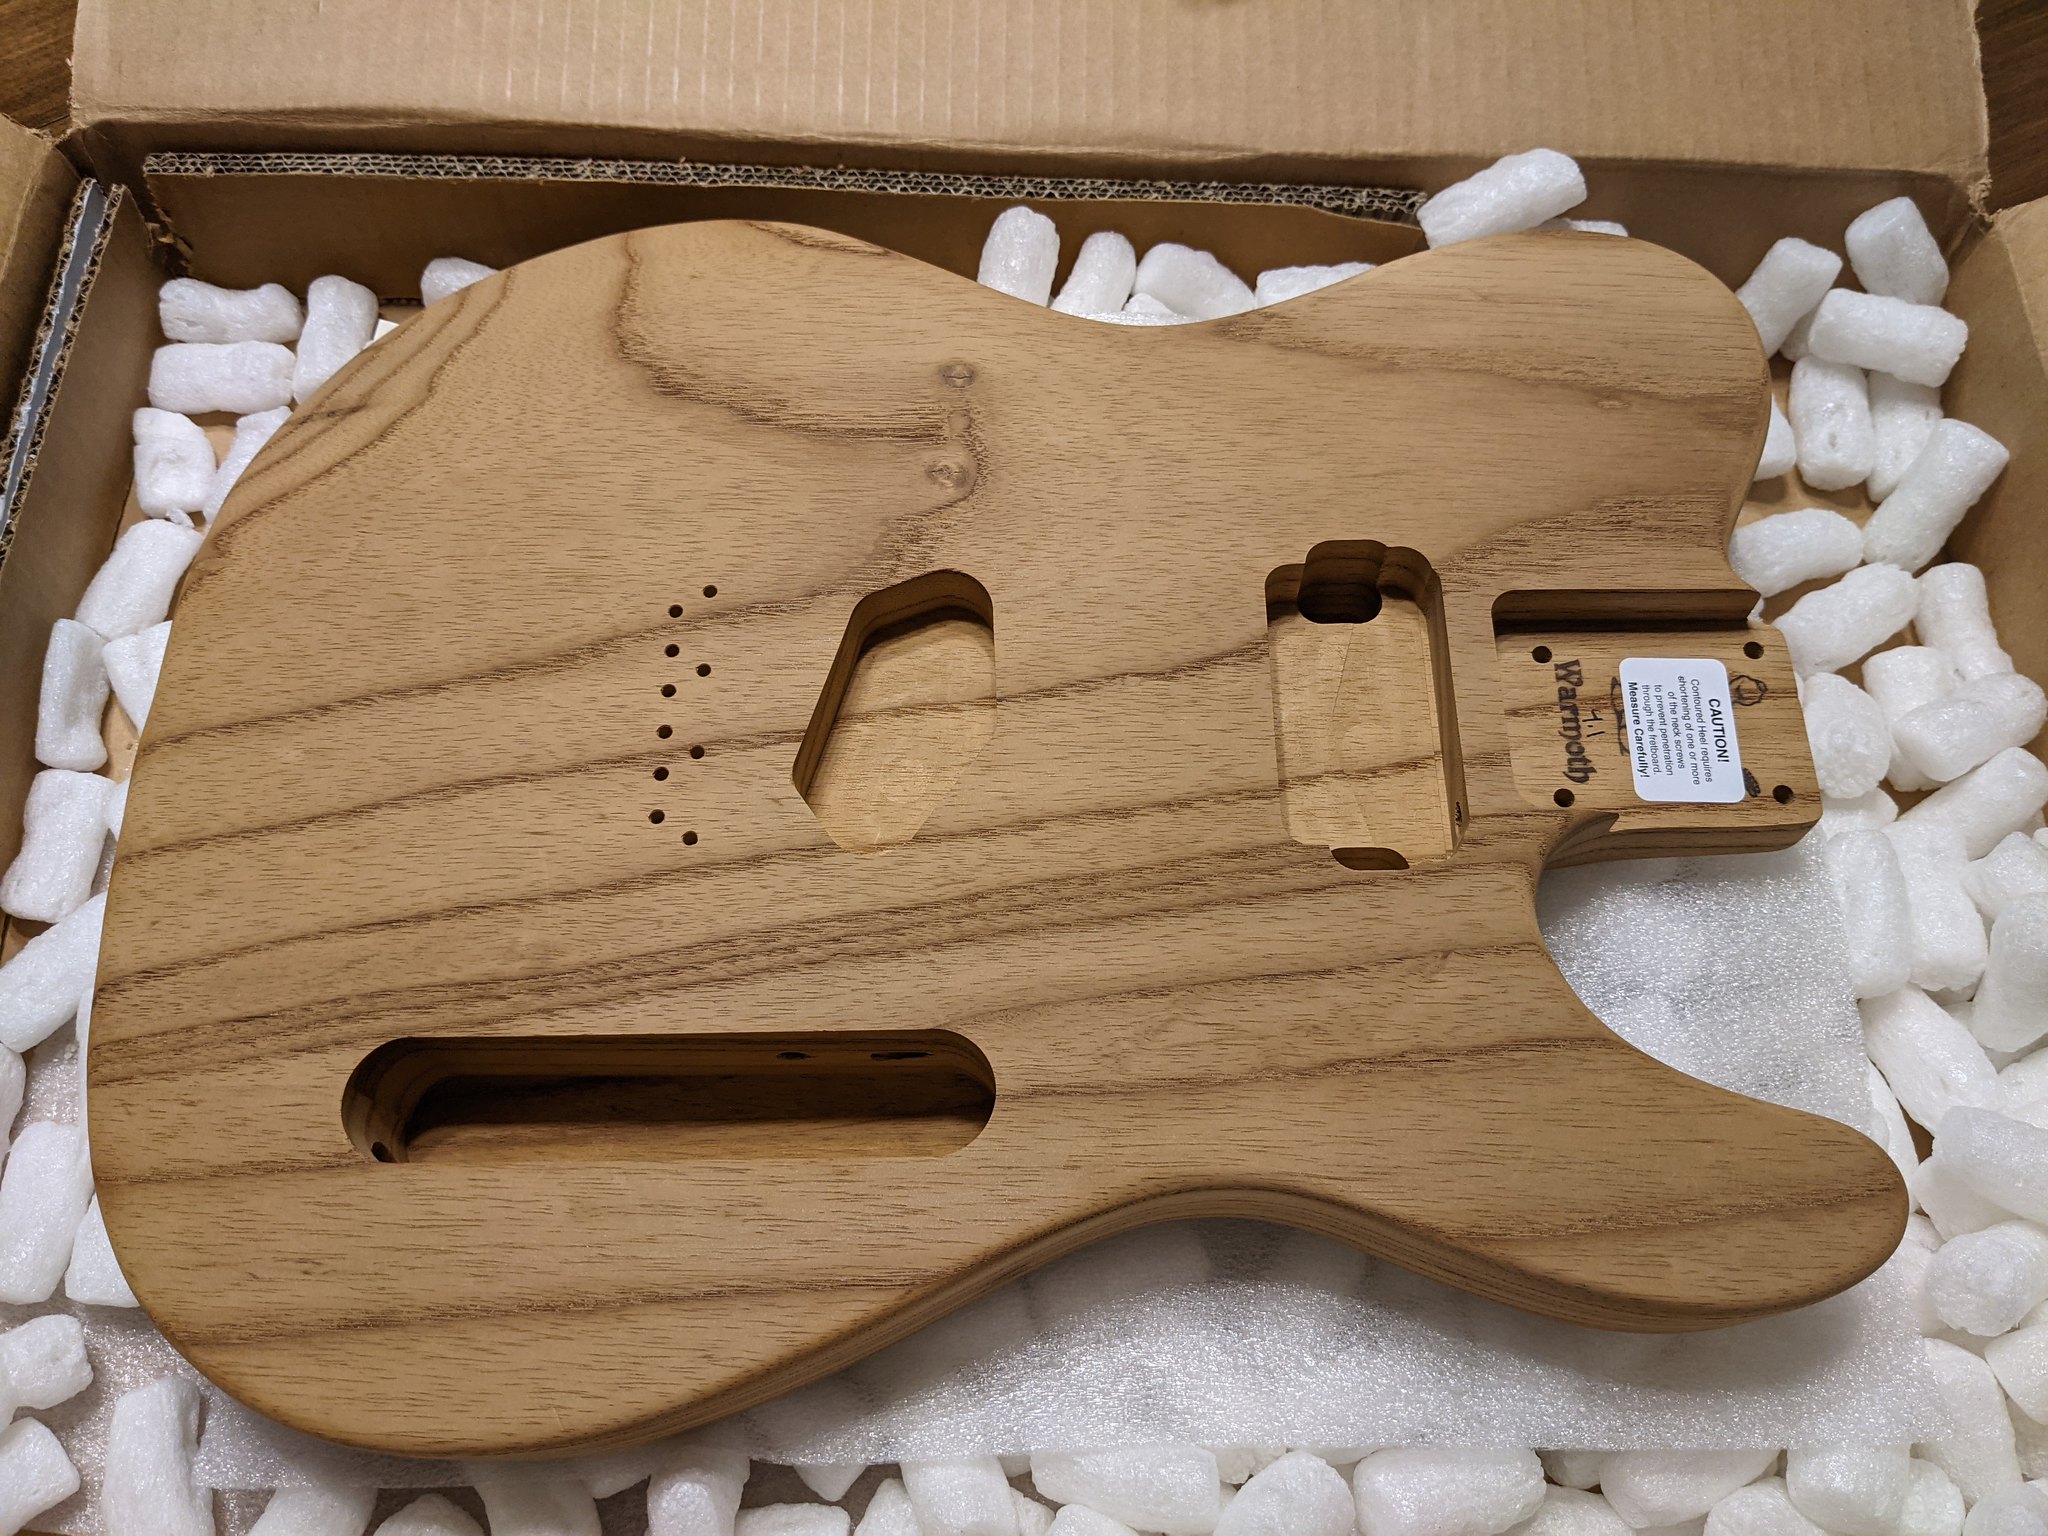
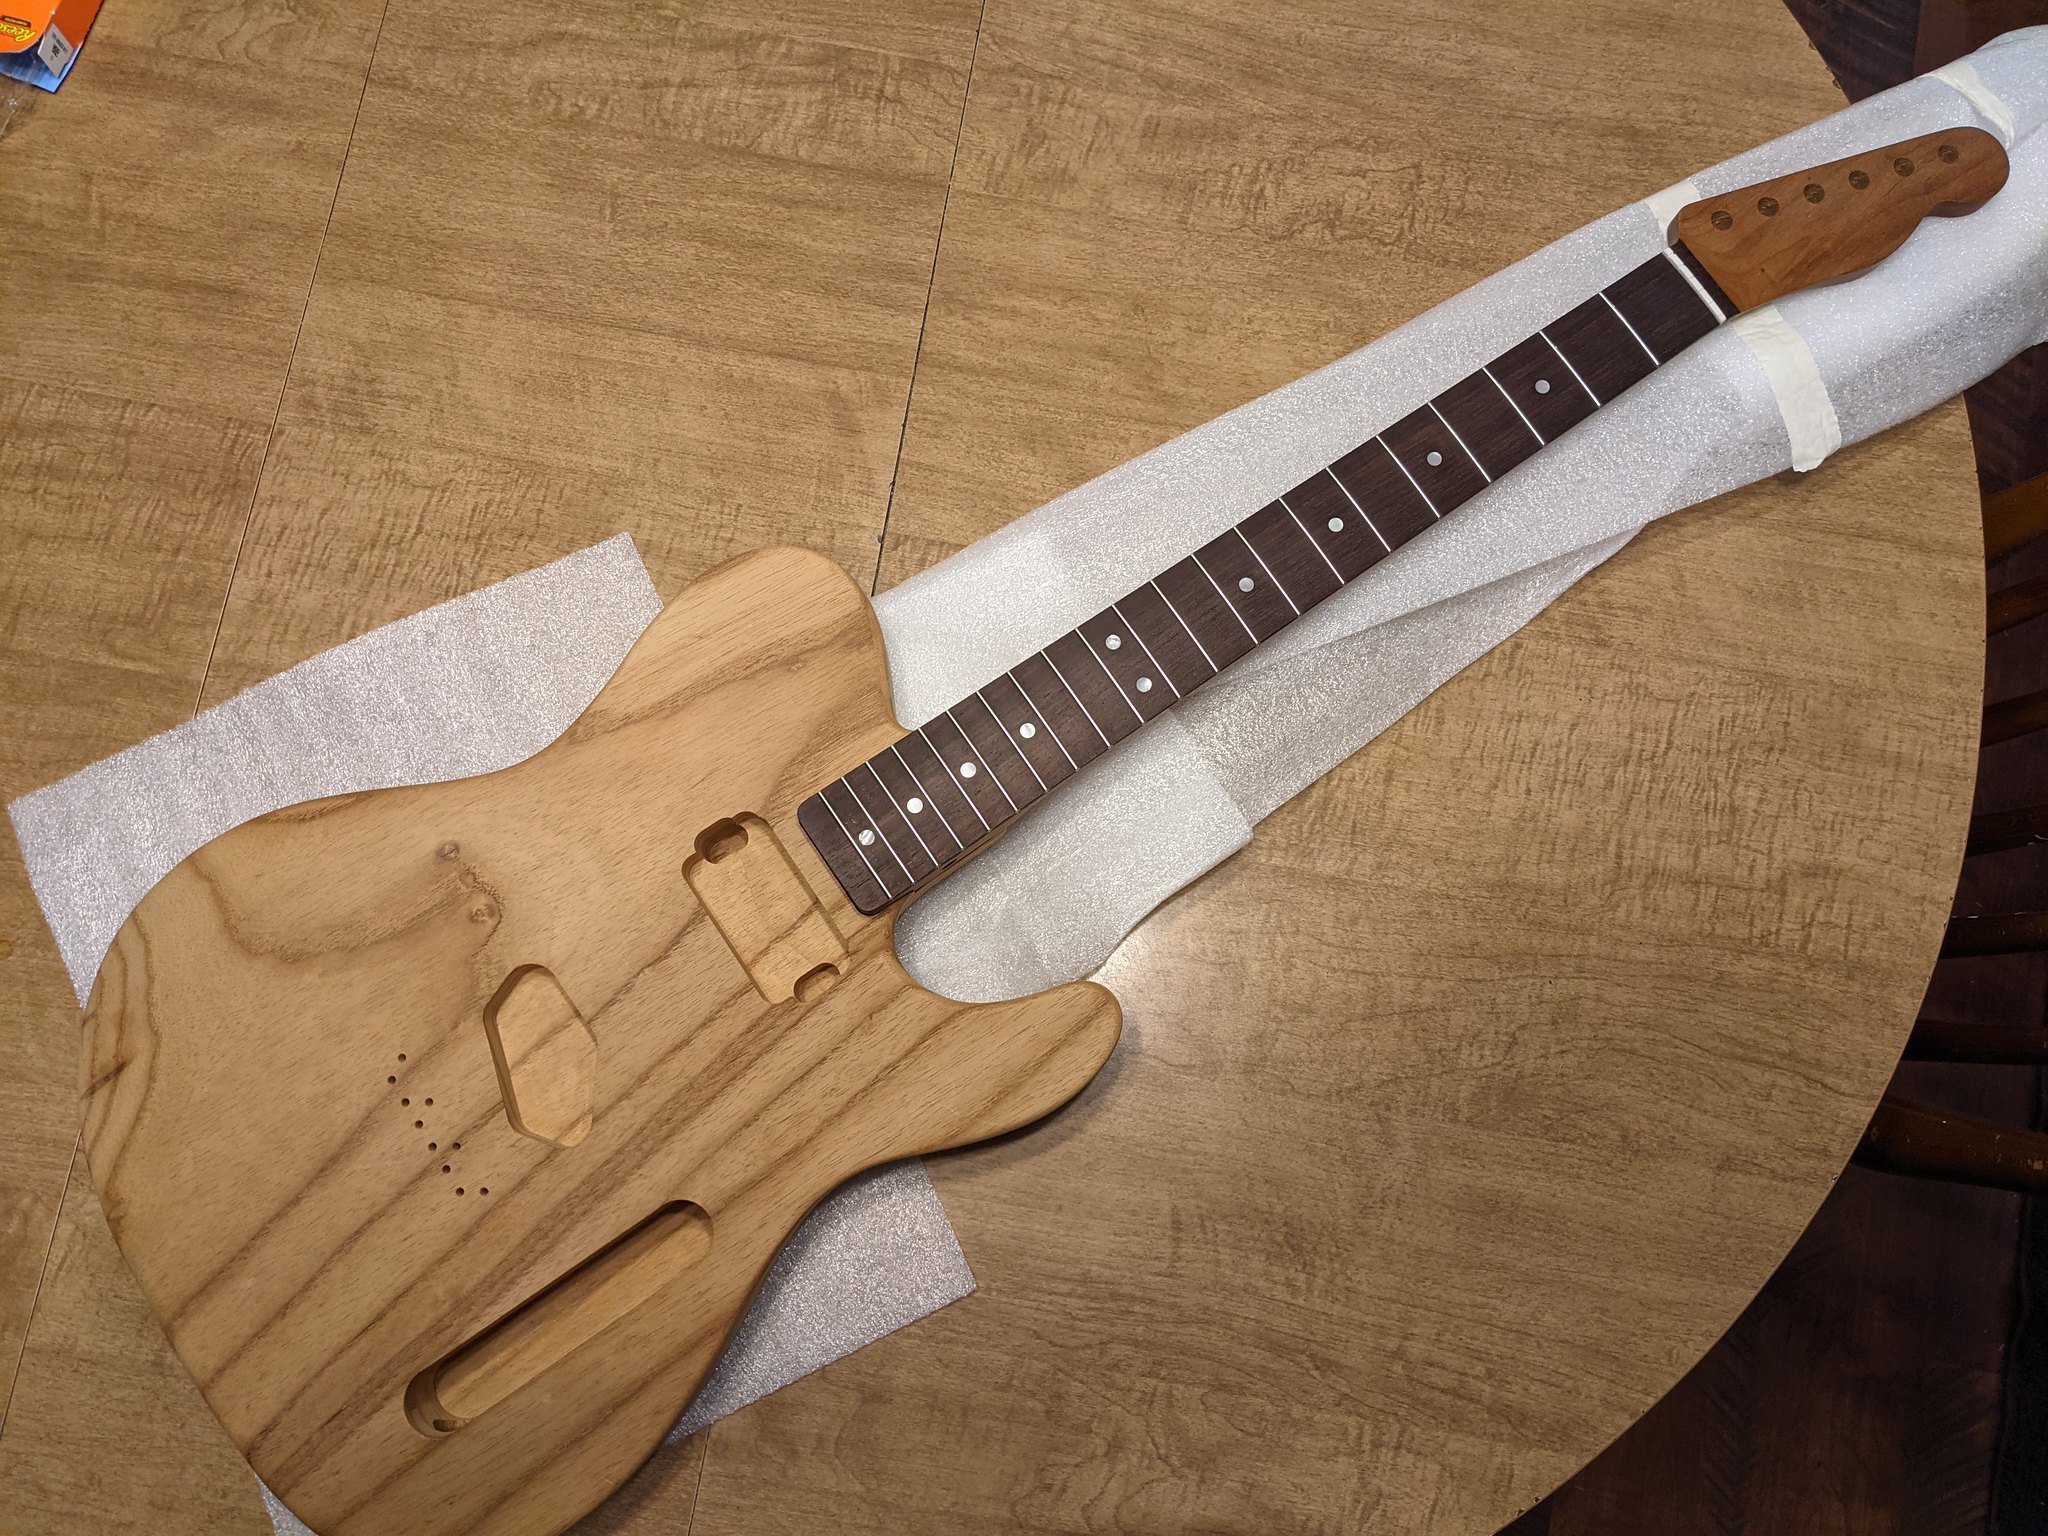
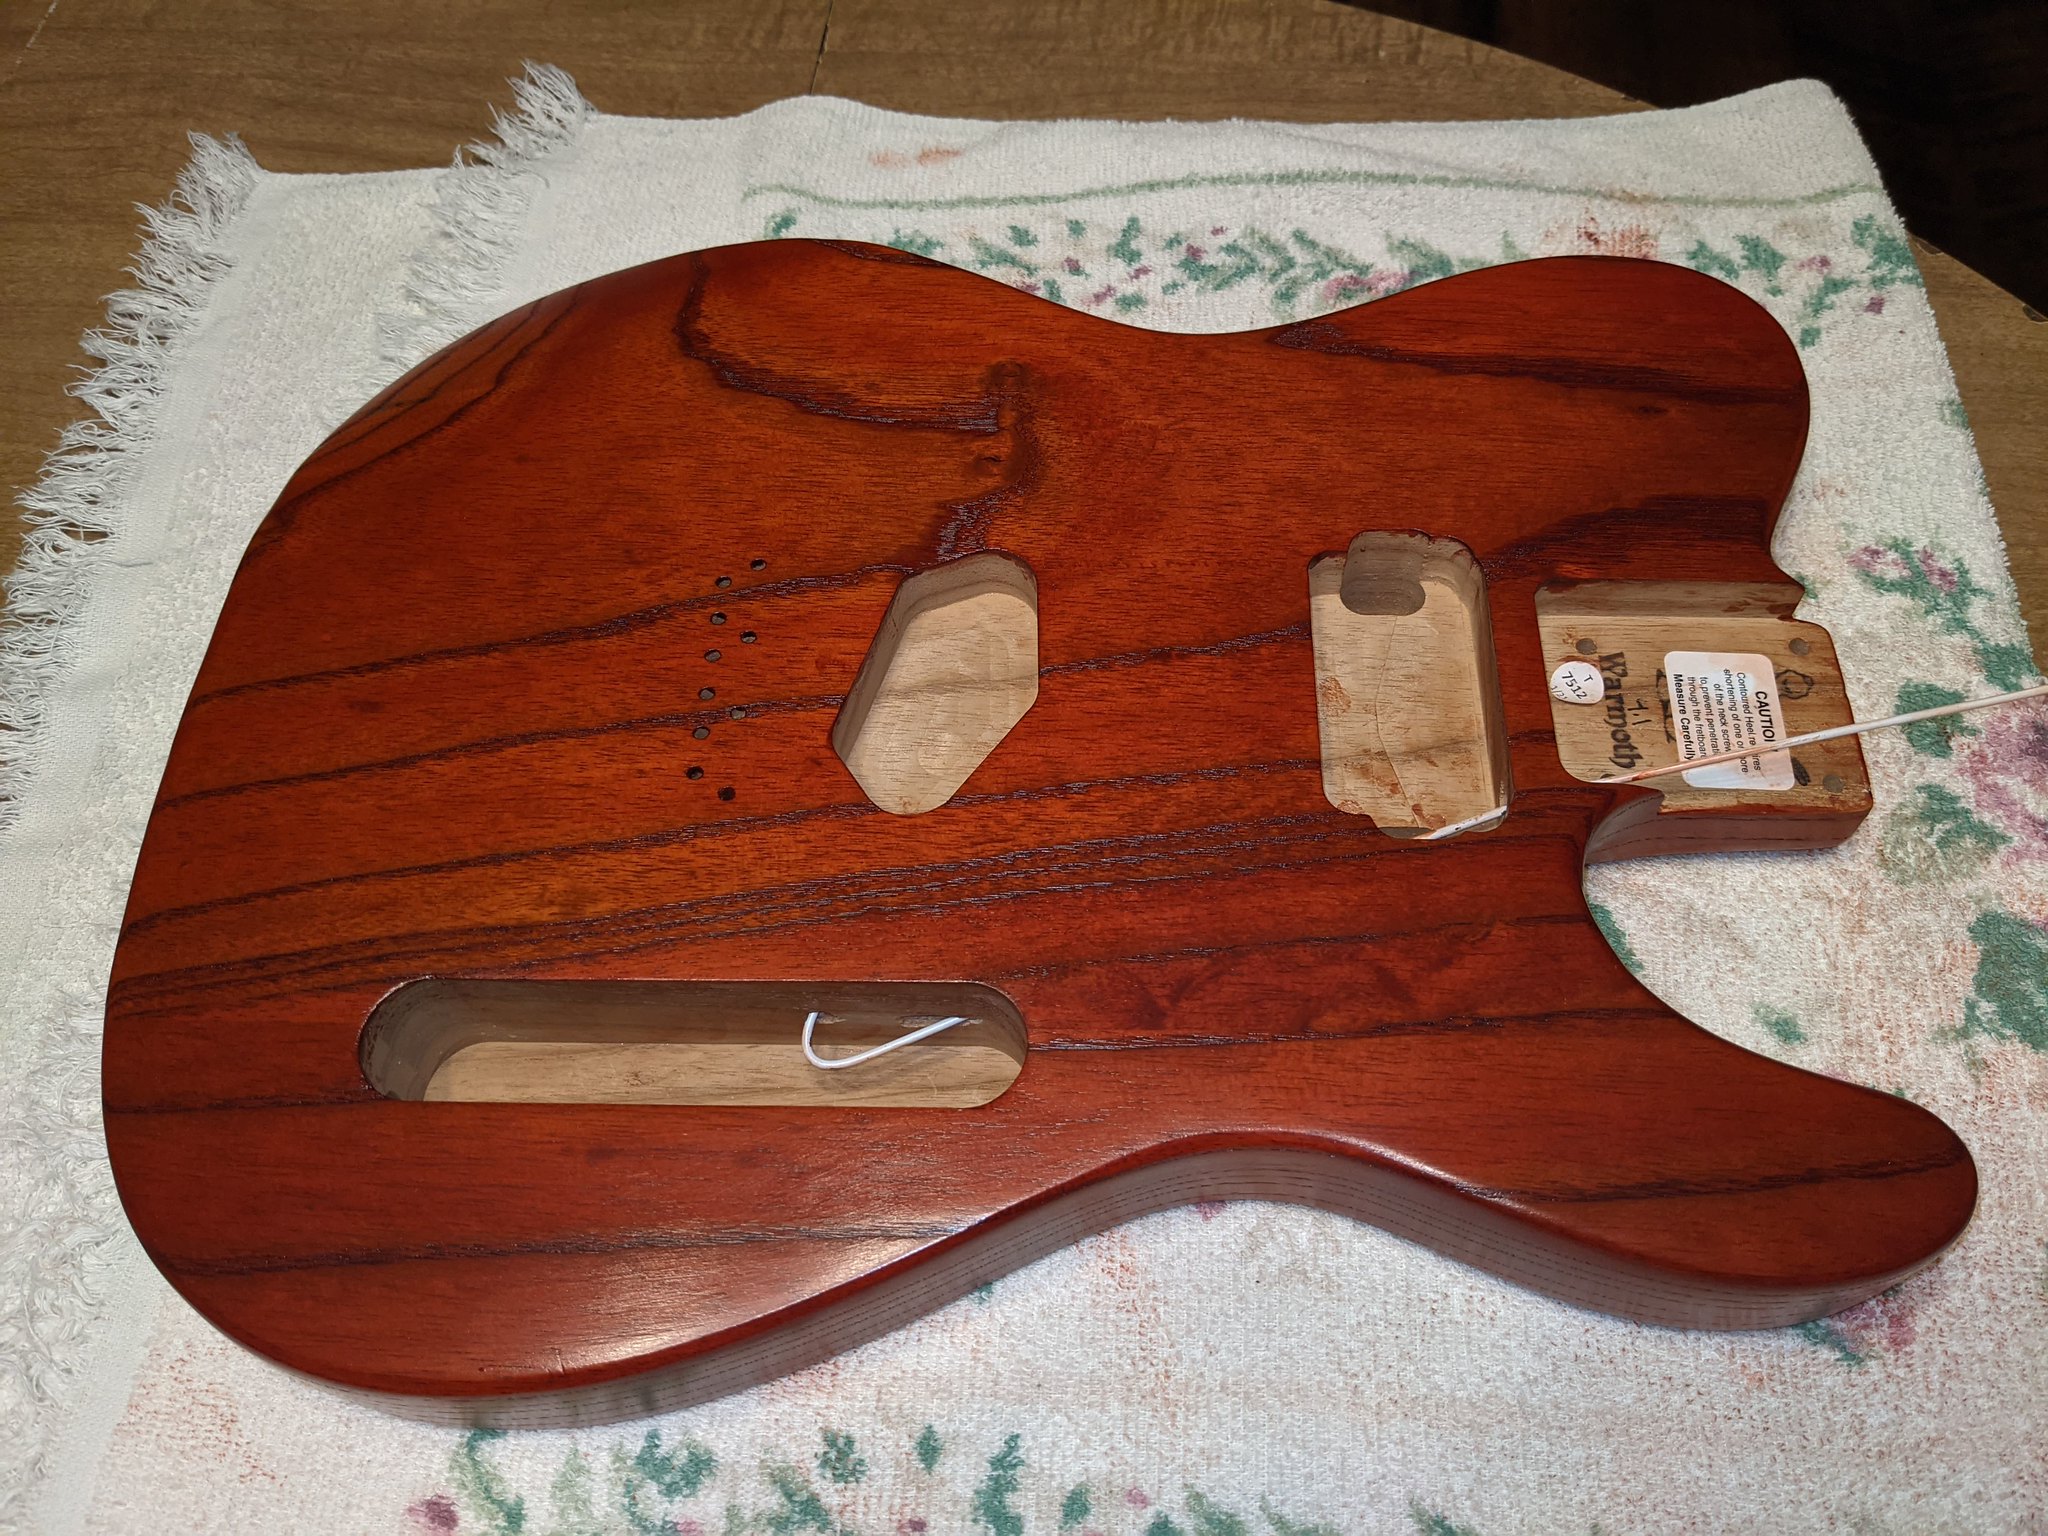
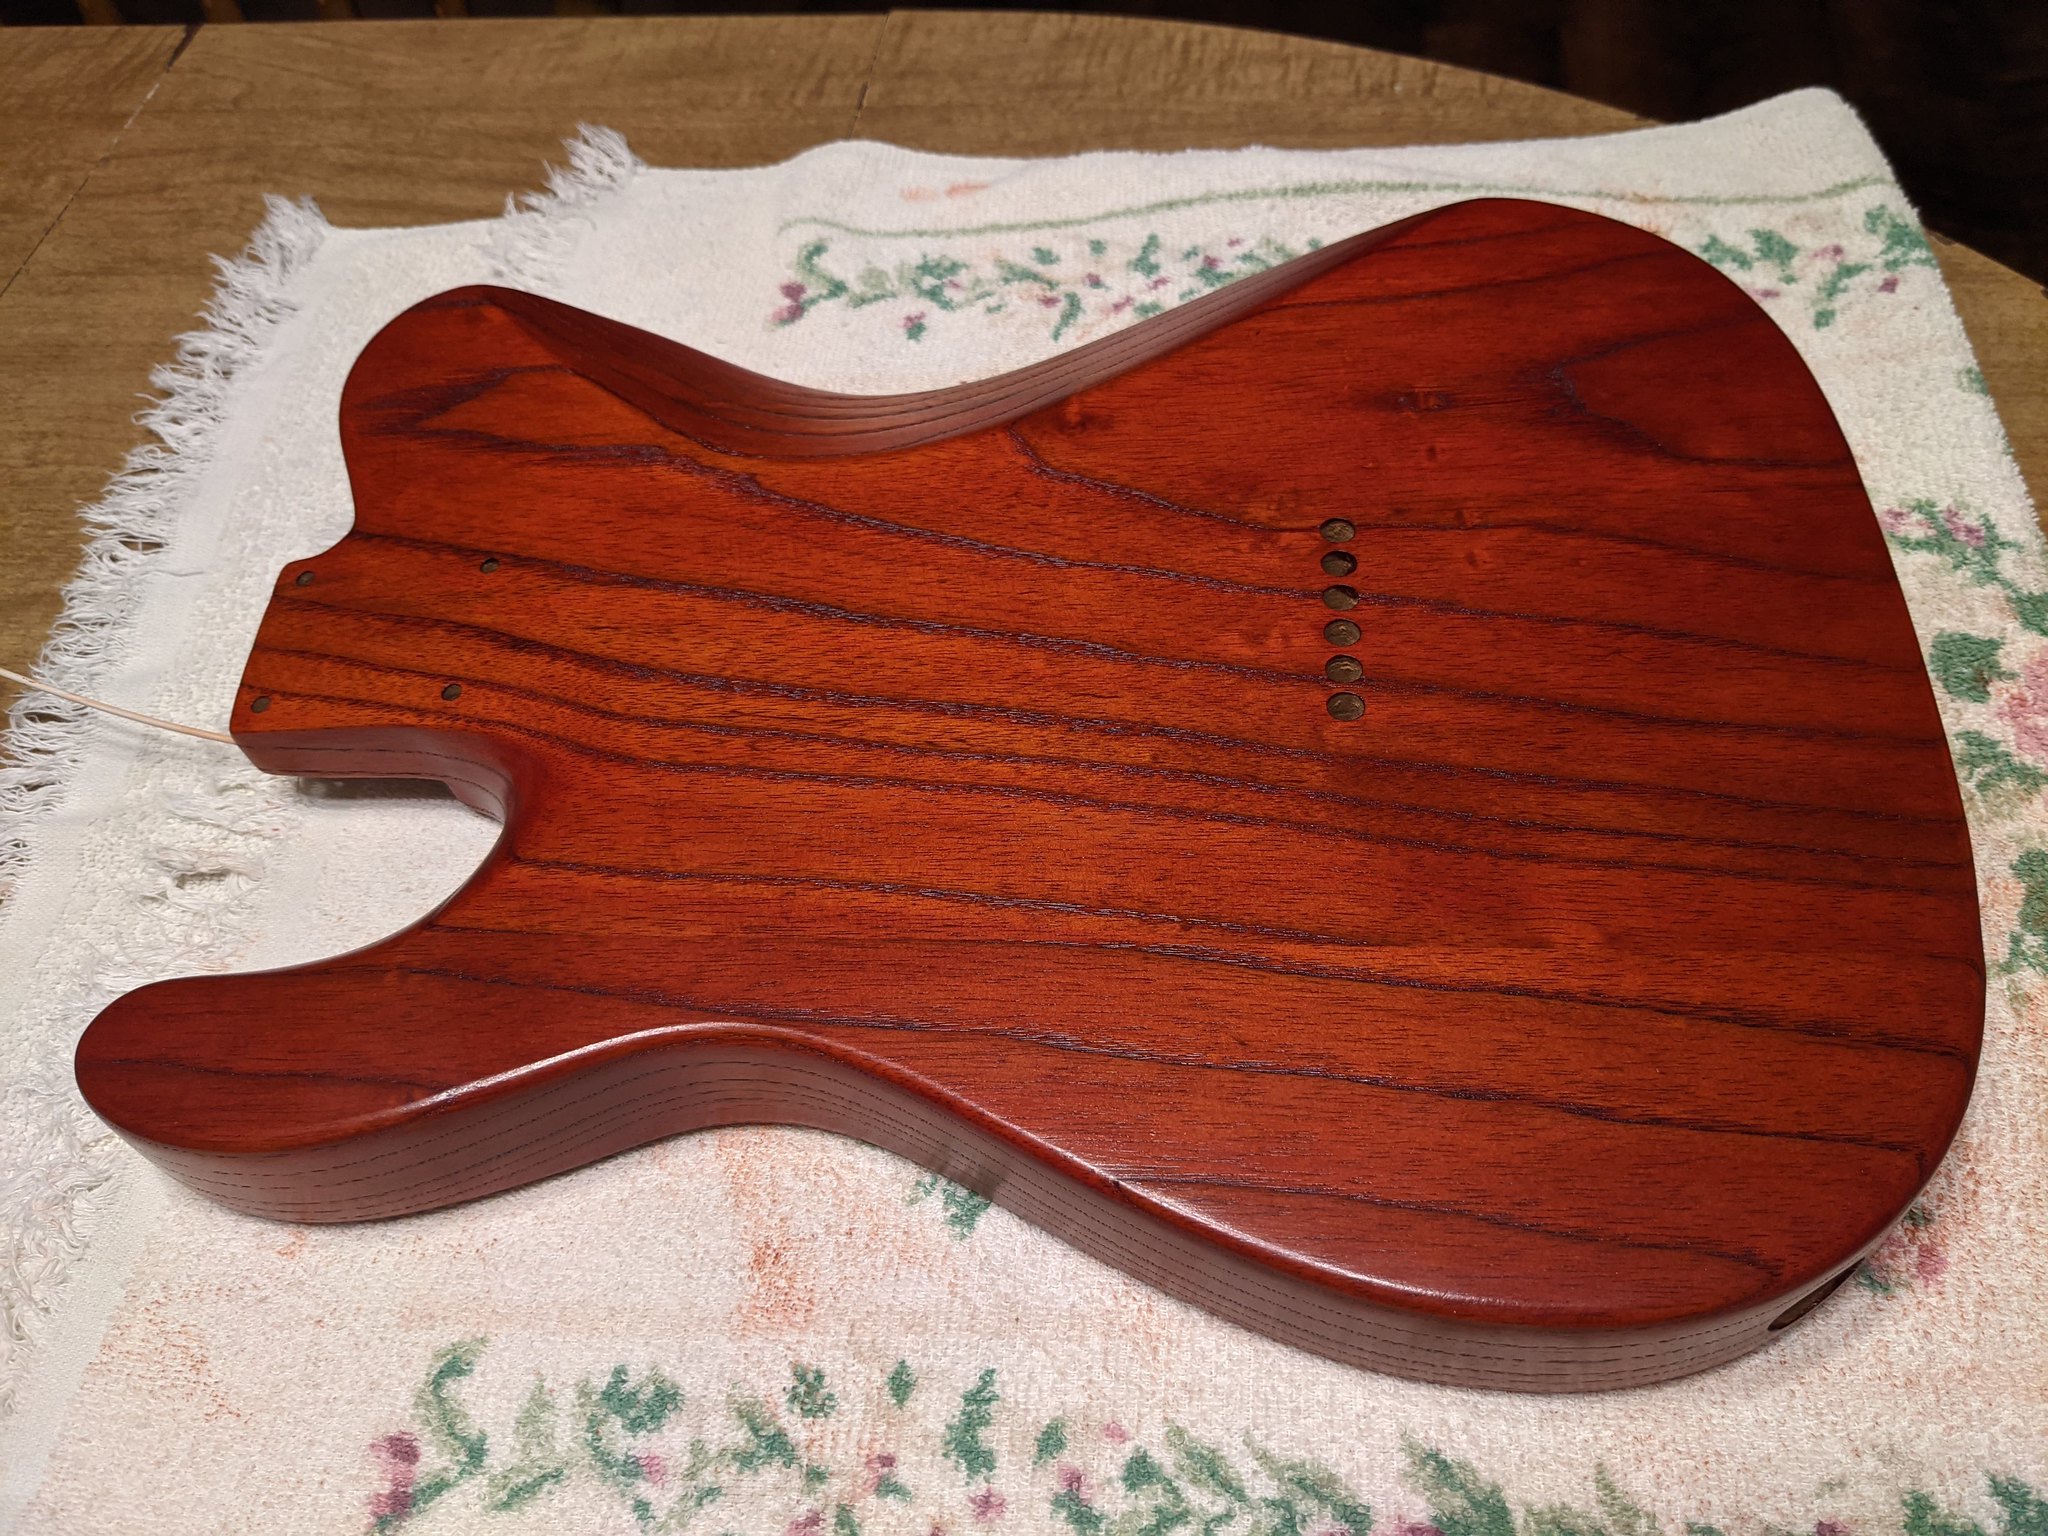
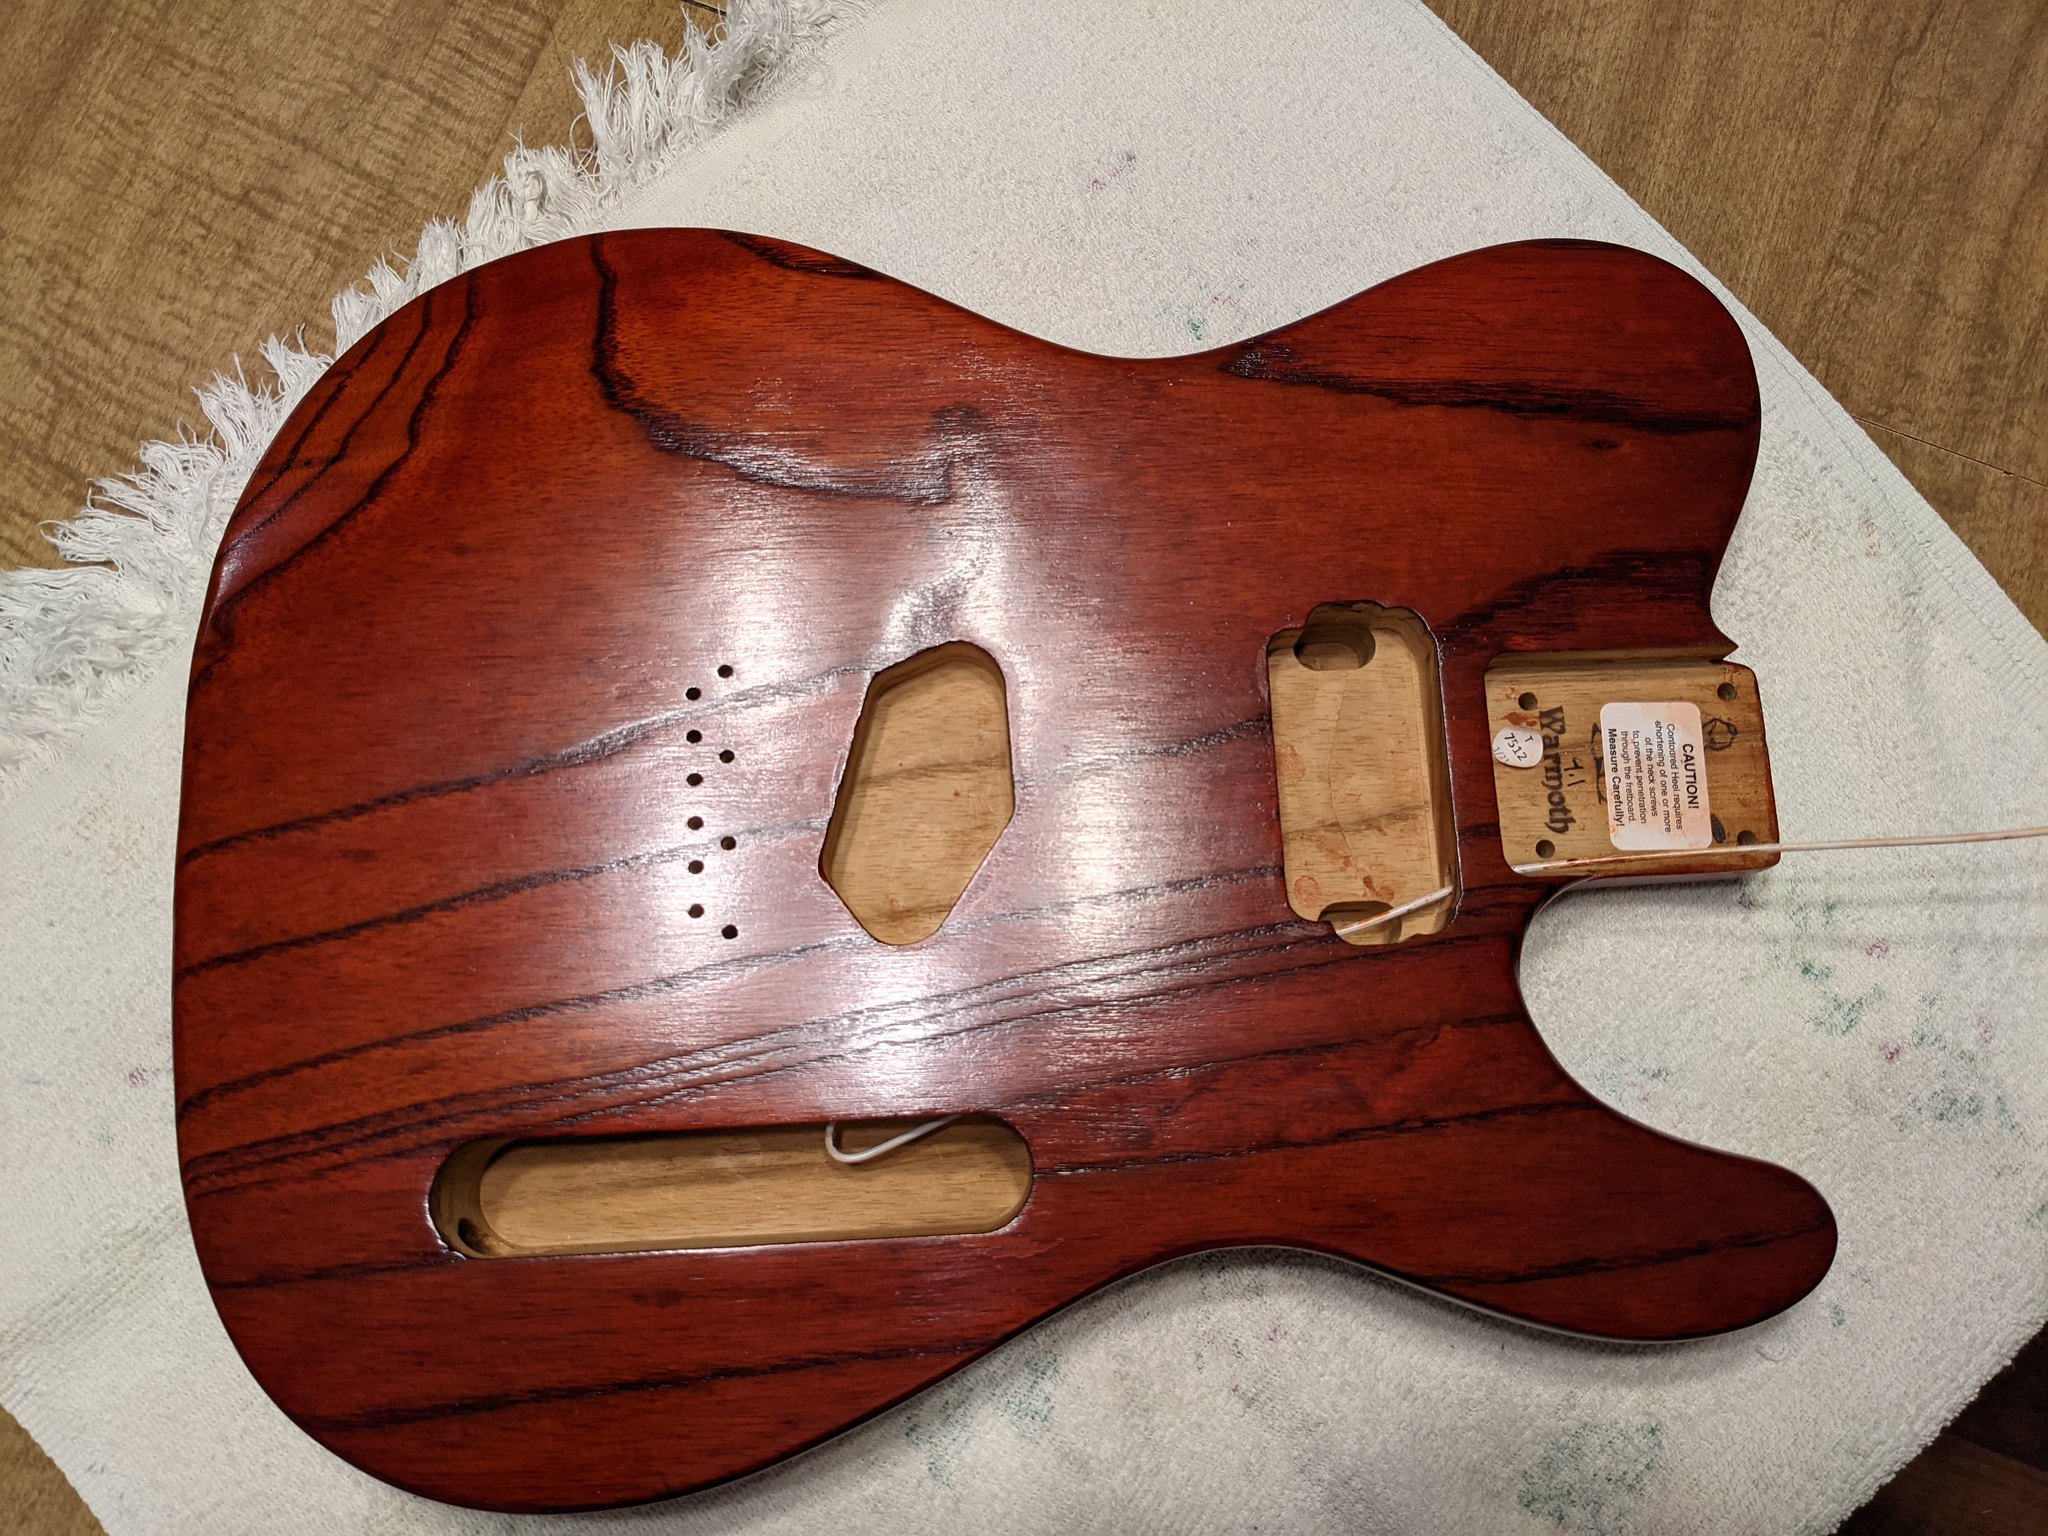
Roasted swamp ash Tele style body from Warmoth
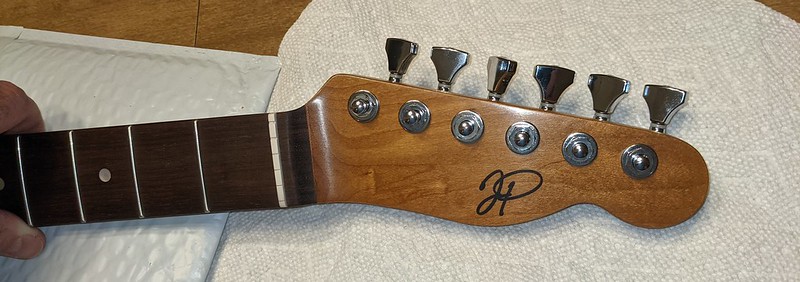
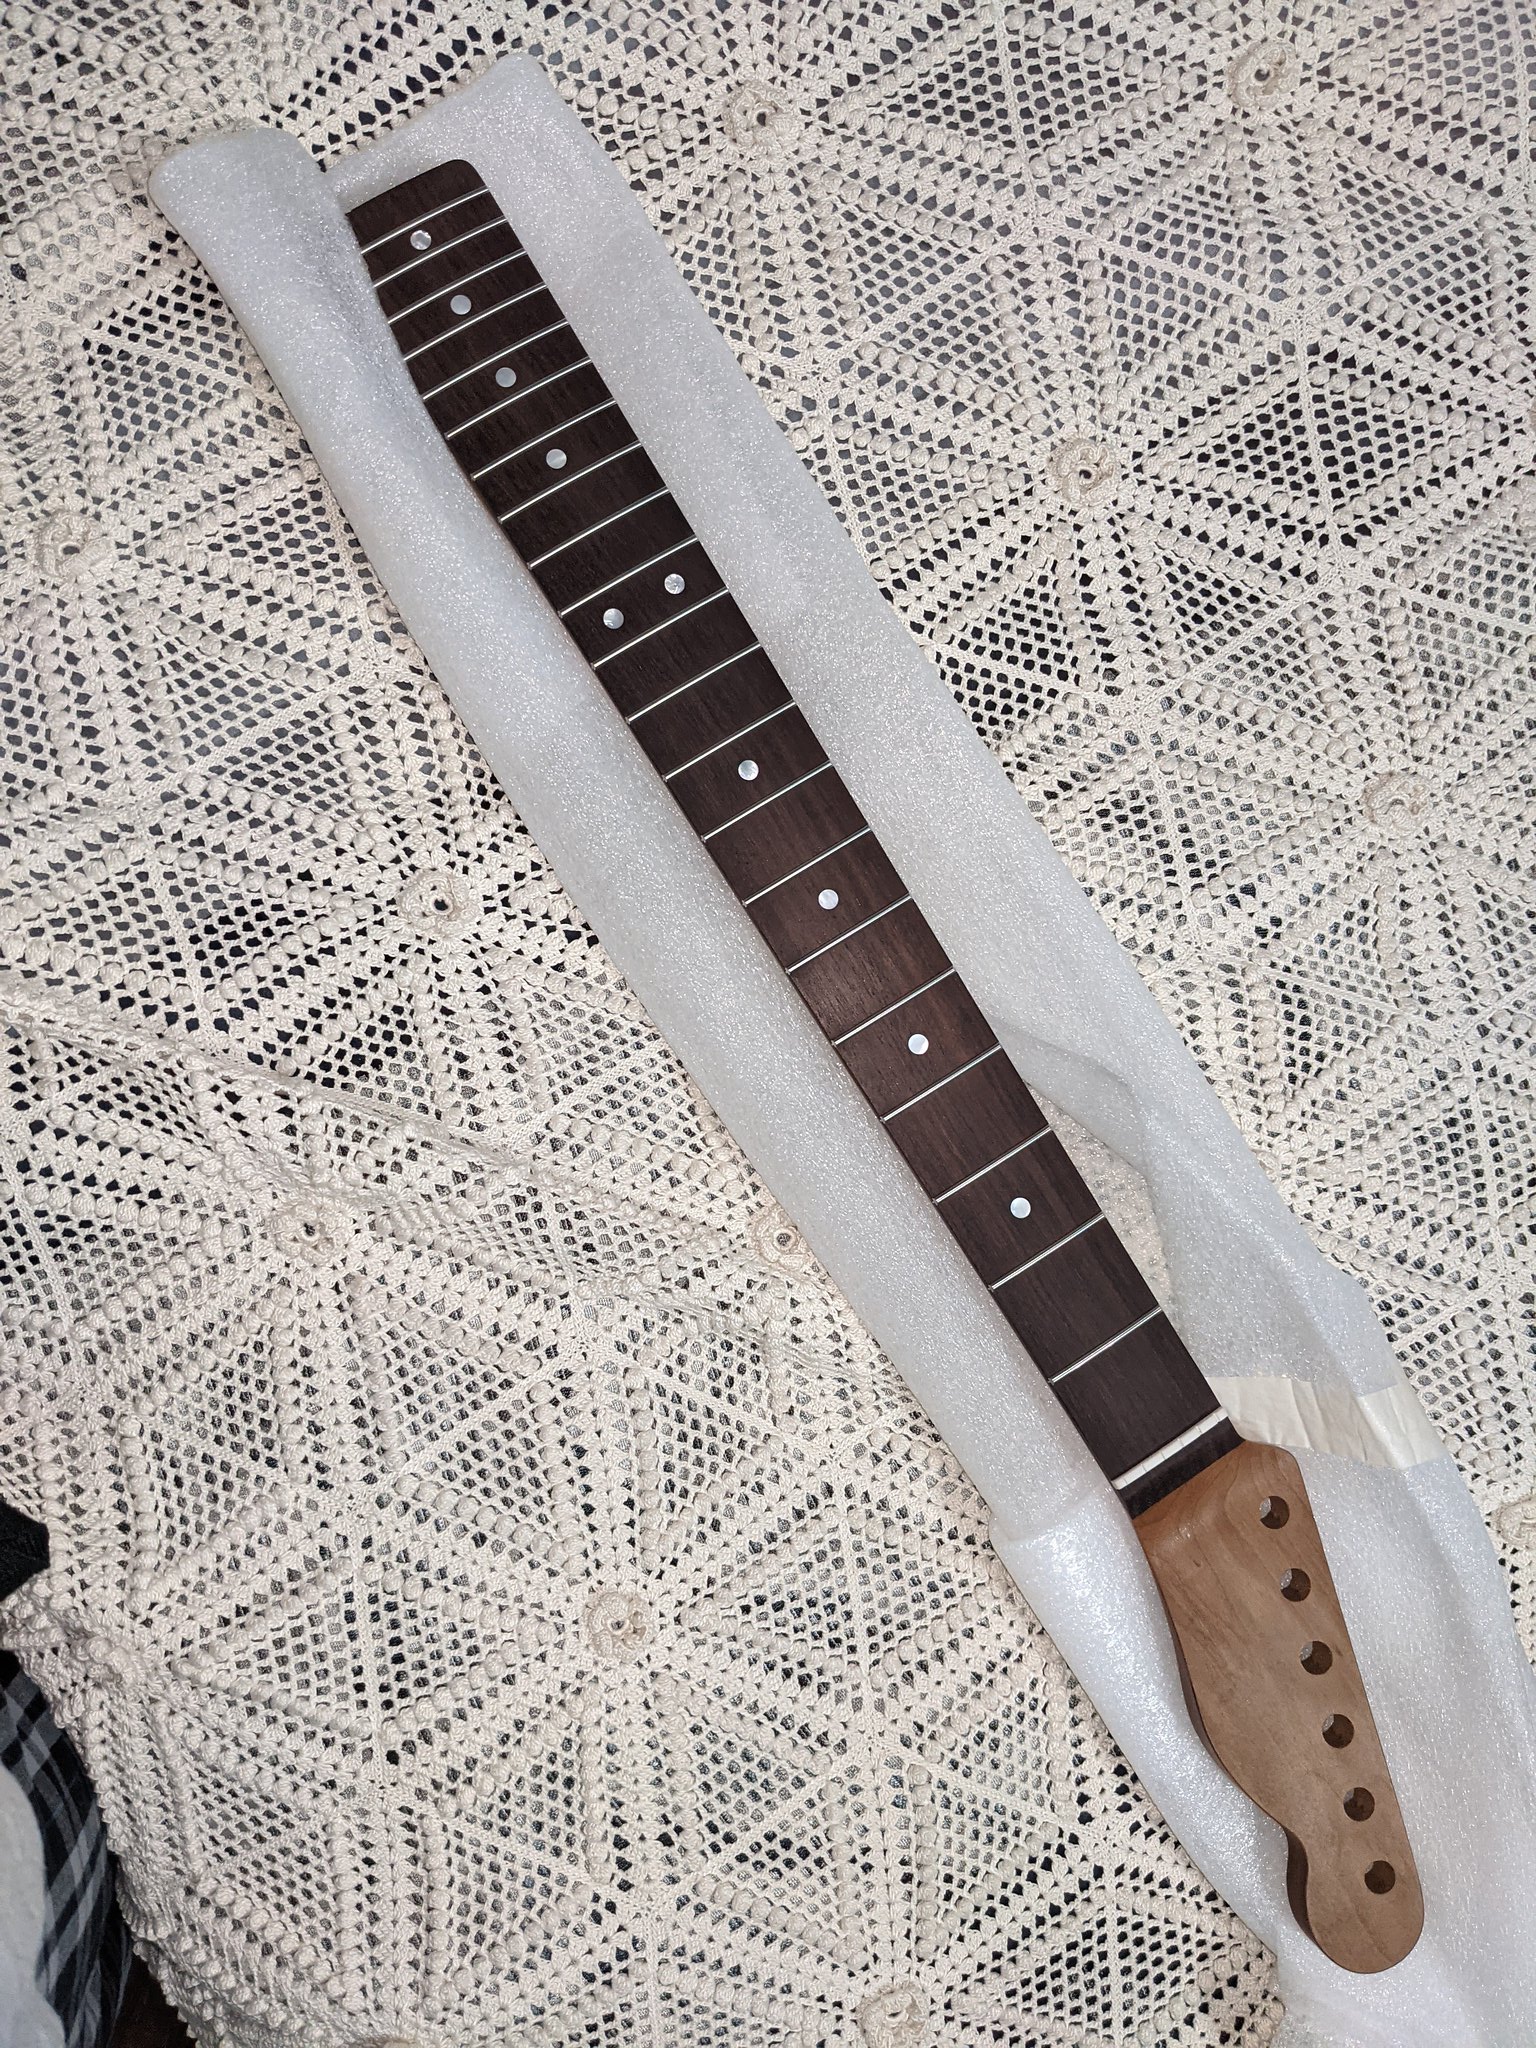
Roasted maple neck with rosewood fretboard, also from Warmoth
Gotoh bridge, vintage style but with compensated brass saddles and cut-down sides
Hipshot staggered, locking, open-gear tuners (actually wanted the non-locking version as they look deliciously retro, but were backordered)
Lindy Fralin pickups--Unbucker for the neck and split blade for the bridge.
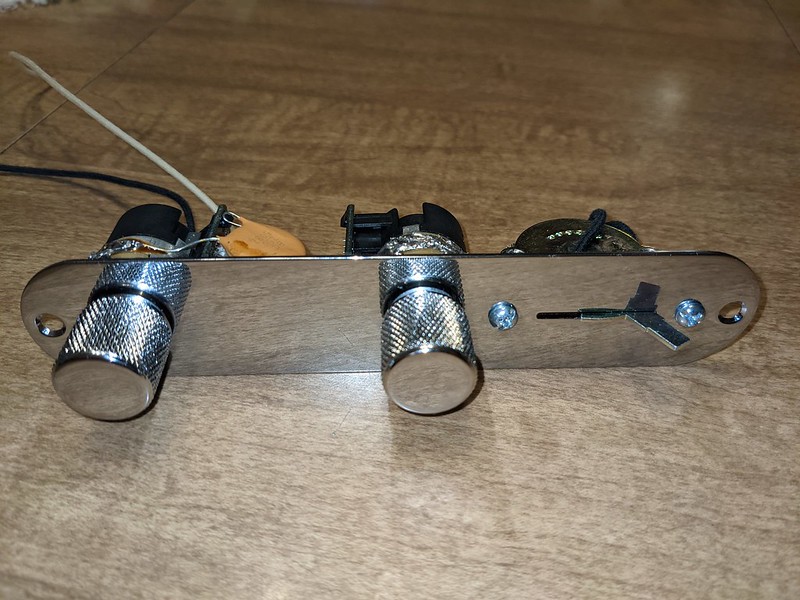
Oak Grigsby Super Switch
CTS push-pull pots
Some fairly standard hardware...Fender control plate & knobs, etc.

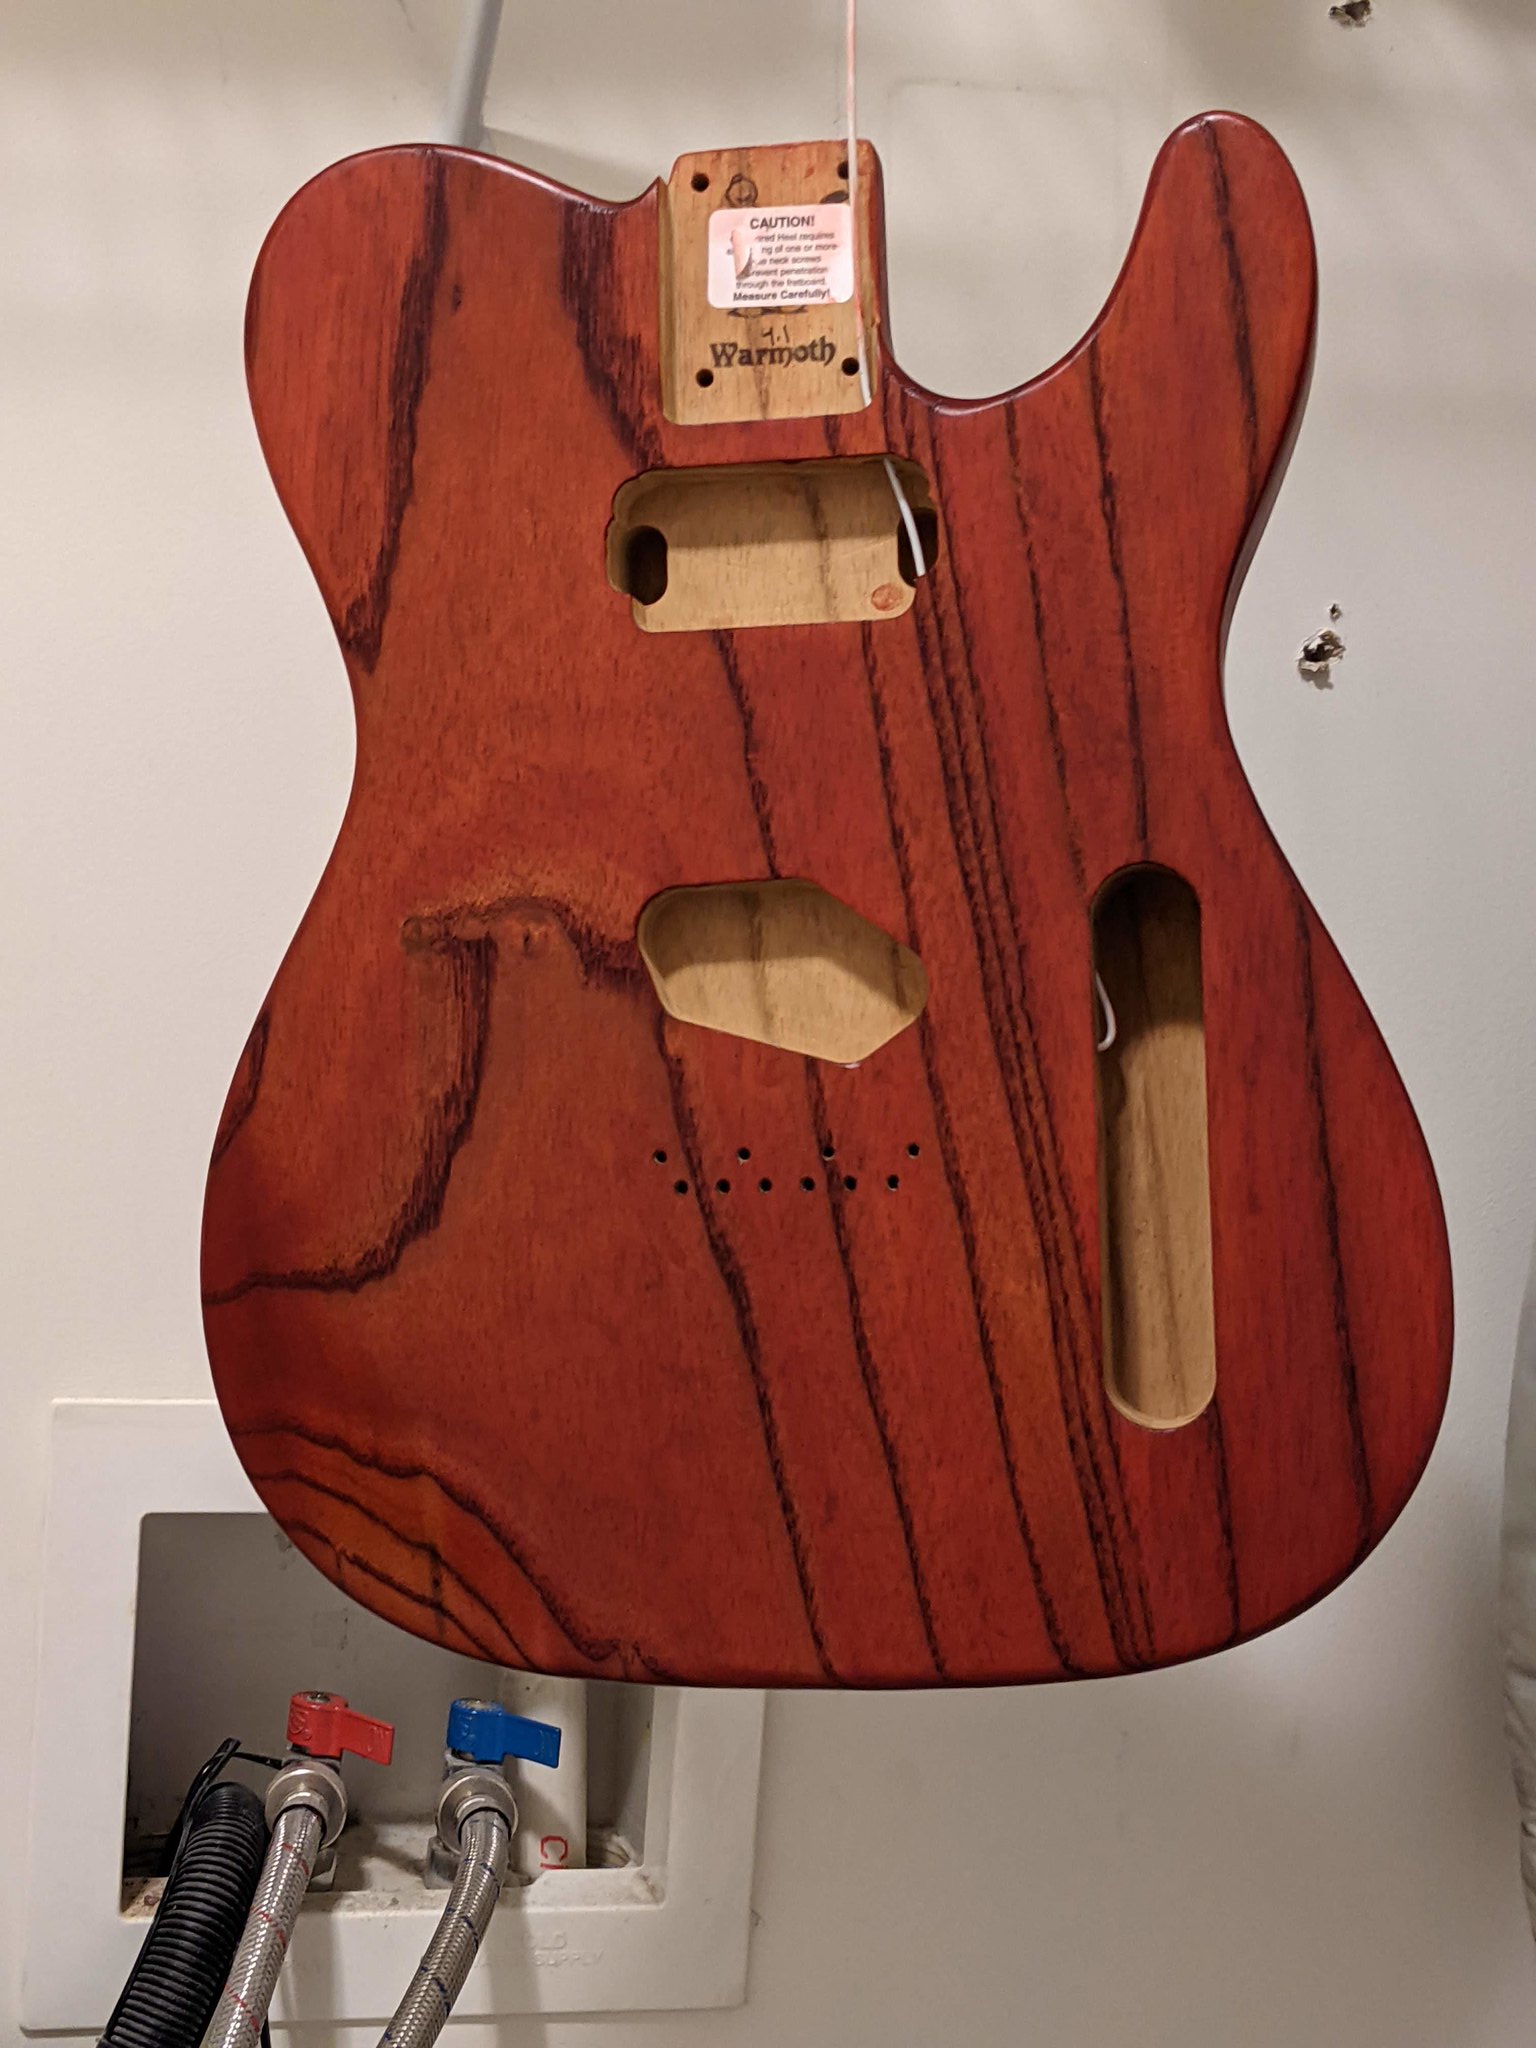
Using Cherry Flamenco finishing kit from Wudtone.  On the RSA, I expect it to be rather dark, and hoping for a transparent burgundy color, hence the subject line.

51121417324_24a6482338_k.jpg

51121560783_d5a59cd9a9_k.jpg"

51121554393_3cf632857b_k.jpg

51121392019_e9fa2ecbc0_k.jpg


Edit to fix pics, and to include unboxing threads per suggestion from @Stratamania.

Out of box threads:
https://www.unofficialwarmoth.com/index.php?topic=33061.0
https://www.unofficialwarmoth.com/index.php?topic=32862.0
 
Look forward to seeing your build.

Just a tip put a link in this thread to your out of the box thread and vice versa to this one.

 
So catching up forum posts with progress, here is body after the Wudtone "Deep Color Coat."  When I first started applying, the wood soaked it up, and I didn't think there would be enough to even finish a coat.  I was able to coat entire body with about 2/3 of the bottle, and then do a second application, leaving only a small amount in the bottle.  Instructions recommended 1-2 applications.  For some reason, I don't have a pic of the back.

51121391699_80e9b5eb0f_k.jpg
 
Here are the results of the first Wudtone "Base Coat".  Two to three coats were recommended with 0000 steel wool in between.  I used the synthetic, and think I did too much, trying to be sure the surface was matte, so went with 4 applications, and I'll call it 3 1/2 coats.  After that first rub I was less aggressive and didn't try to get rid of the sheen.

For the Wudtone Cherry Flamenco, next is to be 2-3 applications of a second Base Coat that is supposed to darken the color some.  This may have to be done in moderation.  As is well-known and discussed, the roasted swamp ash darkens even with clear finishes, and what I'm seeing here is already similar to the gallery images Wudtone shows.  I'm liking it a lot already, so will be cautious. 


51121647636_d5e9b4dfd0_k.jpg

51121076782_8e0a1d6a17_k.jpg
 
PhilHill said:
Looking Very Good. That should turn out really Nice.............. :icon_thumright:
Yeah, I'm loving the color. The darker shade due on this weekend, and it's hard to be patient.        :icon_biggrin:
 
Behind on updates as life has been busy.  The darker pigmented Wudtone was subtle, so no worries on being too dark.  Here it is after 3 (4?) coats.  A bit darker and richer, with more sheen.

In the mean time, I burnished the back of the roasted maple neck.  Started with 600 grit, and went through 800, 1000, 1500, and 2000.  Amazing!  I've done some woodworking before (cabinets, headboard, etc.) but never used anything higher than maybe 150.  I had no idea wood could have a mirror finish with just sanding.  Also have started layering a few coats of lacquer on the headstock to ready it for a waterslide.  (Practicing waterslide application & lacquer technique on a scrap piece of wood...)

To be continued...

51166250419_011302b878_k.jpg
 
Spent an evening (and a bit more) with the soldering iron.  A couple glitches, but I think it will be a success.  It was definitely complicated as the wiring isn't standard.  The general layout is a humbucker neck pickup and single-coil (like) in the bridge.  Went with Fralins for both.  Found an old youtube video from Timothy Lerch that demo'd a Fralin Unbucker with an interesting control setup that was the inspriation.  So the starting point is a 5-way switch:

position 1: Bridge
position 2: Bridge + Split Neck Unbucker
position 3: Bridge + Full Neck Unbucker
position 4: Split Neck Unbucker
position 5: Full Neck Unbucker

I'm using a "super switch" style 5-way, so crowded, but just wait.  :icon_biggrin:

The Lerch video had the splitting controlled with the 5-way, so emulating that I used the 3rd bank to ground the coil split; that part pretty easy.  Why not use a push-pull?  Because they're going to be used for other purposes.

Volume control is a 500K CTS with DPDT push pull.  I added a 500K resister in parallel, only when the pot was pulled out, so I'll have both 500K and 250K resistances (250K mainly for the HB split, and when using the bridge, when I thought I was going to use a standard single in the bridge).  Oh, yeah, also added a treble bleed because I like the volume pot only changing the volume.

Tone control push-pull set up to switch between 22uF and 47uF caps.  Simpler than volume pot, but very crowded!

For the bridge, I was originally thinking about a standard single coil, but ended up choosing the Fralin split blade with the "blues output" that is recommended to work well with 500K pots.  It's Fralin's version of a blade, but the way it's split does hum cancelling, and it's supposed to retain much of the Tele single coil sound.

I'm not a complete beginner with a soldering iron, but far from an expert, so things aren't beautiful, but not a disaster.  The biggest problem is getting it all in the cavity.  With the push-pull pots, there was no place on the bottom of the pots to solder the ground connections, so I used the sides.  That made the control plate too wide to fit into the cavity.  I had to move things around so most ground connections are slightly between the pots.  Annoying, but I think should still work.  It now fits in the body and only slightly rubs when putting it in.  I'm not planning on shielding the control cavity so no shorting out.

 
So on to the Wudtone clear satin top coat.  That's where I was less than thrilled.  After a couple coats it was looking pretty good, but was leaving some streaks in the satin finish.  It was pretty thick, so the problem may have been that it was a bit aged by this time.  I added some naphtha to thin it out for the 3rd and 4th coats, but it sill left streaks that were unacceptable.

I decided to try TruOil on top based on a build @rick2 did.  One coat immediately turned it from satin to glossy!  A couple more coats made things pretty even, although I would prefer a satin finish.  Also, the TruOil seemed to have some micro-bubbles in it that remained after curing; I'm not sure I could get the coats much thinner to avoid it.  Fortunately, you can't really see them unless you're a couple of feet away, with a bright light.  Still, the OCD part of me doesn't like.  :)

I am a bit worried the gloss may contribute to "stickiness" with my forearm.  I'll have to research other threads to see about further tweaks to the TruOil finish.

51166655815_ac954ab45c_k.jpg

 
If you want the tru-oil to end up satin look for some Birchwood Casey Stock Sheen & Conditioner.
 
stratamania said:
If you want the tru-oil to end up satin look for some Birchwood Casey Stock Sheen & Conditioner.
Interesting.  Google shows this as in a bottle like the TruOil, but instructions are a bit vague.  Is this something that could be done after assembly if I decide I'm not thrilled with the finish as is, or should I do it before assembly?  (Hoping not to take everything apart immediately after I put it all together!)

Thanks!
 
After you get the number of coats of tru oil you want let it dry for a month.  Then, buff it with something like meguire scratch x.  That should make any micro bubbles disappear.    As to feeling stickiness on my forearm there’s really none.  In your pic the finish looks greeeeaat!
 
jim232777 said:
stratamania said:
If you want the tru-oil to end up satin look for some Birchwood Casey Stock Sheen & Conditioner.
Interesting.  Google shows this as in a bottle like the TruOil, but instructions are a bit vague.  Is this something that could be done after assembly if I decide I'm not thrilled with the finish as is, or should I do it before assembly?  (Hoping not to take everything apart immediately after I put it all together!)

Thanks!

Ideally like any finish work you would do it prior to assembly.

Also I would recommend once you have completed finishing to put things aside for at least a month to make sure the finish is really starting to get properly hard.
 
rick2 said:
As to feeling stickiness on my forearm there’s really none. 
Good to know.
In your pic the finish looks greeeeaat!
Thanks, that's the dilemma.  I had a vision how it would be, and this isn't it, but it's different in a good way.  Decisions! 
 
Well, I'm in "wait" mode for the body, letting the TruOil cure.  I think I'm going with @rick2's advice and use ScratchX or similar.  So in the meantime...

While checking the fit of parts, I realized a bit of a problem.  I had originally planned on (and bought) a chrome mounting ring for the humbucker, but the route won't quite work.  I found this body in stock and the original route was for traditional single coil.  I asked them to re-route to a humbucker, which they did with no problem, but looking at this closeup you can see the SC route was on the neck side of the hum route and those corners are now larger than the other side.  This isn't a problem with a full scratchplate, but no-go for the ring as 2 of the mounting screws need that corner.  I switched to a reduced size pick guard (styled for a standard control plate and an f-hole) in a vintage tint.  Really like this look.

51242407611_589341fb63_c.jpg


51243176149_8c6637ddd2_c.jpg


As an aside, while looking for pickguards I found a bunch of this shape on Amazon and eBay, labled "Merle Haggard Tuff Dog".  Merle has a Fender signature model with this shape guard, although no f-hole.  I like it because it's a shame to have a beautiful finish and cover it up with the big Tele-style pickguard, where there's not much chance of getting scratched.

 
Other activity not yet documented:

I mentioned I had been working on the neck, by burnishing the back and spraying lacquer on the headstock in preparation for a waterslide.  The self-printed waterslide is now on, with a logo I designed with my wife (the software for her vinyl-cutting machine very useful with nice fonts).  I covered it with a bunch more layers of lacquer, and some extra fine sandpaper in between the last couple coats and at the end.  It's been a long time since all that went on, so I assembled the Hipshot tuners last night.  Pretty happy with how that looks.

51242407581_35f805a663_c.jpg


I previously mentioned the controls being tight in the cavity due to me soldering connections on the sides (the bottoms of the pots were covered with the push-pull mechanism).  I fixed that by moving connections but it turns out it was even tighter than I thought.  Doing some more detailed test fits, I discovered that the tone control was so close to the end of the control plate that it touched the end of the route and pushed the whole plate towards the neck.  The hole for the butt-end (back I guess?) control plate screw was then dangerously close to the edge of the wood and I was afraid the wood would split even with a carefully drilled pilot hole.  I removed everything from the plate, leaving it all attached, and used a round file to turn the round tone knob hole into an oval that allowed me to slide it a couple millimeters toward the volume pot.  Remounted the pots and tightened everything up.  Hope the lock washer on that tone control keeps it tight and it doesn't slide.

I never included a pic of the control plate before, so I'll include one here that hides the messiest of my novice soldering.

51242740328_878627ab2d_c.jpg

 
The 2nd picture in the last two posts is not showing up. Looks like a permissions setting probably.

Edit... they are showing up now...
 
stratamania said:
The 2nd picture in the last two posts is not showing up. Looks like a permissions setting probably.

Thanks, that was annoying.  Had problems with Flickr to start with so switched to Google photos, where my phone had saved them anyway.  Figured would be good if I just skipped the Flickr upload/get link step.  For some reason, treated all 4 images the same way (99% sure) but got different results.  Went back to Flickr...
 
Back
Top