HigherLaws
Newbie
- Messages
- 2
Hello all,
I've done my best to do as much reading as I can and hold off on asking questions that have already been answered. As such, I embarked on my first finishing project after doing my research. Nevertheless, I have some questions about a potential hiccup.
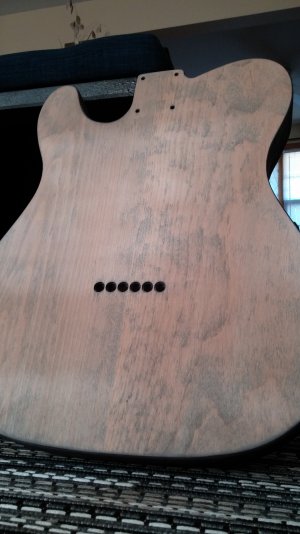
I'm working with a two-piece Alder body that I find to be fairly attractive, given the species. Because Alder is not necessarily known for its personality, I sought to add some through using a black dye to bring out the grain pattern. I gave the body a thorough sanding up to 400 after I received it, raised the grain again, then started with low grit and ended up working to 320. From there I wiped in black dye until I got a solid color and then sanded it back using 320 again. This left some black in the grain and brought out a reddish hue, both of which I liked. I've attached a photo.
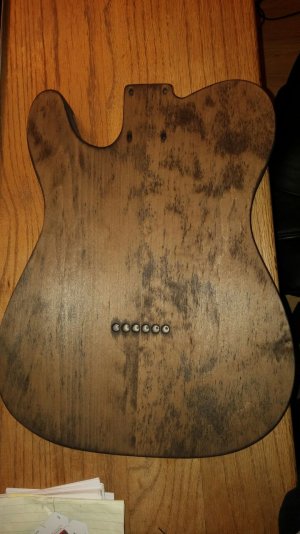
From there I put down another coat of dye, but this time did a darker brown to match a sweet neck I got from Warmouth. I tested this approach on Alder scrap and ended up with a color and grain pattern that I was happy with. I wanted to mimic that, but when I did a layer of the brown, it accentuated the black more heavily on one side of the body. I realize the two pieces of wood have different character, so you might question my choice, but I'm okay with the grain pattern not being in sync. Now, my plan is to sand this back and hopefully take off some of the dark areas. My question is two-fold: will I be able to get at the dark spots after dying it with brown? And would it be foolish to sand back completely and try to get the left side darker with more black dye?
On my test strip I laid down a base coat of shellac, and it came out nicely but darkened everything up a little more (which is fine). But I want to avoid highlighting the black on the right side even further, so I guess this takes me back to my first question...
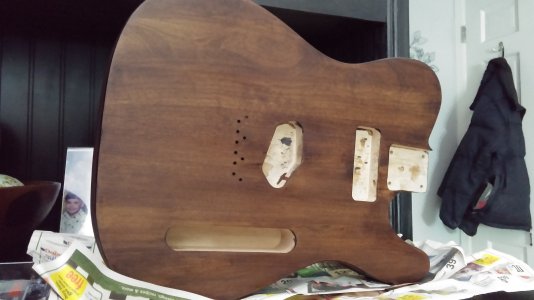
I've attached an after pic as well. The lighting is a bit different but you get the idea when it comes to the spots.


