Prepping a New Roasted Maple Neck

Cactus Jack

Senior Member
Messages
484
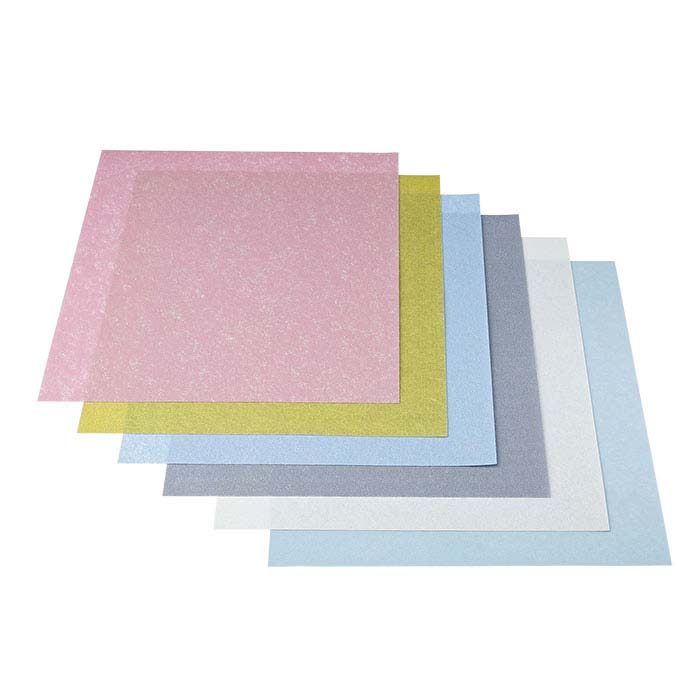
I have a few new necks, and rather than simply bolt them on, I decided to give them a solid once over. My goal is to burnish the neck, and level, crown, and dress the frets. I've never done this before so I'm learning as I go.

Here are a few pics of the necks right out of the box:

3o5XdEw.png

iRANc2e.png

mX6Jmvt.png


Again, I've never done anything like this before, let alone burnish a new neck. I read Cagey's post, grabbed the Strat neck, and got to work. My progression was 600/800/1000/1500/2000/3000 and roughly 10/10/15/20/30 minutes respectively. The pictures don't do the results justice. The neck is like glass, it's soooo incredibly smooth. Now for the good and bad. Good, I love everything about it. Bad, now I hate my finished necks and have 5 other roasted maple necks to do. Funny part, I thought the stock roasted maple felt fantastic...now it feels barbaric.

ZTSje6Z.png

DApWuUK.png

aAyKH9M.png

MuwqEWP.png

xYnpk4V.png

pGXFO4y.png


On to the frets. I debated if I should even attempt a fret leveling. I decided to let my fret rocker decide for me. I grabbed my fret rocker and spent darn near an hour inspecting the frets as closely as possible. While the frets are ready to for 99% of folks I did identify several uneven spots. Some areas were worse than others, but my rule was if I could HEAR the fret rocker tink off a fret I'd mark it. Here are my initial results:

yY6j3a5.png

ifqHX66.png


That's all I got for tonight. Tomorrow and over the weekend I'll attempt to level, crown, and dress the frets. Stay tuned!

 
Nice! I know Cagey did the fret work on my latest build (actually should be arriving to my door today sometime), as well as the burnishing for me, as I ordered it without frets. I may do the same but do the burnishing myself next time. I also like the idea of burnishing the fretboard, at least on roasted maple, which is now my favorite neck. Glossy or finished necks seems horrible now.  :toothy11:

Not sure what other fret board wood can be burnished, or even SHOULD be burnished, outside of roasted maple, and I'm not sure I'm ready to experiment with doing the fret work myself, so I'll still farm that out.
 
pirate said:
Nice! I know Cagey did the fret work on my latest build (actually should be arriving to my door today sometime), as well as the burnishing for me, as I ordered it without frets. I may do the same but do the burnishing myself next time. I also like the idea of burnishing the fretboard, at least on roasted maple, which is now my favorite neck. Glossy or finished necks seems horrible now.  :toothy11:

Not sure what other fret board wood can be burnished, or even SHOULD be burnished, outside of roasted maple, and I'm not sure I'm ready to experiment with doing the fret work myself, so I'll still farm that out.

No doubt Cagey's work will be fantastic. Also, no doubt my work wouldn't even rise to an acceptable level to a pro like him. However, for me it's more about the process and learning. I need to start somewhere.

I think burnishing the fretboard would be awesome, and I don't see why it wouldn't work on every wood. Some like maple I'm sure would be better than maybe a Wenge or something, but I think it would equally awesome.

Please post some pics of your neck when it arrives!
 
Will do! Hopefully tonight when I get home. Working a double today, so won't be until 10 pm or later. Tomorrow at the latest.
 
Today I attempted my first fret level, crown, and polish. Long story short, I love me some PLEK :) .

Wow, clearly I have zero skill doing this, but this is not easy to do by hand. To do well you really need an experienced luthier to perform this work. I'm sure I'll do better next time around as I learned some lessons today. Let's jump in and I'll walk you through my process.

First step is adjusting the neck as straight as possible. I used my notched straight edge to make sure I got it as close to straight as possible. I finished marking up the neck and lined out the tools. Regarding tools, I found a local source that sells precision milled beams for $20. I slapped some 320 on and went to work.

lzbK14w.png


I was nervous getting started. I had no idea how much material would come off. This was actually really easy. The weight of the bar does all the work, and as long as you keep moving there is zero concern about sanding through the radius. The major pain in the butt is to get all the frets level you need to sand down to the lowest fret.

As you can see here most frets have been sanded except the darn low spots indicated by the red highlights.

Z3avQvr.png


Here's another example...gotta keep sanding:

TSeTOEt.png


The high spots indicated by blue have been sanded, but the red has barely been touched...gotta keep sanding:

gsJFvDR.png


Once everything is leveled the frets have uneven tops, but at least they're level. Next step is crowning.

wD1D6Te.png

6zjI7I9.png


First step is taping off the fretboard. I made a rookie mistake by not taping it off before I started leveling. All the material got into the Rosewood and was a pain to clean. I found this tape online, and really like that it came in different sizes as it made taping everything a synch.

0vvDugL.png


I picked up a contoured diamond crowning file. I got it from the same local source for half the cost of Stewmac. It's nice, and very easy to use.

85rrsKC.png

AvoFjfe.png


Crowning seems easy, but to me it was actually the most difficult part. To keep the frets level you really need to go slow. Change your pressure and more material comes off, change your angle and the crowns are uneven. I'd give myself a C-, and need to step up my game next time around. While they may not be perfect, they're also not flat.

Ip4NRYp.png

j1B89Xf.png


Now for the absolutely most tedious aspect of the entire process...polishing. I started with 400 grit sandpaper and worked my way up to 12,000 grit micro mesh. Polishing took 90% of the time involved in the project...which for me was SEVERAL hours. Sandpaper was OK, but I really like the micro mesh. They are little sponge pads and provided great contour around the frets. Great to work with, and I'll replace sandpaper with more of these next time around.

SWLTjvu.png

83iQvbg.png

VIHPmD3.png

8BYevVn.png


Here's a comparison to brand new raw frets:

5RScwzu.png


I know many people don't like to oil up their necks, but I do. Once the polish was done I hit up the neck with a light coat and think it really made the burnishing pop. Tomorrow I need to install the tuners, bolt it onto the body, and do a full setup. Hopefully I'll be rocking my complete guitar by the evening.

Here are a few last pics:

HNZ7PXs.png

WIF99Sz.png

NsovOPu.png

 
Looks really good. That's a fine job. Thanks for allthe pics and explanation.
 
Damn, I didn't realise how much burnishing made the neck shine, really nice work. I'm looking at building my first Warmoth next year, is doing the fretwork yourself something you'd recommend? What body is this neck going on?
 
If you have a crowning file like you do, something that'll make crowning a bit easier/cleaner/faster is to get some of these 3M "polishing papers".  StewMac sells 'em, among others.
337308.jpg
Cut a 1" or so strip off them, and wrap it lengthwise along the crowning file. Start with the green, then grey, then blue, progressing through the grits from coarsest to finest. Go back through your frets with each grit, as if you're crowning all the frets again. Puts a nice, smooth convex  crown on them, so you keep a good profile, as well as cleaning off the ink from your tell-tale marks. Also, since you're cutting side to side instead of lengthwise, the frets won't develop horizontal scratches that you can hear while you're playing.

Once you're down with that, use the micromesh for final polishing, again going side-to-side instead of lengthwise to get a super-fine finish.
 
Cagey - You are a sage indeed. What an obvious, and intelligent, solution...that never crossed my mind :) . Seriously, these little tips and nuggets you share are absolutely invaluable to guys like me. Thank you for your contribution. You are appreciated!

One of my biggest takeaways from this little endeavor has nothing to do with guitars. It's all about self confidence. For years I've told myself I can't do this type of work. I'm a CFO, putting a drill in my hands is down right dangerous. I've let my irrational fear of failure and self doubt keep me on the side lines.

Damnit, it feels good to accomplish something outside of my comfort zone. It feels so good to be curious and learn something new. As lame as it sounds, I'm actually proud of myself. Trust me, my work is so far from perfect the dude in Guitar Center could spot the many flaws. You know what, I don't care. I did it, I like it, its my guitar...and the next one will be even better.
 
Axkoa said:
Damn, I didn't realise how much burnishing made the neck shine, really nice work. I'm looking at building my first Warmoth next year, is doing the fretwork yourself something you'd recommend? What body is this neck going on?

The frets on a new Warmoth neck are good for 99.9% of folks. You can bolt the neck on as is, and start jamming without issue. I took this project on as a learning experience. Once you get your neck, grab a fret rocker, check the frets out, and decide what you want to do. To be honest, I don't know if all this work will make a tangible difference, especially to a hack like me. Who knows, but it was fun.
 
Couldn't put her down tonight. I installed the tuners, another first for me (Love HipShot :) ), and bolted her up.

The body is an MJT. I wanted to go for an eclectic vintage vibe, which is fitting since I pieced it together with spare parts. Pickups are Seymour Duncan Jazz and JB wired to a unique Ibanez 5 way switch. The switch allows for neck in series, neck in parallel, neck and bridge in series, two inner coils, and bridge in series. It was my first time wiring anything, first time soldering, and similar to this project, it took me way longer than it should have. Gotta learn somehow...

IUoXeGI.jpg

nruSKmh.jpg


Tomorrow is the setup. Wish me luck!

 
Cactus Jack said:
Cagey - You are a sage indeed. What an obvious, and intelligent, solution...that never crossed my mind :) . Seriously, these little tips and nuggets you share are absolutely invaluable to guys like me. Thank you for your contribution. You are appreciated!

One of my biggest takeaways from this little endeavor has nothing to do with guitars. It's all about self confidence. For years I've told myself I can't do this type of work. I'm a CFO, putting a drill in my hands is down right dangerous. I've let my irrational fear of failure and self doubt keep me on the side lines.

Thank you for the kind words! Always happy to help.

Sometimes, fear of failure can be a Good Thing. Part of our survival instinct. Keeps us from trying to fight bears or fly off cliffs unassisted :laughing7:  But, it's important to keep in mind that failure can be a damn good teacher. The only people who don't make mistakes are those who don't do anything, and where's the fun in that? :icon_biggrin:
 
Well done for jumping in and giving it a shot. The final polished result looks good.

Just a couple of notes that may be useful.

I was looking at the earlier levelling and it seems quite a lot of material was removed. In addition to checking the neck is straight with a notched straightedge it is worthwhile checking how straight the frets are along the length. The tops of the frets being straight would need to take precedence over the board if there is a discrepancy. It may be a trade-off.

When using the beam the lie of the strings needs to be followed with a compound radius rather than each stroke being parallel with the centre line of the neck as would be the case with a straight radius.

Again well done for jumping in and going for it.
 
stratamania said:
Well done for jumping in and giving it a shot. The final polished result looks good.

Just a couple of notes that may be useful.

I was looking at the earlier levelling and it seems quite a lot of material was removed. In addition to checking the neck is straight with a notched straightedge it is worthwhile checking how straight the frets are along the length. The tops of the frets being straight would need to take precedence over the board if there is a discrepancy. It may be a trade-off.

When using the beam the lie of the strings needs to be followed with a compound radius rather than each stroke being parallel with the centre line of the neck as would be the case with a straight radius.

Again well done for jumping in and going for it.

You are correct. I did take a lot of material off. I took too much off.

About 3/4s into crowning it popped into my head that I should’ve measured the level of the frets too and compromised before sanding.

I think my biggest problem was my highest fret was abnormally high while my lowest fret was abnormally low. As such, I probably sanded too much. Also, compared to two other necks I’m working on this neck had 3x the amount of uneven spots, so it took a lot of work. I should’ve started with something easier.

Can you explain following the strings a bit more? My technique was to touch the bar just enough to keep it moving and put little to no downward pressure. I ran the bar length wise up and down the entire neck following the strings. I never went directly side to side.

Thanks!
 
Okay got it. Moving lengthwise is what you want to do. But a compound or perhaps what is better described as a progressive radius is a cross section of a cone rather than a cylinder with a straight radius.

So the idea is the beam although it needs to move lengthwise also needs to fan out toward the bridge as the strings themselves do. If the beam is kept parallel to the centre line of the neck as it would need to be on a straight radius that would be less than ideal.

Here is a picture in plan view of a cone. The red dotted lines illustrate a line that is not following the taper of the cone.

Cone Plan View by stratamania, on Flickr

You might find this video also useful.

[youtube]https://www.youtube.com/watch?v=EeXkvwmH0ts[/youtube]
 
Ahhh....makes total sense. Thank you for the clarification. I'll change my technique next time, which will no doubt generate better results.
 
Reflecting a bit more on the project. Rookie mistake was jumping without fully assessing playability first. I think I should have performed a full setup and determined by playability if the frets needed to be leveled. If I could achieve my ideal setup, awesome, no work is needed. If I can't get the setup dialed, then I'd assess the frets. This time around I did it because I wanted to learn but on future guitars, I'll let playability dictate the process.
 
Back
Top