Koa Semi-hollow Carved-top Tele, Version 2 - Finished

aguyinaustintx

Junior Member
Messages
88
Here's the finished guitar and specs:

gita-top.png


gita-full.png


gita-headstock.png


gita-neckjoint.png


gita-case.png


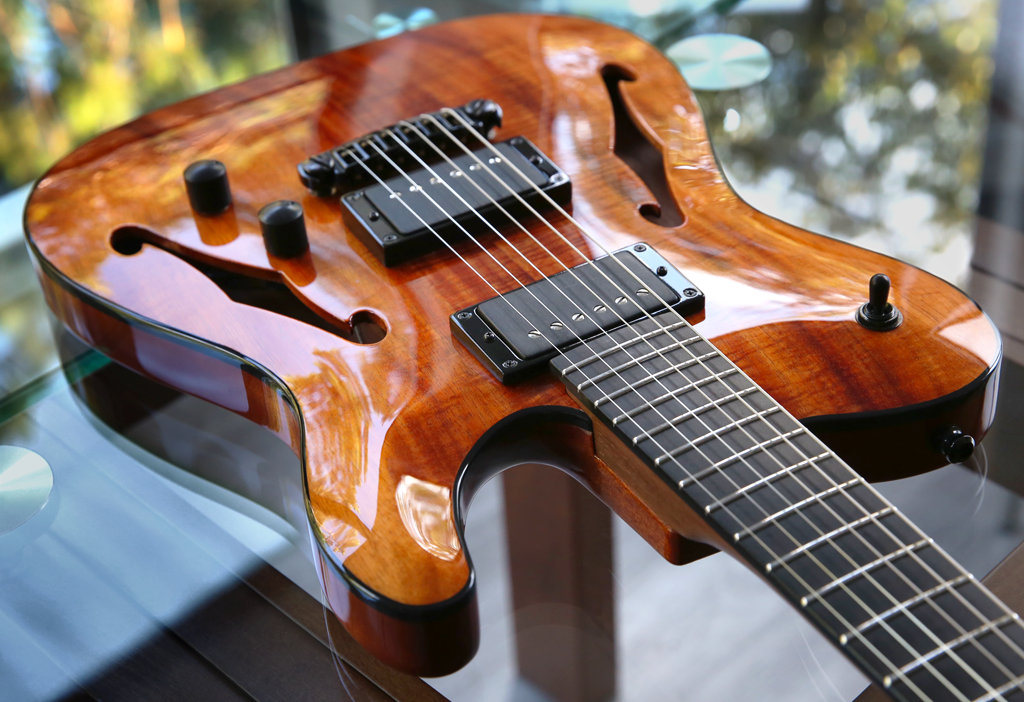
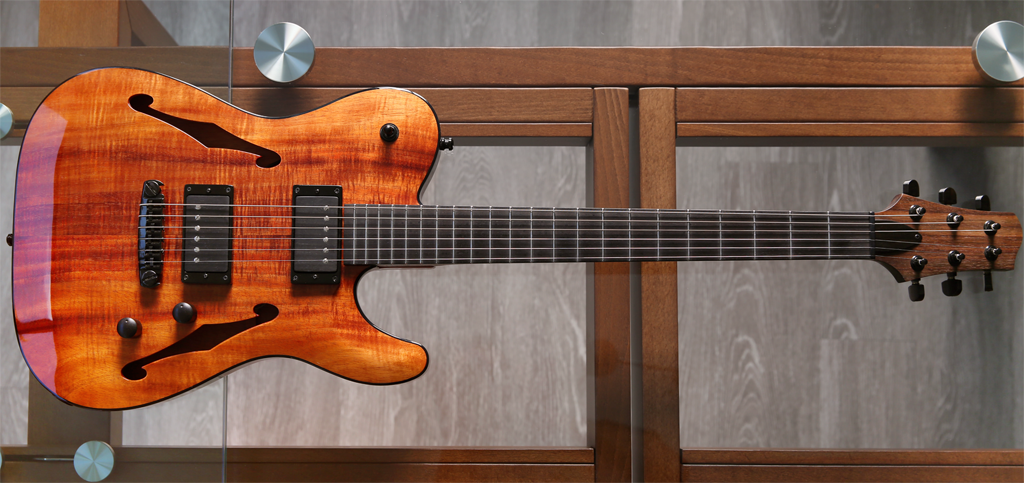
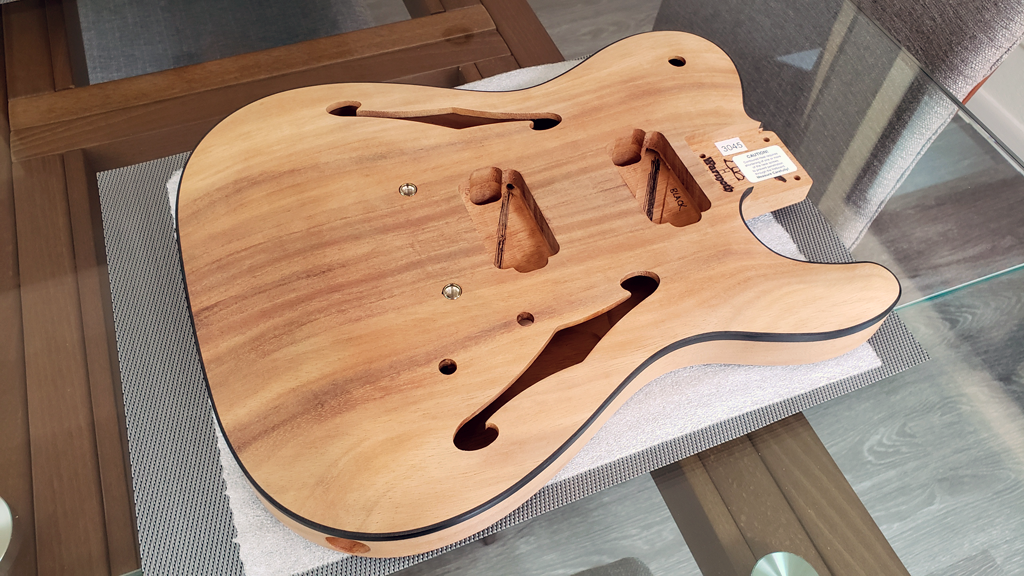
Warmoth Telecaster, Carved Top, Hollow:
Orientation: Right Handed
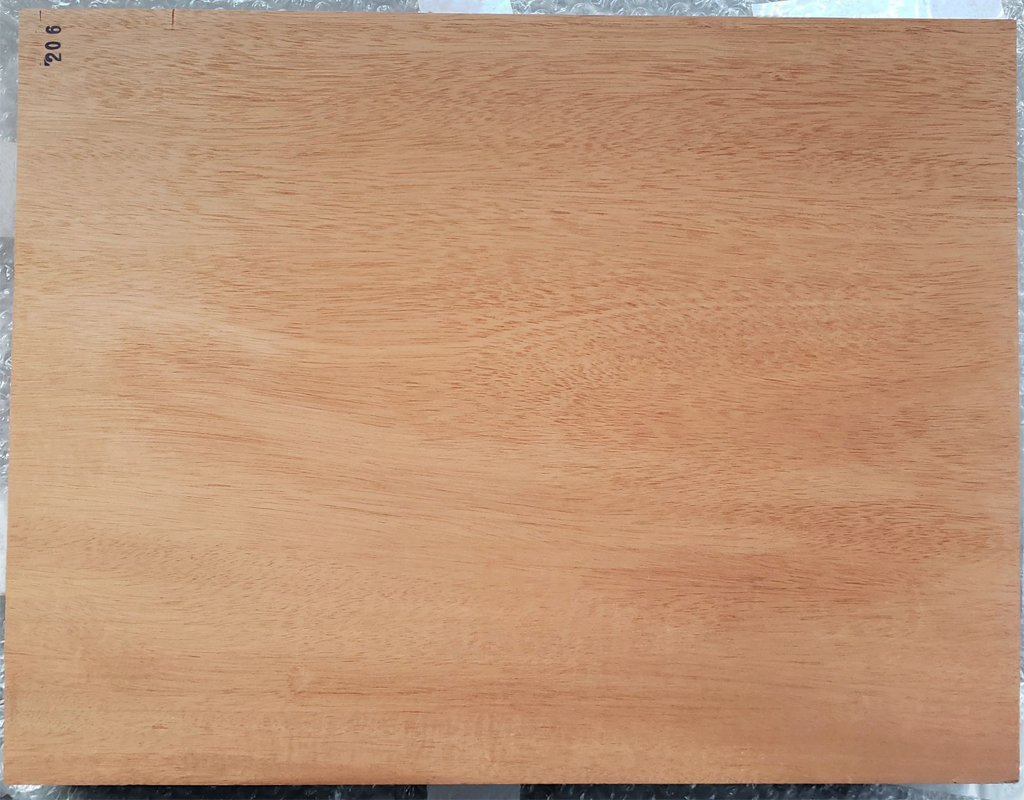
Customer Supplied Top: Koa (Acacia koa)
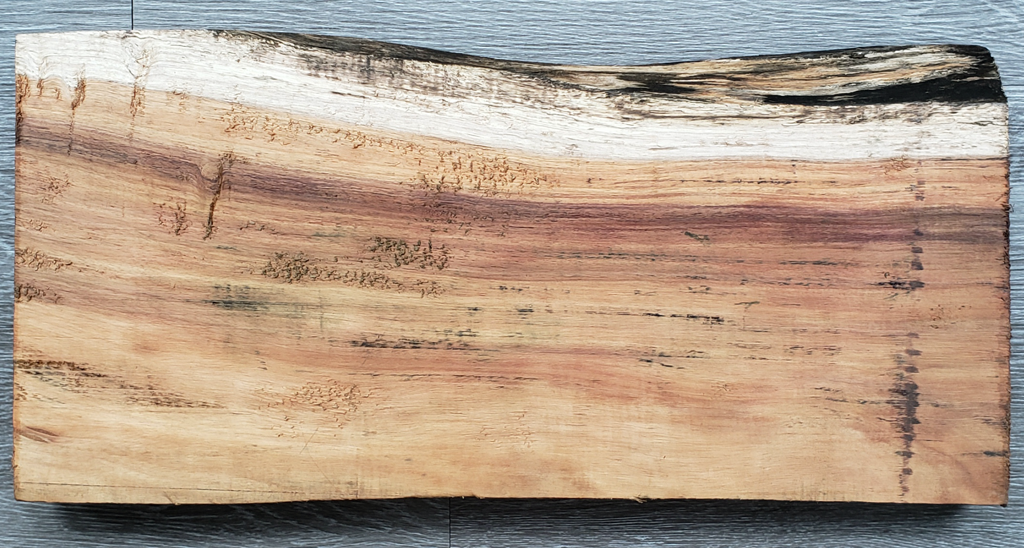
Customer Supplied Bottom: Honduran Mahogany (Swietenia macrophylla)
Black Top Binding
Tele Neck Pocket
2 F-Holes
Pickup Rout: Humbucker - X - Humbucker
Controls: (3-Pot CT Tele) Vol - T1 - None
Upper bout 3-way switch rout
Bridge Stud Install: Schaller Signum
7/8" Side Jack Hole
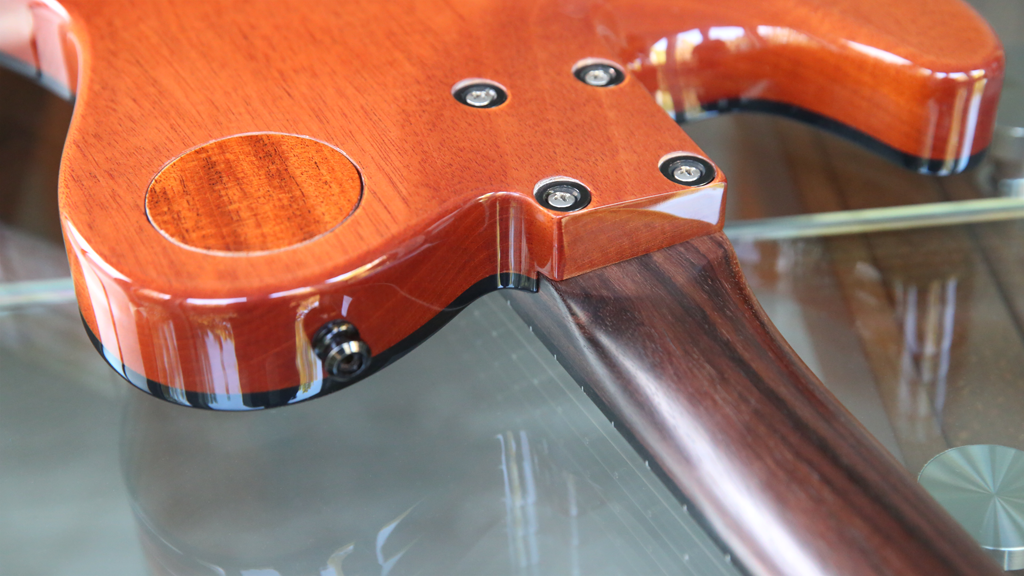
Standard 4 Bolt Mounting Holes, converted to Machine Bolts/Ferrules/Bushings by Wilkins Guitars
Contoured Heel

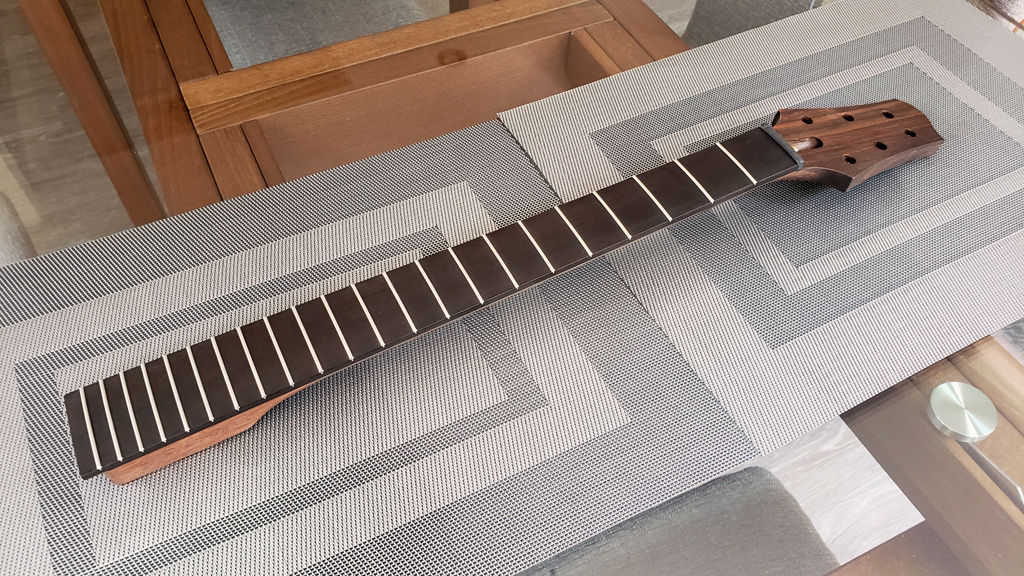
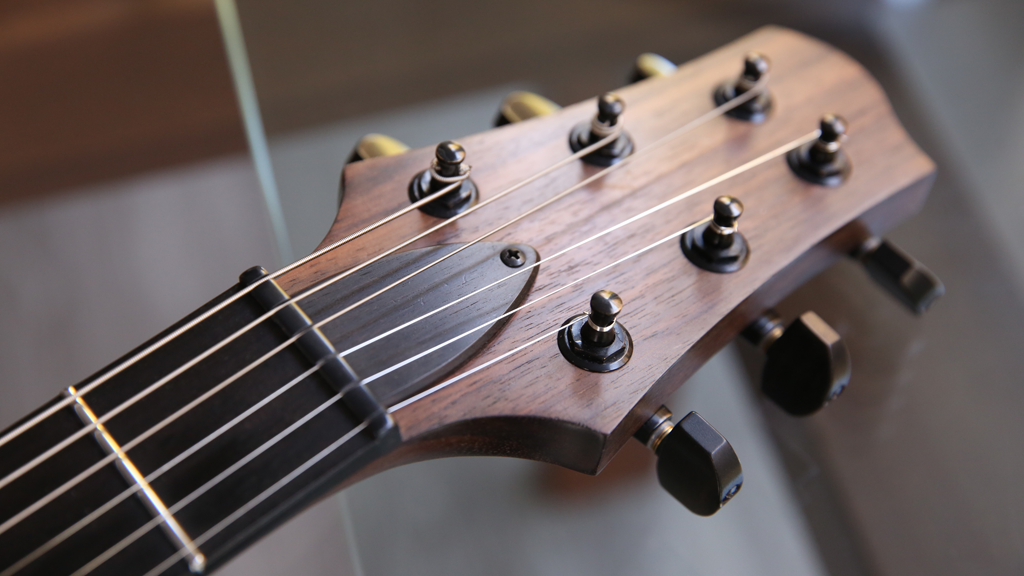
Warmoth Modern Tilt-back Construction Neck, Vortex:
Indian Rosewood (Dalbergia latifolia)
Indian Ebony (Diospyros melanoxylon) Fretboard, Unique Choice FB3262
Tele Heel
Scale: 25-1/2"
Orientation: Right Handed
Nut Width: 1-11/16"
Neck Profile: Wolfgang
Radius: Straight 12"
Frets: 22
Fret Size: SS6105 (Stainless)
Tuner Ream: Schaller (25/64")
No Inlay
No Side Dots
GraphTech Black TUSQ XL - Standard Nut
Mounting Holes: Standard 4 Bolt

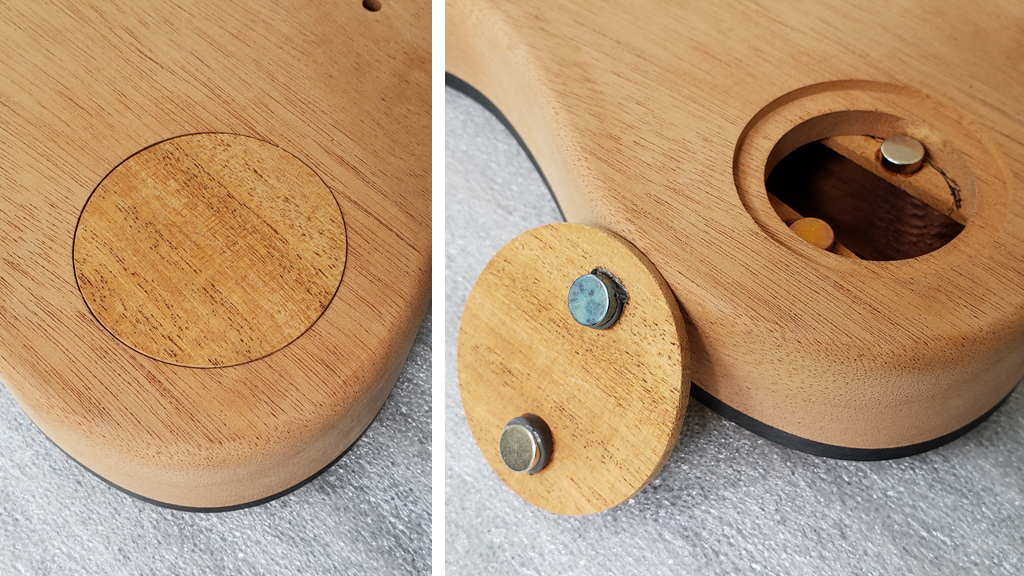
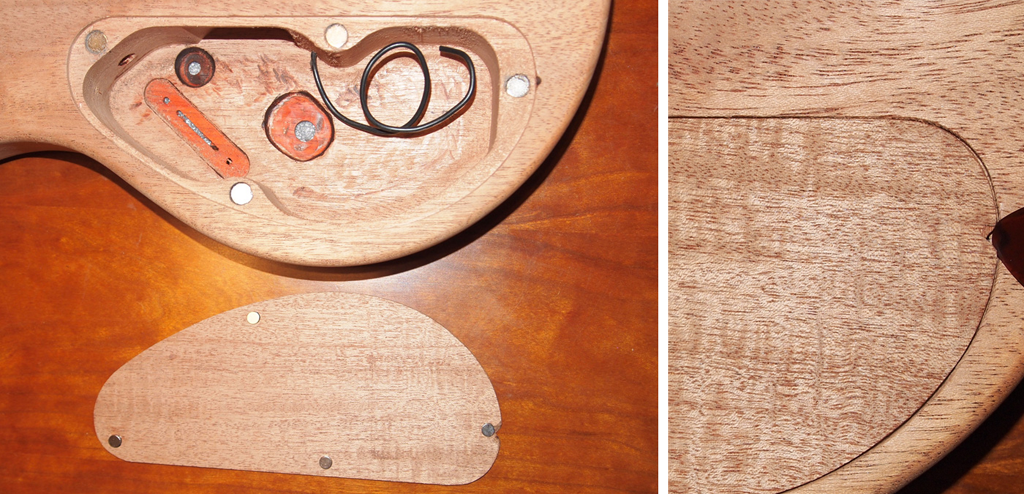
Pickup Selector Switch Cover Plate:
Mahogany with Magnetic Fasteners (Custom)

Dknob.com Custom Parts:
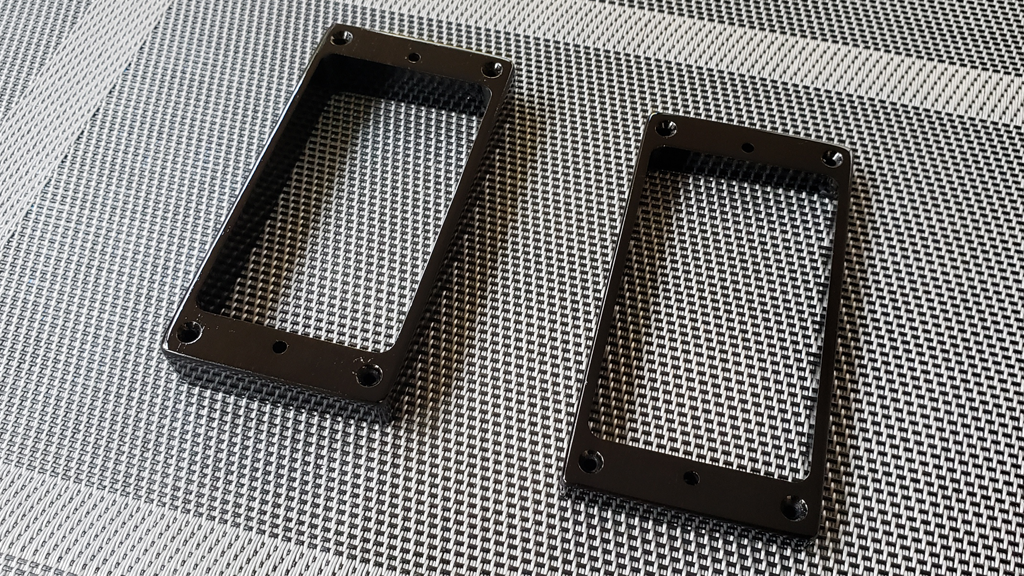
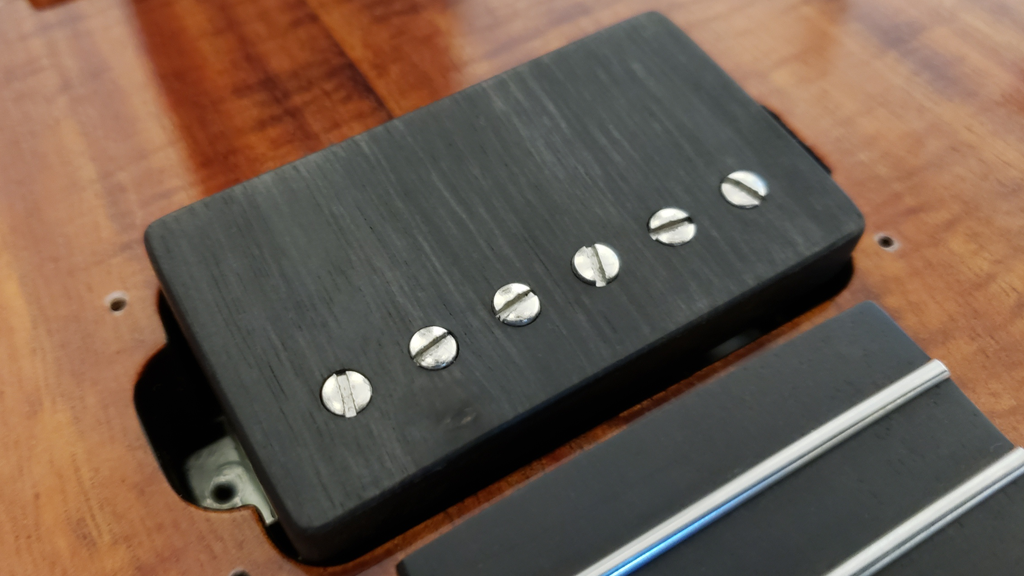
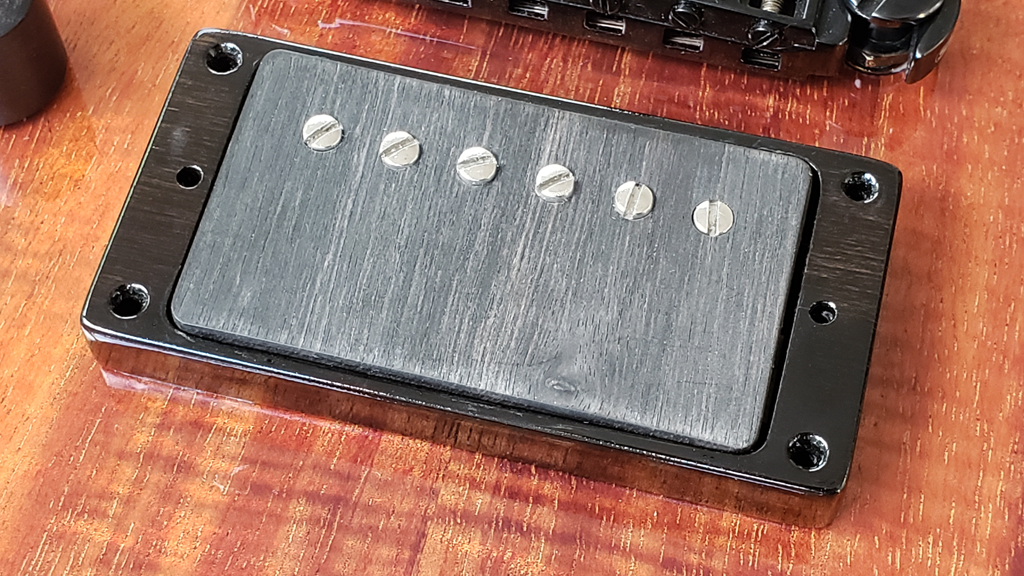
Ebony Humbucker Pickup Covers and Rings
Ebony Dome knobs
Ebony Truss Rod Cover
Ebony 3-Way Switch Tip
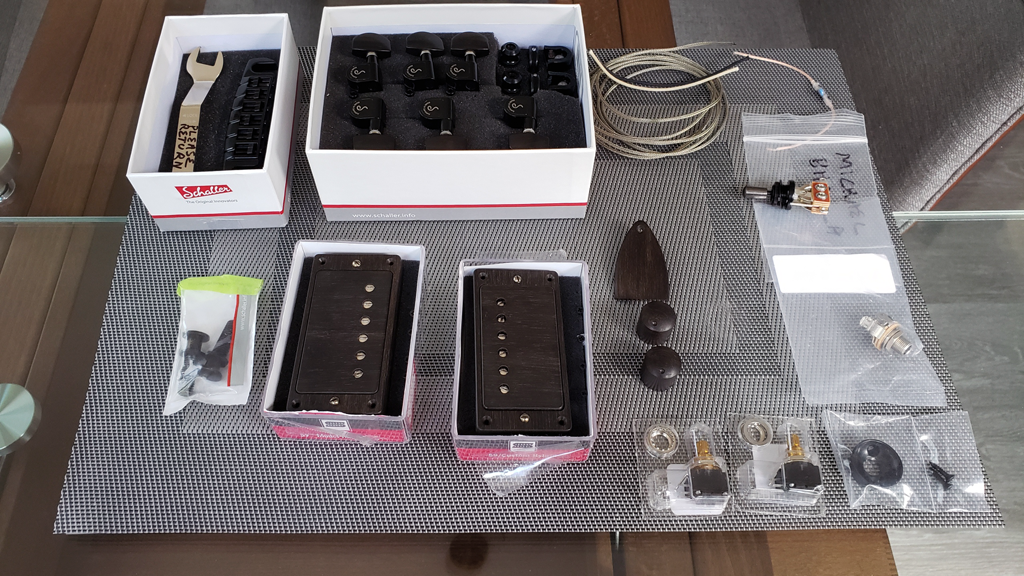
Schaller:
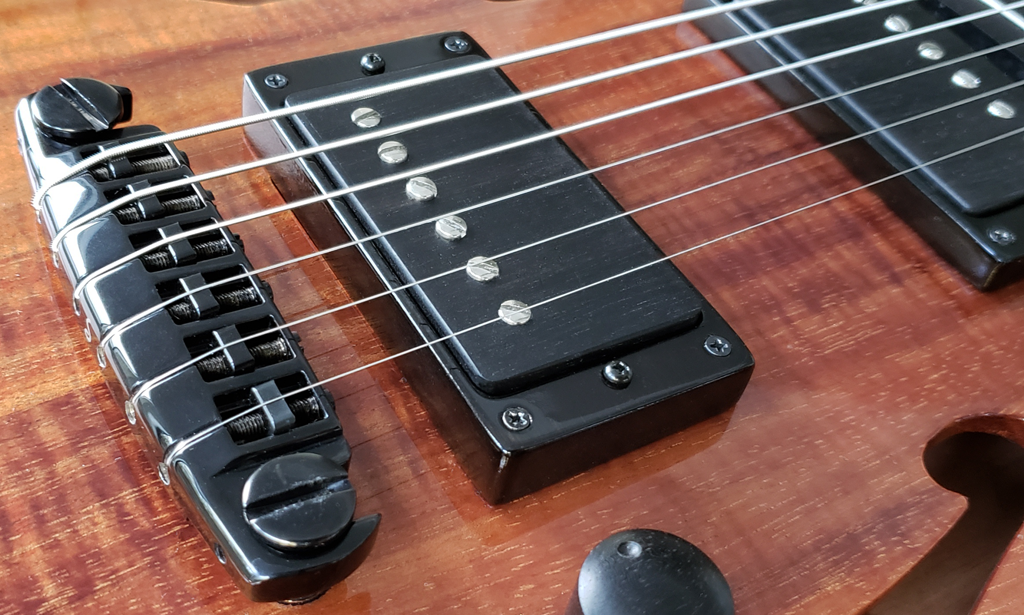
Signum Wraparound Bridge (Black)
M-6 3+3 Guitar Machines (Black)
S Locks (Black)

Crazyparts.de:
Ebony M6 Tuner Buttons

SeymourDuncan:
'59 Neck SH-1n Pickup
'59/Custom Hybrid SH-16 Pickup

Circuit:
Bourns 500K Audio Series 95 Potentiometers
0.30 mF Tone Capacitor
Braided Wire
Black 3-way Toggle Switch
Black Electrosocket Jackplate
Pure Tone Output Jack Output Jack

Finish:
Wilkins Guitars

Fret Dress, Nut and Saddle Filing, Setup
Ben Nippes of South Austin Music, his mojo really made it sing
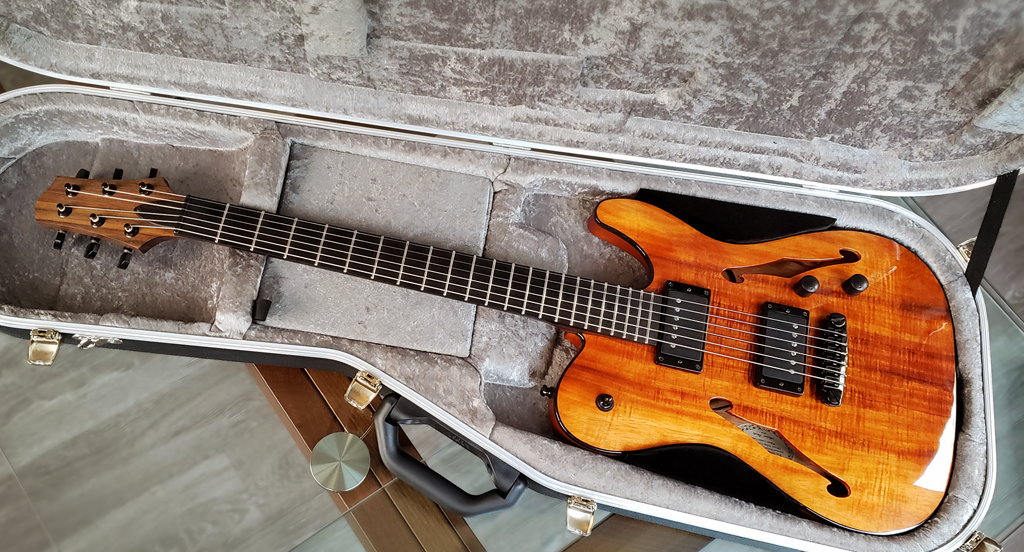
Case:
Hiscox PRO-II-EF-B/S Strat/Tele with Custom Padding, Kaizen Foam and Velvet Flock

 
Wow! That looks gorgeous. I'm definitely going with the vortex neck on my next tele build as well. Can't wait to see this one finished!
 
Curious about the magnetic custom plate.  Did you make it and whats the design. I'd like to do one for a strat
 
I made the wood/magnet 3-way switch plate cover myself, using a piece of mahogany intended to be used as headstock veneer, purchased from www.rothkoandfrost.com. It was cut and sanded freehand to fit in the slot. Two strips of wood were glued on the inside of the cavity opening, positioned so that there was enough area to glue the magnets onto, while leaving enough room for the the switch to fit through the opening.

The tricky part was fastening the magnets. Perhaps there's an easier way, but here's how I did it -- without using any power tools. Four neodymium magnets were used, two epoxied to the strips of wood, and two to the cover. The magnets needed to be short enough so that the height of two stacked together was less than the depth of the cover countersink. The magnets seemed too strong, so two were deactivated (i.e. made to no longer be magnets) by heating them on an electric stove top. One activate magnet was used on the bottom of one side, and the other activate magnet was used on the top of the other side. The polarity of the active magnets was flipped, so that if the cover was lined up incorrectly, like poles would face each other and push the cover away. The deactivated magnets can be identified by their colors in the photograph below, one has a blue tint, the other yellow.

Two "magnets" (one active, and the other not) were epoxied to the strips of wood without trying to position them accurately. Once set, the other two were stacked on top of the epoxied ones, with small bits of cardstock sandwiched between each pair. Their magnetic attraction meant that they would be positioned exactly where they need to be. The cardstock (discarded later) meant that the magnets would be close to each other but not actually touch, ensuring that the cover would sit snug on the rim of the opening. A strip of blue tape was wrapped around the circumference of the cover to ensure that there would be an even gap around it. A small dab of JB Weld epoxy was put on top of each pair (adding a little height to the stack), then the cover was put on top and weighted down. Everything was left alone for 12 hours so that the epoxy formed a strong bond. A little sanding was needed to make the cover flush with the body.

The cover can be removed by pushing it from the inside by poking a screwdriver through the switch hole.

Here's what it looks like unfinished. The end of this thread has a photograph of the finished end result.

3way-cover.png


I've used a similar approach for control cavity covers. Four neodymium magnets were epoxied to the body, and four smaller ones to the cover. The area where the cover screws would normally screw into the body was countersunk to fit the magnets. The countersinks were drilled slightly deeper than needed. In order to position the magnets on the cover, the ones for the body were temporarily inserted with extra magnets stuck underneath so that they sat slightly too high. The cover magnets were stacked on top, a tiny amount of epoxy was put on top of them, the cover was pressed down, and the epoxy was allowed to set. The bottom magnets were taken out, a dab of epoxy was put inside each countersink, the body magnets were pushed in. Tiny bits of cardstock were taped to the top magnets so that a little space would be left between them. The cover was pressed on and the epoxy was allowed to set. A notch was cut into the cover and body, allowing a pick or tiny screwdriver to be inserted to pry the cover off.

160804-cc.png


This was the first time I provided wood blanks to Warmoth. I learned is that the moisture content must be 10% or less, and that Warmoth prefers not to return pieces that do not meet their criteria for moisture and other factors. The dimensions need to be adequate, taking into account any cupping that might be present. It's best to check with Warmoth on the required dimensions for the intended body style.

The one-piece Honduran mahogany base and the koa top are shown below. A "lam top" was not required -- the koa was thick enough to make a 3/4" book matched top. Warmoth once did tops that way, but for most species no longer does, because of cost.

tula-ii-wood-bottom.png


tula-ii-wood-top.png

 
I had dknob.com make the ebony pickup covers with the grain parallel to the neck covers for looks, while the rings were made with the grain perpendicular to the neck for strength. Next to each other, the opposing grain directions looked a bit odd. I decided to darken the rings in order to make their grain lines less prominent. I dyed them with black Transtint, followed by two layers of rub-on polyurethane and one layer of spray can polyurethane. The grain was not filled, in order for the rings to remain recognizably made of wood. The poly is still curing. Here's what they look like.

ebony-rings.png


ebony-cover.png


Gorgeous stuff, can't wait to see it assembled! If you don't mind me asking, how much did the wooden humbucker covers run you? You can message me if you don't want to post it here. I might like to have some made for a future build.
 
pirate said:
Wow! That looks gorgeous. I'm definitely going with the vortex neck on my next tele build as well. Can't wait to see this one finished!

Thanks! In trying to decide between the Vortex and Warmoth headstocks, the Vortex got the nod because the strings seemed to leave the nut at less of an angle -- which hypothetically meant better tuning stability.
 
The ebony pickup rings have been dyed and finished. Waiting for the mounting screws to come in. Here's what the bridge pickup looks like. The finish isn't perfect, but it's good enough for me.

ebony-cover-ring.png

 
I accidently dropped the ebony bridge pickup ring, causing it to crack. It was super glued back together. The repair broke under the force of the mounting springs. It was super glued back together again. To reinforce the repair, channels were cut on the bottom between the two pieces and filled with JB Weld, one on either side, between the adjustment screw hole and outside edge. The ring was sanded, dyed, and finished again. All of that work to make wood look like plastic! Lesson learned, don't make humbucker rings out of wood. The ebony covers were left unfinished, coated with a little fretboard oil to darken them to match the fretboard.

ebony-covers-rings2.png

 
Back
Top