Leaderboard

Finishing clarification + Faux Binding

benvigil

Newbie
Messages
7
First post, forum newbie, built a few guitars, been playing for 30 years.

It seems a number of people have used this Mayones Gothic Black guitar as inspiration:
12100116251327b_04.jpg


That one, along with Rob Chapman's recent ML-3 RC guitars have inspired me to build a swamp ash, open grain, black-top tele... but I have two main questions:

1. Top Coating/Finishing
I am planning on PAINTing the top with a flat black and brushing the sides and back with Zinsser SealCoat. Firstly, would you recommend I pre-seal the top with SealCoat before painting the flat black? I'm afraid of building up the finish so much that the grain starts getting filled. And second, would there be any chemical-reaction concerns with top-coating both finishes with very thin coats of Minwax Wipe-on Poly. Whatever the case, I'll knock down the sheen with steel wool.

2. Faux Binding
There are a couple recent threads about faux binding techniques but none have any real strong suggestions besides "just do a real binding". Short of doing a real binding, I was thinking about either:

a. painting the top black, then routing a 1/4" beveled/chamfered edge (which would create a sharp line with no grain blead), re-sealing the fresh "binding", and finally top coating the entire body;

b. using some kind of tool (undetermined, ATM) to route a 1/8" channel along the body perimeter which I could them fill with something white.

Does anyone have any suggestions on either of these fronts?

Thanks!

Ben
 
Welcome to the forum! We have a lotta fun here, and are glad to have you!

As for the binding thing, you might want to review this build thread for the L5S in my sig.

Real binding isn't as hard as you might imagine, but there's an order to things that's important. Read through the thread, and we'll go from there.
 
Thanks Cagey!

I'm really not interested in an actual binding... it's just not the look I'm going for. I'm starting to lean toward a natural pinstripe and printing the font, back and sides the same flat black. Or maybe a black top, natural sides/back with a natural & black double pinstripe.

On the finish order, do you see any problem with Wipeon Poly over the SealCoat and the flat black paint?

Ben
 
I don't see any problem with that order, but it depends on what the color coat is. You can put anything over the Zinsser Sealcoat, but poly may not like what you use for a color coat. I'd look into that if it was me.

The other thing you could do is dye the body black before putting on the Sealcoat, thereby eliminating the need for a color coat. Then you'd know the poly will stick. Also, you have less finish buildup if you really want that open grain look. Be faster, too.
 
Well, I like the idea of a colored, beveled edge too. It would require a couple of hours of precise brain work & concentration. You would be able to reduce the edge down to zero right when you got to the neck pocket, which would be pretty cool. I don't know if Warmoth will sell a body with the edge straight up, which would be the ideal starting point. I wouldn't even try to cut it with a router, but then some people know that stuff well. A piece of 50-grit wet/dry sandpaper on a hard flat block would bevel it down in an hour? Towards the end I would switch to a coarse double-cut metal file, just to ensure the flatness of it. If you wanted you could even make it wider and narrower as it rounded the curves but you'd have to make a good drawing and stick to it - none of that "Let's see what the file feels like doing" silliness. 
 
StübHead said:
Well, I like the idea of a colored, beveled edge too. It would require a couple of hours of precise brain work & concentration. You would be able to reduce the edge down to zero right when you got to the neck pocket, which would be pretty cool. I don't know if Warmoth will sell a body with the edge straight up, which would be the ideal starting point. I wouldn't even try to cut it with a router, but then some people know that stuff well. A piece of 50-grit wet/dry sandpaper on a hard flat block would bevel it down in an hour? Towards the end I would switch to a coarse double-cut metal file, just to ensure the flatness of it. If you wanted you could even make it wider and narrower as it rounded the curves but you'd have to make a good drawing and stick to it - none of that "Let's see what the file feels like doing" silliness. 

I drew 2 lines, one on the face and one on the side, and filed a straight line in between - took at most 40 minutes per side (or I'm remembering wrong).
bc14b524.jpg

c5e0be1d.jpg

19d5ba9d.jpg


You could accheive a mean faux-binding look with a few judicious layers and a nice file technique:
http://www.knaggsguitars.com/index.php/2012/10/16/chesapeake-choptank-tier-2-chocolatecream-2/
 
benvigil said:
a. painting the top black, then routing a 1/4" beveled/chamfered edge (which would create a sharp line with no grain blead), re-sealing the fresh "binding", and finally top coating the entire body;

Have you ever used a router before? If there are any burns in the wood, you will need to do some sanding. This ruins your perfect edge.
 
line6man said:
Have you ever used a router before? If there are any burns in the wood, you will need to do some sanding. This ruins your perfect edge.
yeah I own and have used router. And I agree with you... it's not ideal, which is why I was looking for some more input on my ideas.

Ben Vigil
 
line6man said:
benvigil said:
a. painting the top black, then routing a 1/4" beveled/chamfered edge (which would create a sharp line with no grain blead), re-sealing the fresh "binding", and finally top coating the entire body;

Have you ever used a router before? If there are any burns in the wood, you will need to do some sanding. This ruins your perfect edge.

Nothing more painful then putting burns in your wood.
 
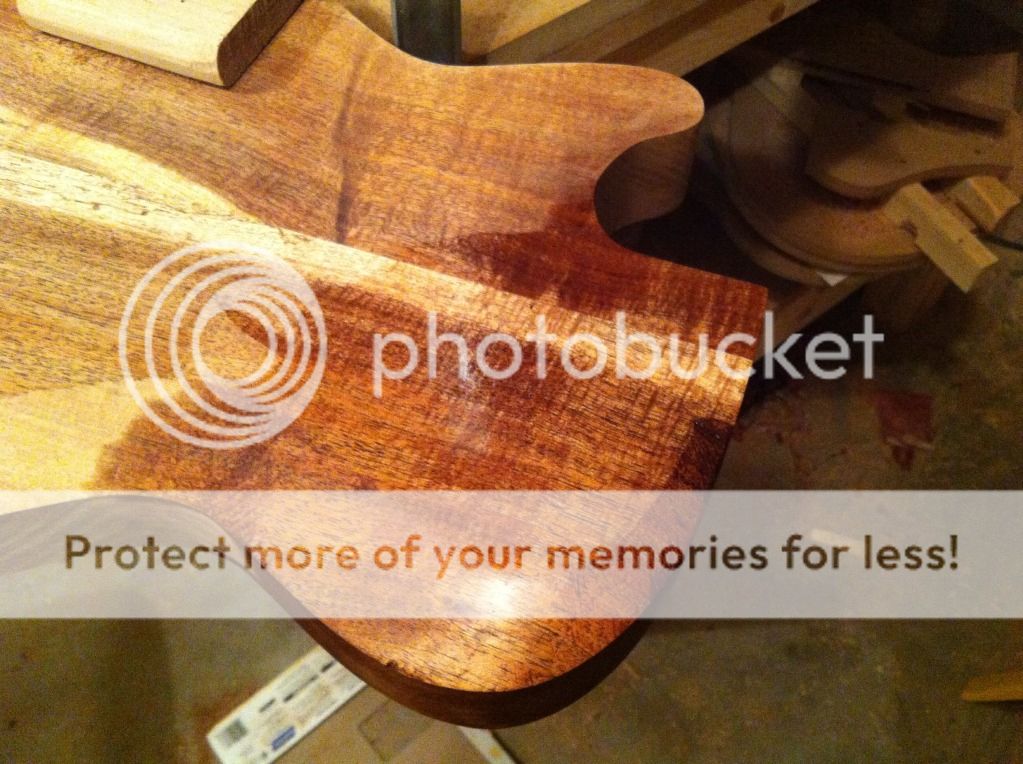
So this is what I ended up with... sorry for the grainy iPhone pics.

It's a Swamp Ash body, SD Custom Custom and SD Tele Hotrails Neck pups. Reused a maple/maple neck I already had on hand.

10514116_246124748917806_1647903842_n.jpg


I taped off the sides to paint the top and cleaned up the edges with sandpaper.

10533009_312127168956246_1298795956_n.jpg


The sides and back are clear shellac with poly wipe-on finish. The top is also poly'd but if I did it again, i'll use a VERY minimal top coat to preserve as much grain texture as possible. The top wasn't as textured as I'd have liked even after attempting to raise the grain. I got the body cheap from Warmoth, my guess is the curl running down the middle is most of the reason.

10537270_540720899389742_1868352_n.jpg


The control plate is custom cut from a blank I ordered. My main concern is how close the volume is to the 3 position switch on a standard tele. I also wanted some custom switching options.

The 3 switches:
[list type=decimal]
[*]Series/Parallel - for both pups. Note that when in parallel mode switch #3 has no effect.
[*]Phase - puts the two pickups out of phase in the middle position.
[*]On/OFF/On - In the center position, does nothing. UP splits both pickups maintaining humbucking by splitting to the North and South coils of the Neck and bridge pups respectively. DOWN will only split the pickups when the 3-way selector is in the center position.
[/list]

10499323_684703408266741_95868881_n.jpg
 
Very nice! I like that one a lot!

How well does the SD mix with the rail pickup at the neck when you select that position? I have two Teles with 'buckers at the bridge and single coils at the neck and while the individual pickup selections sound good, the mixed position doesn't sound good on either of them.
 
Cagey said:
Very nice! I like that one a lot!

How well does the SD mix with the rail pickup at the neck when you select that position? I have two Teles with 'buckers at the bridge and single coils at the neck and while the individual pickup selections sound good, the mixed position doesn't sound good on either of them.
In the middle position are you splitting the bridge humbucker?

As far as mine, I'm still getting used to it. The middle position sounds very nice and smooth... the two pups play very nice together. That said, their were two surprises: (1) I'd like to get a little more twang out of the combination. I was hoping the phase switch would give me some tonal variety, but in every combination (HB/HB, S/S, and Parallel/Parallel) the pickups out of phase just sound AM radio awful. So I might re-purpose that switch to function as a middle position "inner/outer" coil switch. It won't make much of a difference for the neck pickup, but the bridge pup will get thinner and brighter which might add the twang Im looking for. And (2) both pups sound really, REALLY good in parallel mode in all three positions. Just the right amount of warmth and top end chime.
 
No, the 'bucker is always a 'bucker.

I doubt I'll ever do anything about it. The pickups sound too good on their own, so that's the way I'll use 'em.
 
You should be able to use the blade switch to throw the red/white wires (assuming SD colors) of the bridge HB to ground (or positive) only in the middle tele position. That way, you have two single coils in position #2, which will sound dramatically different.... better. And the individual pups will remain the same.
 
I have two Teles with 'buckers at the bridge and single coils at the neck and while the individual pickup selections sound good, the mixed position doesn't sound good on either of them.

By now this is an irreducible requirement for me for any guitar that's in danger of being used in a band context, just because:
A) there is nothing that can substitute for a neck SC, if that's what you want to sound like (Hell-ooo, "Little Wing" tone);
B) there is nothing that can substitute for a bridge HB, if that's what you want to sound like (Hell-ooo, umm, rock 'n' roll(?).

BUT: to play nice with others does require the use of separate volume AND tone controls - the 4 knob setup - plus a 3-way selector. I've twice tried it with 2 volumes and a master tone, and it didn't work right. I'd guess it could be made to work if you were to devise a switch that would kick in a capacitor of a certain value - I rarely ever turn the neck PU's tone below 10 - but that pot (or something) still needs to BE there to work right. I don't find it hard to use in a hurry because I'm very, very used to the 4-knobbers and it's "easier" for me to adjust the sound that way than to arrange a pedalboard with all the preset desired tones built in to the switching (the more modern approach).

And I personally won't ever do another of these without a 4-way for the bridge PU too - each coil, and both coils in series and in parallel. (I also find the out-of-phase sound useless for my needs). I still have the first one I wired up that way with a 5-way Superswitch, but the 4-way Tele selector switch is easier to wire (each Tele PU on the "tele" diagram = one coil of the bridge PU) & it does all I need. And regarding "presets", with the 3-way PU selector in the middle and the neck PU on 8, every position of the bridge's 4-way mixes something different with the neck PU, and they're all good. With the 3-way in the middle like that, there are (can be) drastic changes with a little bitty knob adjustment - and it's a GOOD thing....

 
StübHead said:
I have two Teles with 'buckers at the bridge and single coils at the neck and while the individual pickup selections sound good, the mixed position doesn't sound good on either of them.

By now this is an irreducible requirement for me for any guitar that's in danger of being used in a band context, just because:
A) there is nothing that can substitute for a neck SC, if that's what you want to sound like (Hell-ooo, "Little Wing" tone);
B) there is nothing that can substitute for a bridge HB, if that's what you want to sound like (Hell-ooo, umm, rock 'n' roll(?).

Perzactly. And that's what I wanted. I'm just disappointed that the middle position is not something that I can use. It's got some sort of oddball phase-inverted, series-parallel, coil-cutting, single coil humbucker tone that just sounds like kukka.

On the plus side, I don't have to think about that switch. Slap it one way or the other and you're there. No need to be careful, and you get a whole new guitar.
 
Back
Top