Leaderboard

Cordovan Transtint: Concentration, How much for Guitar Body

s1player

Junior Member
Messages
76
Hello Everyone - I am going to do a very dark Cordovan base color on a guitar. I want to do a "very dark" concentration of Transtint Cordovan. Ideally, I want to obtain a very dark concentration in 2 wipe on coats. BTW - I say 2 coats cause I just want the guitar very dark and I don't want to do endless passes the get slowly closer (as I have had to do when dying necks with Honey Amber dye). Just a couple rounds and I want to be done with the dark base color.

So, the questions:

1. (Approx) How much dye mix is required to do 2 passes on a guitar. I have read everything from 4-5 ounces to needing a quart "cause you don't want to run out in the middle of the dyeing process". But, a quart seems excessive. I also don't want to needlessly premix a bunch of dye if I don't have to.

2. What concentration ratio of Cordovan Transtint dye would need to be used to get very dark. Is it doubling the amount of tint recommended by Transtint. What does a dark ratio of dye to water look like.

btw - I am just looking for a start point for my experimentation. I do realize the following:

1. I need to test the dye for myself. I have test pieces similar to the guitar wood to test on and plan to do that.
2. Wood reacts differently depending on the species and even the specific piece can take stain differently. So, ultimately I will need to decide if it looks right on the actual guitar.

Thank you.
 
A few thoughts and observations, and a question or two as well.


Why do you insist on this getting done in only two coats?  If you need to brew your dye to a strength that will do it in two coats for the specific piece you have, that's fine, but there's a lot to be said for the control over color strength that a weaker brew will give you  Of course, if you are already committed to the Transtint product, you are of course at the mercy of the limitations of that product, whatever else you have in mind. 


In any case, it's not the quantity of dye solution that will drive how rapidly your guitar darkens up - it's the concentration of the dye solution, and your choice of vehicle for the dye.  Water will sometimes give different results than you'll get with alcohol or MEK or acetone.  Acetone and alcohol boil off pretty fast, so you may be able to build color rapidly - but because they boil off so fast, you also don't get much time to work the dye, and you could get witness marks that water won't provide.  Soak the surface with untinted vehicle (water, alcohol, acetone, as appropriate) before you apply dye. 


If you use acetone (or for the clearcoats, lacquer), work in a well ventilated area -- and it wouldn't be a bad idea to double up on a respirator (not just a dust mask) as well.  20-30 bucks at Home Depot.  If you have one already, replace the filters if you haven't done so in the last month. 


How strong is strong?  Well, you'll have to experiment.  Start with the manufacturer's instructions, and then go from there.  My experience with the transtint product is that you have no idea how strong it is until you apply it to wood.  It looks pretty dark in the container as soon as you get any appreciable quantity of the concentrate into solution.


Take notes.  Verify results. Improvisation is the enemy of happiness, when it comes to finishing on the final production piece.  DO your learning (read: screwing up) on scrap.


Hi Bagman - Thanks for the tips. Answers to a couple of questions you raised:

Why do I want to get this done in 2 coats

I used transtint Honey Amber mixed with a tiny bit of Vintage Maple to dye (in alcohol, which may have been part of the problem) to vintage tint a few guitar necks. I had to go over these necks 4 maybe 5 times. It was tedious. And, I found the more coats the more opportunities for mistakes. So, if I can hit the right shade in 1 or 2 coats, it's worth the trade off to me.

In addition - using water as the medium for the bodies - the more passes with water could mean additional rounds of grain raising and possibly time consuming sanding. Again, I would just as soon do that twice and be done - rather than spend 4 or 5 or more rounds of dyeing, grain raising and sanding. Just not interested in that much work to sneak up on the resulting dark shade I want.

And, yes, at least for the base cordovan color - I am locked in to Transtint.

Also, I am going to use water as the base. When using the alcohol base on necks - the alcohol dried too quickly, which resulted in overlap spots. Would rather have the time provided by water - even if it does mean grain raising.

Thanks.

Bagman67 said:
A few thoughts and observations, and a question or two as well.


Why do you insist on this getting done in only two coats?  If you need to brew your dye to a strength that will do it in two coats for the specific piece you have, that's fine, but there's a lot to be said for the control over color strength that a weaker brew will give you  Of course, if you are already committed to the Transtint product, you are of course at the mercy of the limitations of that product, whatever else you have in mind. 


In any case, it's not the quantity of dye solution that will drive how rapidly your guitar darkens up - it's the concentration of the dye solution, and your choice of vehicle for the dye.  Water will sometimes give different results than you'll get with alcohol or MEK or acetone.  Acetone and alcohol boil off pretty fast, so you may be able to build color rapidly - but because they boil off so fast, you also don't get much time to work the dye, and you could get witness marks that water won't provide.  Soak the surface with untinted vehicle (water, alcohol, acetone, as appropriate) before you apply dye. 


If you use acetone (or for the clearcoats, lacquer), work in a well ventilated area -- and it wouldn't be a bad idea to double up on a respirator (not just a dust mask) as well.  20-30 bucks at Home Depot.  If you have one already, replace the filters if you haven't done so in the last month. 


How strong is strong?  Well, you'll have to experiment.  Start with the manufacturer's instructions, and then go from there.  My experience with the transtint product is that you have no idea how strong it is until you apply it to wood.  It looks pretty dark in the container as soon as you get any appreciable quantity of the concentrate into solution.


Take notes.  Verify results. Improvisation is the enemy of happiness, when it comes to finishing on the final production piece.  DO your learning (read: screwing up) on scrap.
 
I see where you're coming from.  All I can say in response is this:


Tl;dr: 
Your choices are between fast and good.


A good finish is going to take a long time no matter what, if you are using widely available DIY products.  If you are a production shop shooting precat urethane, you can get awesome results fast - but you have to invest the capital in equipment and training the labor to get there. 


As a hobbyist, you can probably save a step here and there.  But if you do (for example, by swapping alcohol for water), you've already described one issue you face - water means more raised grain and thus more sanding and thus more likelihood of burning through your color coat and so on and so forth.  Alcohol often means witness marks.  I'd probably go with the water for that reason, and just get used to the idea of taking longer over the whole job.  More generally, the more corners you cut, the less satisfactory the overall result is likely to be.


Best of luck, in any case.  I'm eager to see how your project takes shape.  And we will always be here to provide whatever support our collective experience might yield.


And separately, concerning your issue with the honey amber dye on necks - it may be worthwhile to consider building coats of dewaxed blonde or amber shellac to color necks in the future, and topcoat with the clear finish of your choice.  Dye can do beautiful things on figured maple, but maple is often uncooperative with dyes.


Peace


Bagman
 
Trying to skip steps or otherwise speed up the finishing process is generally a recipe for disaster. There's a reason professional finishes are expensive: they're a time-consuming pain in the ass, and somebody's gotta pay for it.

Bagman's advice is good. Heed it.
 
Okay Bagman and Cagey. I know when to listen to the voice of experience. I will set my expectations that there will likely be more than 2 rounds of dye and sand to get what I am looking for.

Thanks for both of your perspectives.

Starting my dye testing today - so should have a better sense of how the cordovan behaves in the next couple days.
 
You may not need multiple coats of dye to get where you need to be. I dyed this body in one step...

IMG_2239_Sm.JPG

The finish over it took a lot more work as I screwed it up more than once, but the color was as you see it at first pass with the dye.

The trick is as Bagman mentioned up-thread - you need to do some experimenting on scrap to find the right color depth/concentration. Just slobbering your first mixture on a perfectly good body could break your heart.

Also, I'm pretty sure I cut my dye with solvent rather than water. I don't remember if it was acetone or alcohol, but it wasn't an issue. Which brings us to wondering what kind of wood you're dealing with. Some species don't behave as well as others when dying. Could be why you had trouble with necks in the past - they're often Maple. It's a closed-cell wood that doesn't take dye/stain as well as we'd sometimes like. That, and Alder both need to be sealed before you stain or there's a good chance they'll end up blotchy.

Water-based dyes/stains work ok, but unless you're a die-hard tree-hugger or own a business that regulators are looking a bit closely at, there's not really any reason to put up with the drawback of putting water on freshly levelled wood, then having to figure out how to repair it after applying stain.
 
thanks Cagey. That is a beautiful guitar. Once I sand back the cordovan on the flame maple - Red is one of the top colors I am going to test - along with a lite mix of cordovan and purple.

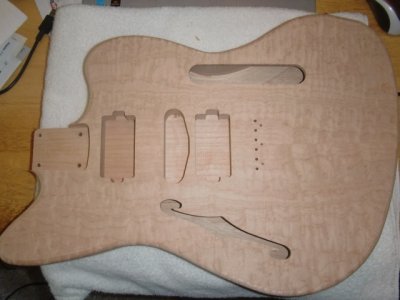
You asked about the wood combo's. The top is a Flamed mapled with some additional nice vertical grain lines. The back and body are Alder that has noticable vertical grain but nothing out of the ordinary. Here's a pic (hopefully, this doesn't get my thread locked. I have 3 other Warmoth's and 5 of their necks - so I really am a big fan. They just didn't produce a HB beast like this.)


Also, just tested Cordovan in water solution.  Transtint's baseline recommendation is about 1 ml per ounce to get a medium solution. I just tested on some scrap maple and found that I will need at least 4 ml per ounce to get a reasonably dark concentration.

Seems weird I would need about 4 times their recommended amount. Will look again in an hour when it's fully dry and reassess. That's going to consume a lot of the (quite expensive) dye.

As to why I chose water - based on youtube videos showing water being used for grain popping maple AND my own experience using alcohol as a carrier for neck vintage tint - I thought the slower dry time of water was worth it. Eventhough it may raise the grain. I really want to avoid any overlap marks.


Attachments

  • CIMG0952.JPG
    CIMG0952.JPG
    243.8 KB · Views: 523
btw - how many ounces of mixed up water and dye solution should I expect to use on each dye pass of the guitar.

Want to make sure I have enough plus some buffer before I start.

Thanks.

 
I think maybe you have a long row to hoe in front of you. Alder needs to be sealed before it's stained, but while Maple usually does as well, you don't want to do it on figured Maple that you're going to sand back. Otherwise, you lose some figure. You actually want some uneven absorption, as that's what "pops" the figure. Curl and quilt are actually end grain, so it's the uneven absorption of dye that makes it obvious.

That sorta means you need to seal that Alder, but leave the Maple alone. But, chances are pretty good it's gonna leave a line. Something you might consider is not staining the back, but tinting the finish. You'll probably still leave a line, but it may be easier to deal with and look more natural.

As for mixture strengths, it's impossible to say because it's up to your eyes and desires. Transtint (or any other supplier) will give you numbers, but they're just starting points. If you use that information precisely, you'll get repeatable results. But, nobody does. That's why some folks will tell you to make what may sound like too much. You'll want some left over in case you burn through the finish and need to re-stain the body, or if want to produce another body like it. Most guys who do a lotta finishing have a collection of leftovers for repair work that are just waiting to explode in the event of a fire because you'll never mix the stuff the same way again.
 
Cagey said:
That sorta means you need to seal that Alder, but leave the Maple alone. But, chances are pretty good it's gonna leave a line. Something you might consider is not staining the back, but tinting the finish. You'll probably still leave a line, but it may be easier to deal with and look more natural.


A common approach do diminish the line you're describing is to stain the top, and then shoot the back and sides with a tinted finish and do a slight burst edge on the top.  This gives you the advantage of a visually nifty burst edge AND it conceals some sins.


I have a test piece of Alder that is a pretty close grain match to the alder back on the guitar. Once I get the ballpark Cordovan tone - I am going to apply it to my test piece of alder and see how it goes. I have read everything from "Alder must be sealed and grain-filled and stained. No Dye" to "Alder dyes just fine". So, I am going to just test it out on my scrap pieces. My goal on the alder is to get a uniform dark cordovan tone - not trying to accentuate any grain - so hoping that even if there is some blotching - I can re-apply the dye enough times to get it reasonably uniform. Will know much more after my test pieces.

It retrospect - I probably should have paid more for an all maple body on my first dye outing.

To make it more complicated - I am going to do a masked binding around the maple top (you may recall my other thread on that issue).

I precisely measured out mL and ounces for my dye mixtures - so I am confident it's repeatable should I need to mix more.

So, I think I am going to do an initial mix of 6 ounces of dye-water. That should get me through the body at least twice. Then, I can mix more if I need it.

Thank you again.


Cagey said:
I think maybe you have a long row to hoe in front of you. Alder needs to be sealed before it's stained, but while Maple usually does as well, you don't want to do it on figured Maple that you're going to sand back. Otherwise, you lose some figure. You actually want some uneven absorption, as that's what "pops" the figure. Curl and quilt are actually end grain, so it's the uneven absorption of dye that makes it obvious.

That sorta means you need to seal that Alder, but leave the Maple alone. But, chances are pretty good it's gonna leave a line. Something you might consider is not staining the back, but tinting the finish. You'll probably still leave a line, but it may be easier to deal with and look more natural.

As for mixture strengths, it's impossible to say because it's up to your eyes and desires. Transtint (or any other supplier) will give you numbers, but they're just starting points. If you use that information precisely, you'll get repeatable results. But, nobody does. That's why some folks will tell you to make what may sound like too much. You'll want some left over in case you burn through the finish and need to re-stain the body, or if want to produce another body like it. Most guys who do a lotta finishing have a collection of leftovers for repair work that are just waiting to explode in the event of a fire because you'll never mix the stuff the same way again.
 
I'm not sure there's any difference between dye and stain other than dilution. Dye is full-tilt boogie, while stain is some solution with dye in it. Where there's a big difference is between dye and pigment. Has to do with the particle size of the tinting product. Dye particles are small and meant to sink into whatever it is you're finishing, while pigment particles are large and meant to cover.

But, I could be corrected pretty easily <grin>

I do know you wouldn't have been happy with an all-Maple body. Damn thing would have been heavier than sin.

6 ounces of dye-water is going to cover that fiddle more than once, that's for sure. Stuff goes on really thin, so it doesn't take much.
 
I've done an entire guitar body with General Finishes water based dye straight out of the can and used less than two fluid ounces to cover the front and the back - I didn't do the edges since I planned to do the burst you see here.  End grain will be more absorbent so figure on doubling the number.


5847506872_c55a745aa8_b.jpg
 
Very nice result.

Looking at those General finishes stains - they look to be more economical than the Transtint. Will definitely look at those for my next project. Their Merlot looks right in the ballpark of the transtint cordovan.

Bagman67 said:
I've done an entire guitar body with General Finishes water based dye straight out of the can and used less than two fluid ounces to cover the front and the back - I didn't do the edges since I planned to do the burst you see here.  End grain will be more absorbent so figure on doubling the number.


5847506872_c55a745aa8_b.jpg
 
Back
Top