A Bender Telecaster for Bill

mayfly

Epic Member
Messages
8,716
Good evening gentlepeople,

A while ago my buddy Bill, having played some of the guitars that I made, approached me about making a telecaster for him.  Bill is a semi-pro player with a lot of skill.  His main two guitars are a fender 'Nashville' telecaster, and a Fender 52 re-issue tele.  His faviourite is the 52 (because of, among other things, how it sounds), but he has grown fond of the bender and the extra pickup in the Nashville.

So - we got together and hatched a plan to bring both guitars together into a single unit.  That is, build a Warmoth that sounds and looks like the 52, but with a bender.  His plan is to sell the other two once we have this one done and sorted.

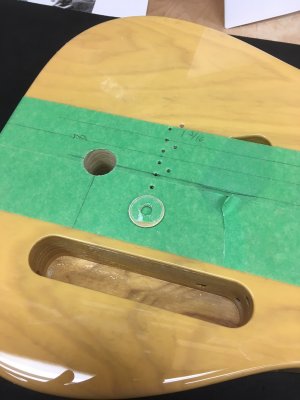
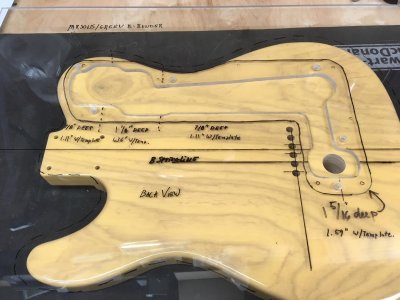
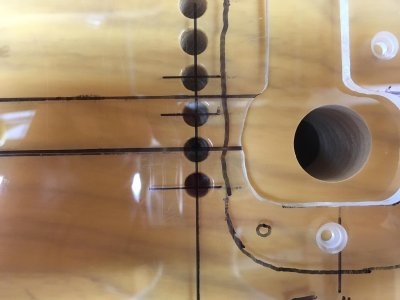
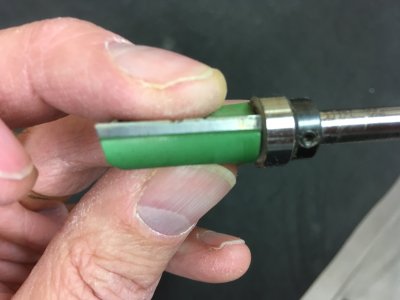
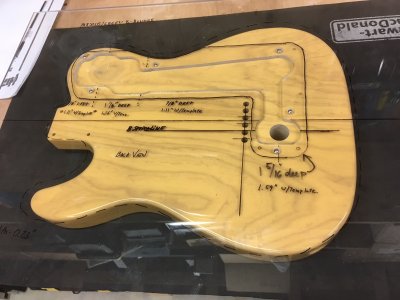
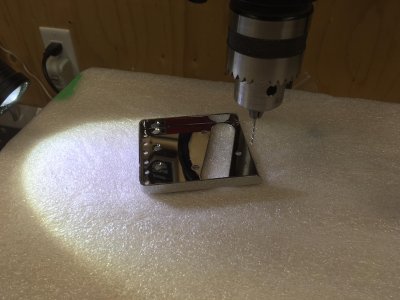
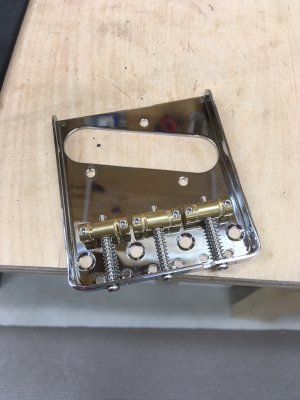
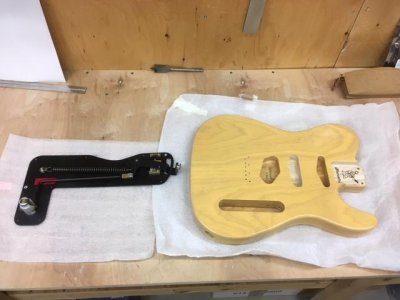
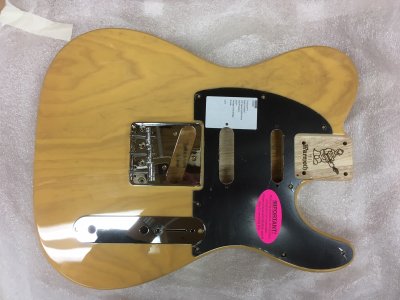
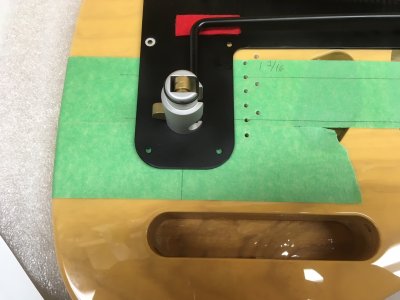
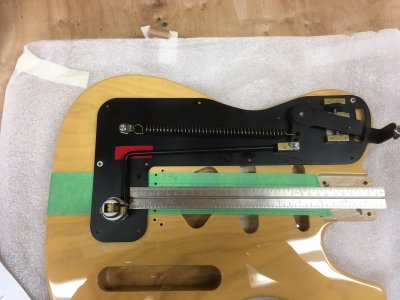
Here's the starting point:  a warmoth swamp ash showcase body (re-routed for a strat pickup in the middle) , and a hipshot B-Bender mechanism.

index.php


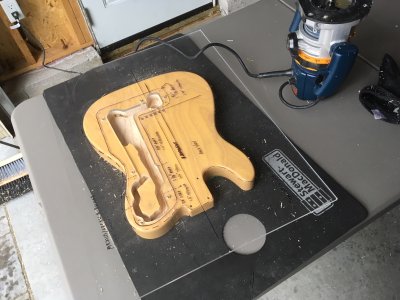
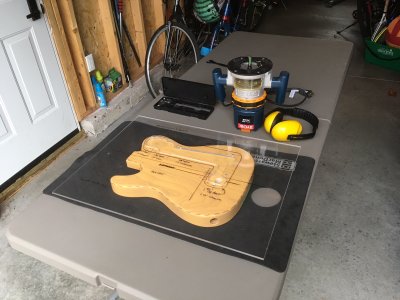
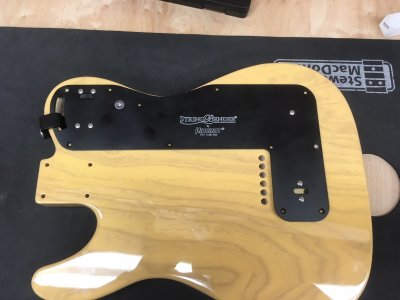
Here's a mockup of what we hope to be a kickass guitar:

index.php


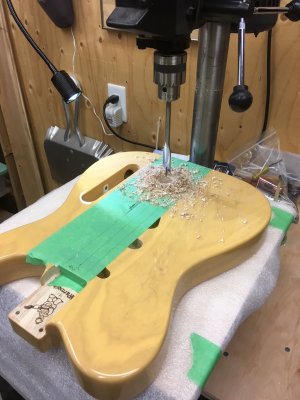
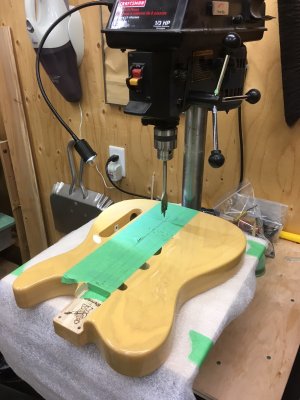
Now I have to confess that this is the first guitar that I've ever built for someone else.  Because of that, I'm actually pretty nervous about the prospect!  Small stuff that I would normally let pass I can't let happen.  My worst fear is to F*ck something up.  Because of this, I intend to check and double check everything as I go, as well as document the heck out of the build.  If anything it will give Bill a story to tell!  :headbang:
 

Attachments

  • IMG_2551.JPG
    IMG_2551.JPG
    34.1 KB · Views: 199
  • IMG_2556.JPG
    IMG_2556.JPG
    998.6 KB · Views: 204
Good evening to you too, good Sir. Very interesting build! I can't say I've ever been enamored of a B-bender, but I have always been interested in how they go together. Here's hoping you post pics of it as it goes along.

PS: I'm sure Bill will be thrilled with your work!
 
Thanks Steve.  I hope you're right!

The bender that I'm installing is known as a "Parsons/Green" bender.  In addition to a big ass hole carved out of the back, installation requires a 15/16 hole to be drilled in the top of the guitar.  Placement of this hole is critical:  get it wrong and the string will not line up with the bridge causing problems.  Here's a little photo essay of the progress:

The instructions say to lay the bender on the top of the guitar along the b-string line, then measure the distance between the edge of the pull string tower and the b-string hole.  Here we go:

index.php


The photo is at an angle so it looks wonky, but it really is pretty close to 1 3/16:

index.php


The instructions say to take this measurement and add 1/2 the diameter of the pull tower (21/64 if you're interested).  Doing the math, this turns out to be 1.64".  So then draw a line at that point intersecting the b-string line:

index.php


Putting the bender back on the top to test our math.  Looks like we're pretty close!

index.php


The edge that's closest to the right is the spot.  That's enough excitement for tonight.  Tomorrow I'll re-check all this and then fire up the drill press!

index.php


Attachments

  • IMG_2561.JPG
    IMG_2561.JPG
    954.1 KB · Views: 176
  • IMG_2560.JPG
    IMG_2560.JPG
    792.8 KB · Views: 176
  • IMG_2559.JPG
    IMG_2559.JPG
    756.6 KB · Views: 174
  • IMG_2558.JPG
    IMG_2558.JPG
    902.8 KB · Views: 172
  • IMG_2557.JPG
    IMG_2557.JPG
    984.1 KB · Views: 177
What a cool project. Bill has the right guy on the job to get it done correctly. Looking forward to following this one.
 
Excellent thread.

I've been wondering about these since you were selling a body some time back and you mentioned Jimmy Page using them. I then researched a little more and found Marty Stuart using one and it turned out he has the original Clarence White Tele.

On the line of the B string mentioned, does it use the actual lie of the string or a line parallel to the center line intersecting the bridge?

Look forward to the rest of this well-documented thread.
 
Allright!  Here's what's been going on:

First, check that my drill press table is perpendicular to the actual drill.  I've got a precision square for this little task:

index.php


I got out my 15/16 spade bit and sharpened it up so it was like a razor.  I actually wanted to get a new bit, but no one is selling this type of spade bit anymore!  They are all for construction wiring, so they have a screw tip to help the bit penetrate quickly.  I definitely didn't want that, so I just sharpened up the old one.

index.php


I didn't want the press table to scratch the body, so I covered it with the same material that the body was shipped in:

index.php


carefully punched the body where the hole is to go.  Note that I re-did some of the measurements.  Hopefully I'm not second guessing myself here.

index.php


Attachments

  • IMG_2562.JPG
    IMG_2562.JPG
    700.8 KB · Views: 160
  • IMG_2565.JPG
    IMG_2565.JPG
    1.2 MB · Views: 161
  • IMG_2566.JPG
    IMG_2566.JPG
    1 MB · Views: 158
  • IMG_2568.JPG
    IMG_2568.JPG
    929.8 KB · Views: 161
I spent a stupid amount of time lining up the body on the press:

index.php


No turning back now!!

index.php


I didn't want to blast through the entire body, preferring to go most of the way then punch through from the other side using the pilot hole as a guide.  My reward was a perfect hole with a perfectly coin shaped chunk of Bill's guitar  :)

index.php


Attachments

  • IMG_2574.JPG
    IMG_2574.JPG
    768.8 KB · Views: 157
  • IMG_2571.JPG
    IMG_2571.JPG
    901.4 KB · Views: 158
  • IMG_2570.JPG
    IMG_2570.JPG
    936.5 KB · Views: 159
Getting close to the main event!  Time to line stuff up on the routing template.  This template I made ages ago.  It's been used to make several bender guitars.

index.php


This is the main thing that matters:  the placement of the cross-hairs on the b-string ferrule.

index.php
 

Attachments

  • IMG_2576.JPG
    IMG_2576.JPG
    281.3 KB · Views: 156
  • IMG_2577.JPG
    IMG_2577.JPG
    223.3 KB · Views: 152
Very cool. Seeing tools and drill presses and guitar bodies is so much fun :kewlpics:
 
Thanks guys.  Here's more progress (can you tell I'm not working today?)

I bolted the template down to the body.  Yep that's right - I screwed that sucker down!  Don't want any chance of it moving even a little bit.

index.php


My 1/2 pattern router bit was chipped, so I splurged on a new one.

index.php


I have a rule:  No routing inside the house. Having said that it's fairly inclement here in Ottawa today, so I set up in the garage.

index.php


Tools of the trade - Ready to go!

index.php


Makin' funny patterns.

index.php


Ok - that's lunch

index.php
 

Attachments

  • IMG_2585.JPG
    IMG_2585.JPG
    2.1 MB · Views: 143
  • IMG_2584.JPG
    IMG_2584.JPG
    1,011.6 KB · Views: 142
  • IMG_2582.JPG
    IMG_2582.JPG
    878.8 KB · Views: 139
  • IMG_2581.JPG
    IMG_2581.JPG
    892 KB · Views: 138
  • IMG_2580.JPG
    IMG_2580.JPG
    627.3 KB · Views: 137
  • IMG_2578.JPG
    IMG_2578.JPG
    815.7 KB · Views: 136
Mayfly said:
I bolted the template down to the body.  Yep that's right - I screwed that sucker down!  Don't want any chance of it moving even a little bit.

i assume you used the same holes the bender uses
 
DMRACO said:
Mayfly said:
I bolted the template down to the body.  Yep that's right - I screwed that sucker down!  Don't want any chance of it moving even a little bit.

i assume you used the same holes the bender uses

Nope - different holes.  But they are covered by the bender and are out of sight
 
Too much fun! Makes me wanna route something!

Good rule, not routing in the house. But, it's getting pretty nipply here, too, even for the garage. I imagine it's much worse already up where you are.
 
Cagey said:
Too much fun! Makes me wanna route something!

Good rule, not routing in the house. But, it's getting pretty nipply here, too, even for the garage. I imagine it's much worse already up where you are.

It's actually not bad - plus 7 with a bit of rain.  It was the 'bit of rain' that drove me into the garage.
 
More progress!  I took off the template and did a test fit.  All was good:  Everything fit flush and there was no binding of the mechanism.

index.php


so then I masked it off and gave that big ass newly routed bare area a coat of sealer:

index.php


Attachments

  • IMG_2586.JPG
    IMG_2586.JPG
    748.3 KB · Views: 150
  • IMG_2588.JPG
    IMG_2588.JPG
    332.5 KB · Views: 152
With that drying it was time to look at the bridge.  We bought a fairly pedestrian three saddle bridge for the project; my plan is to cut the b-string notch then make some other mods that I learned from the Joe Barden bridges.

Here's the bridge with the notch cut.  Hmmm - looking at it zoomed into the photo I see there's some rough areas at the bottom.  I'll have to clean those up.

index.php


Part of the appeal of the Barden bridge are a couple of additional mounting holes at the front near the pickup to hold the entire assembly directly to the body.  it's an easy mod, so why not:

index.php


Finished bridge with Gotoh compensated saddles installed.

index.php
 

Attachments

  • IMG_2590.JPG
    IMG_2590.JPG
    666 KB · Views: 125
  • IMG_2592.JPG
    IMG_2592.JPG
    330.6 KB · Views: 149
  • IMG_2593.JPG
    IMG_2593.JPG
    856.5 KB · Views: 151
Funny how photos will show you things your naked eye passes over. I noticed the other day a nut I had cut for the Tele I'm working on now had a slot out of place. I mean, obviously so. How I never saw that during all the work I did getting it to that point is beyond me.
 
Back
Top